As an Amazon Associate, I earn from qualifying purchases at no extra cost to you.
11 Refacing Kitchen Cabinet Ideas (Great for New Starts)
 ByRayan

Unless you have money to burn, tearing out your whole kitchen is a total mistake. I see people do it all the time, they gut perfectly good boxes, just to buy new ones that look the same. It makes me want to scream, honestly.
Your cabinets probably have great bones, but the faces look like they belong in a museum. You do not need a sledgehammer to get a fresh look. You just need to be smart, move fast, and use these 11 refacing kitchen cabinet ideas to save your sanity.
I will show you how to swap doors, change colors, and fix your kitchen without losing your mind. We are going to make those old cabinets look like they cost a fortune, even if you spent almost nothing on the actual work.
1. Paint Those Boring Wood Doors
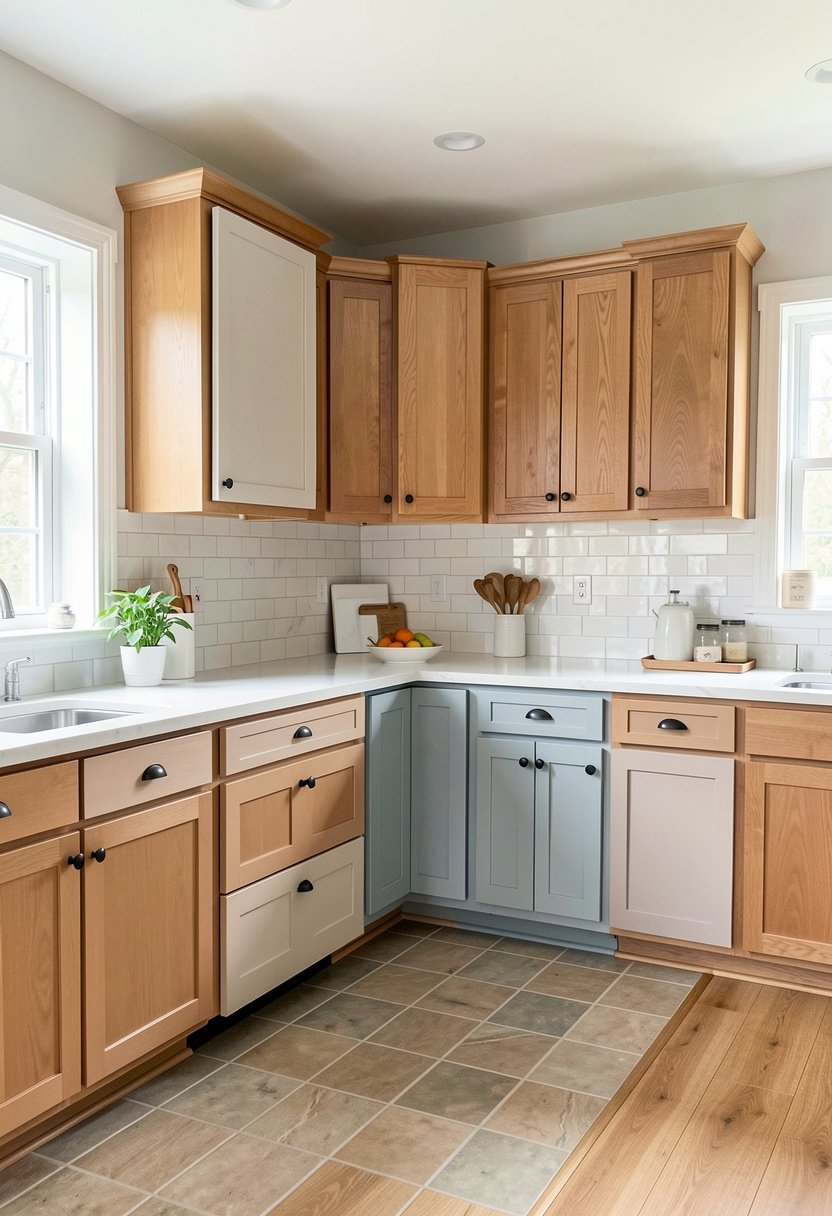
Most people think wood cabinets are stuck that way forever. That is just lazy thinking, and I hate it. You can grab a brush, buy some good primer, and change the whole vibe in a single weekend. It is the cheapest trick in the book, but it works every single time.
Stop buying cheap spray paint at the store, because it will peel off in a month. You need a good furniture paint that levels out nicely, or you will see every brush stroke. Use a light color to make a small room feel massive, or go dark if you want a moody, high-end look.
Do not try to skip the sanding part, because the paint will just slide right off those old surfaces. If you want a pro finish, take your time, and do thin coats. You will be shocked by the result.
- Sand everything down first.
- Use a high-quality primer.
- Pick a durable paint finish.
- Take doors off hinges.
2. Swap Your Hardware Today
If you keep those tarnished knobs, your kitchen will always look tired. Most people settle for whatever came in the box ten years ago. Do not be that person, because new hardware is like jewelry for your home. It changes everything.
Go for modern matte black pulls if your kitchen feels too busy. If you want a classic look, try some polished brass, but skip the shiny stuff that looks like plastic. You only need a screwdriver, ten minutes, and a vision. It is the easiest win you will ever get in home design.
Measure your holes before you go shopping, or you will have a nightmare on your hands. If the old holes do not match, you can fill them with wood filler, sand them smooth, and paint over the spots before drilling new ones.
- Measure hole spacing carefully.
- Pick a consistent finish.
- Buy quality solid metal.
- Fill old holes properly.
✅ Also Read: 11 Rustic Farmhouse Kitchen Cabinet Ideas
3. Add Glass Front Panels
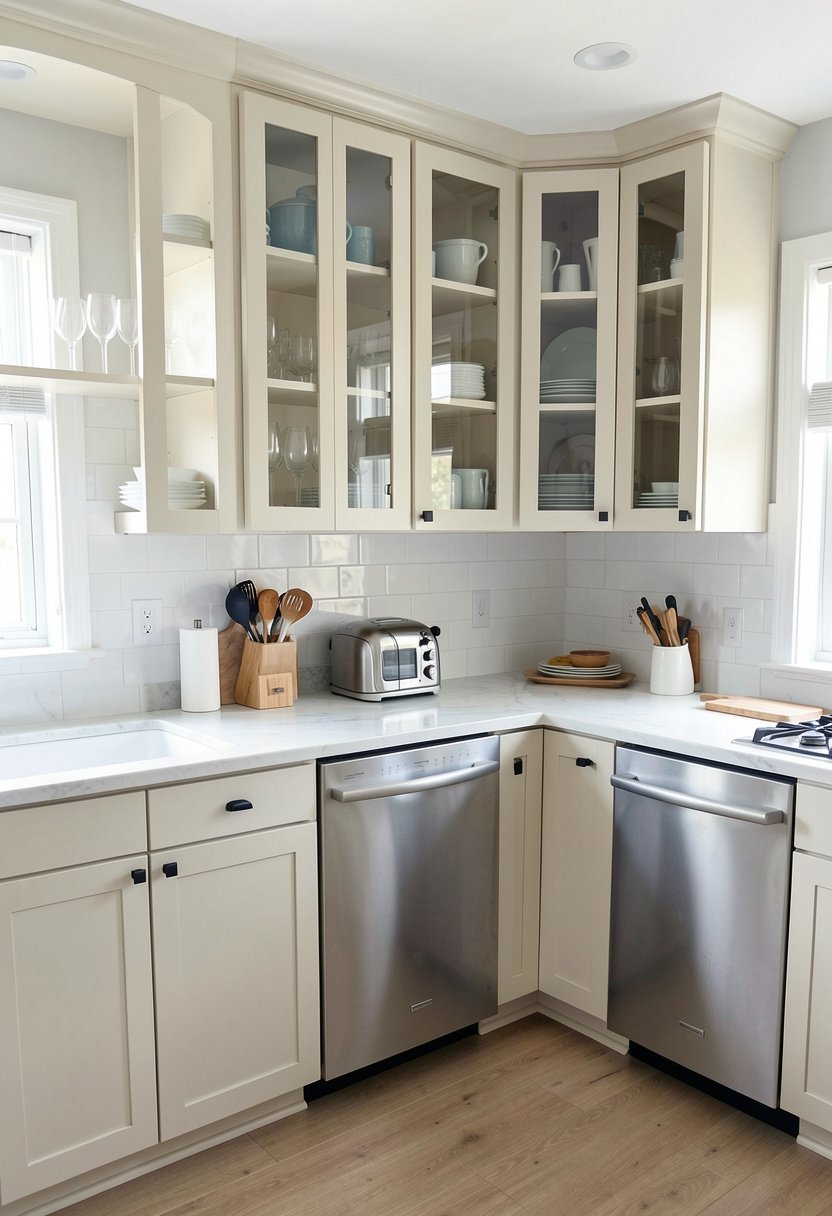
Solid wood doors can make a kitchen feel like a dark cave. If you have some pretty plates, why hide them? Cutting out the center of a cabinet door, and adding a piece of glass, makes the whole space feel airy. It is a total game changer.
You can hire a local shop to cut the wood, or just buy new shaker doors with glass already installed. Use clear glass for display, or go with frosted glass if your shelves are a bit messy. I love this trick because it creates a high-end, custom look for almost no money.
Be careful when you attach the glass, use a clear silicone, and make sure it sits flush. If you rush this part, the doors will rattle every time you close them, and that will drive you crazy.
- Use clear tempered glass.
- Think about internal lighting.
- Keep the shelves neat.
- Secure glass with silicone.
4. Install Floating Open Shelving
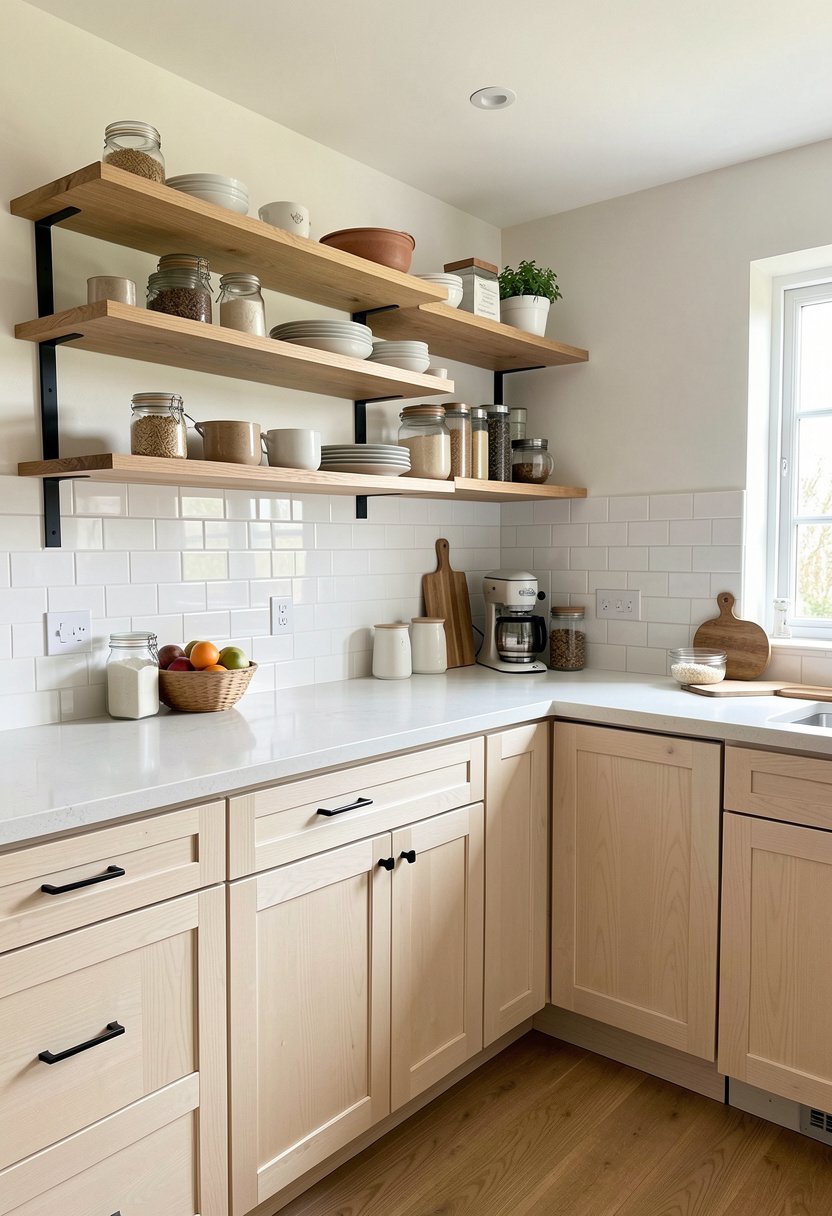
Wall cabinets can crowd a room, and they often trap your eyes against the wall. Take a few doors off, patch the holes, and paint the inside to match your walls. It feels like you added square footage to the room, and it looks so incredibly clean.
I know people worry about dust, but it is just not a problem if you actually use your dishes. Open kitchen shelves force you to keep things organized, which is a good thing. Stop hoarding mugs you never use, and show off the pretty stuff that brings you actual joy.
Make sure you support the shelves well, because plates are heavy. Use good brackets, or hide the supports inside the wall. If it sags, it will look cheap, and we are aiming for high-end style here.
- Remove doors very carefully.
- Patch holes with filler.
- Paint the inner back.
- Style your items well.
5. Use Modern Wood Veneers
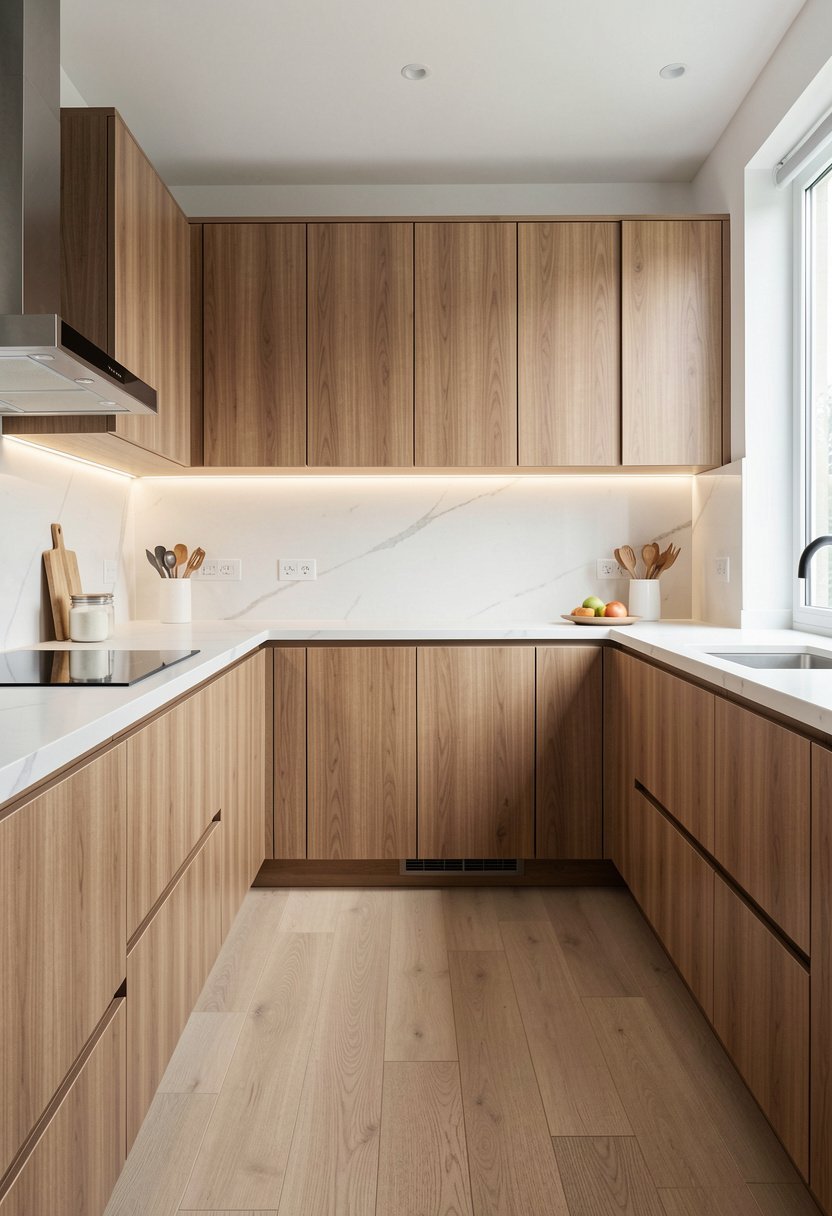
If your cabinets are in bad shape, paint might not be enough to save them. A wood veneer is like a new skin for your frames. It is a thin layer of real wood that sticks right onto your old boxes, and it looks like a brand new custom build.
You need patience to do this, because you have to trim it perfectly. It is not for the faint of heart, but the oak wood veneer finish looks incredibly expensive. If you mess up a corner, it will look sloppy, so measure three times and cut once.
Do not try to do this while you are tired or stressed. The glue sets fast, and you want a smooth, clean bond. When done right, nobody will ever guess those are old boxes underneath the beautiful new wood finish.
- Clean frames perfectly first.
- Use a sharp utility knife.
- Apply glue very evenly.
- Seal with a wax.
6. Create Shaker Style Faces
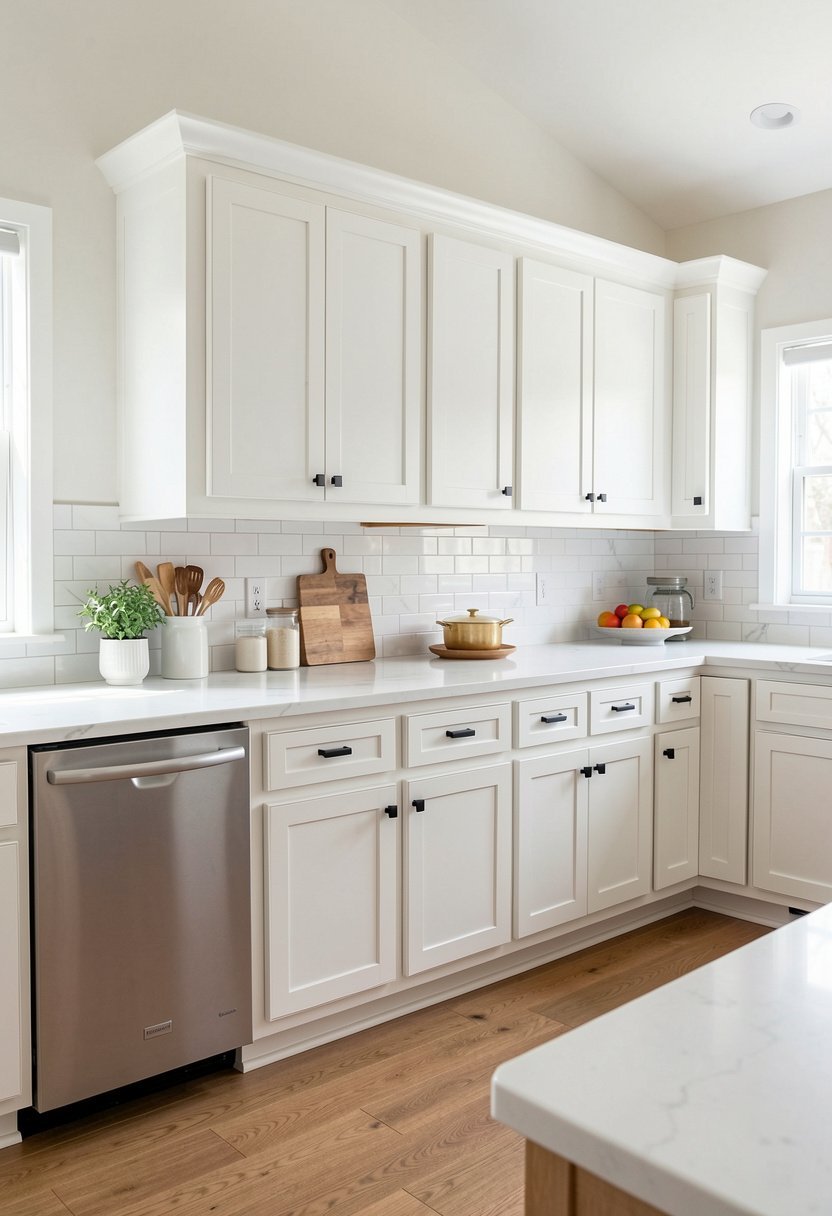
Shaker doors are popular for a reason. They are simple, clean, and they never go out of style. If you have those ugly, dated, flat doors, you can glue thin strips of wood to the edges. It builds up that frame look, and it is honestly so easy.
Use wood glue for cabinets and a few pin nails to hold the strips in place. Once the glue dries, you just paint the whole door in one solid color. It hides the seams, and it makes your kitchen look like a custom designer job.
Avoid making the strips too wide, or they will look heavy. Keep them thin and clean, just like the real deal. If your edges are a bit rough, just sand them until they feel like silk before you apply any primer.
- Use thin wood strips.
- Apply glue and nails.
- Sand the edges smooth.
- Prime and paint well.
7. Change the Cabinet Color
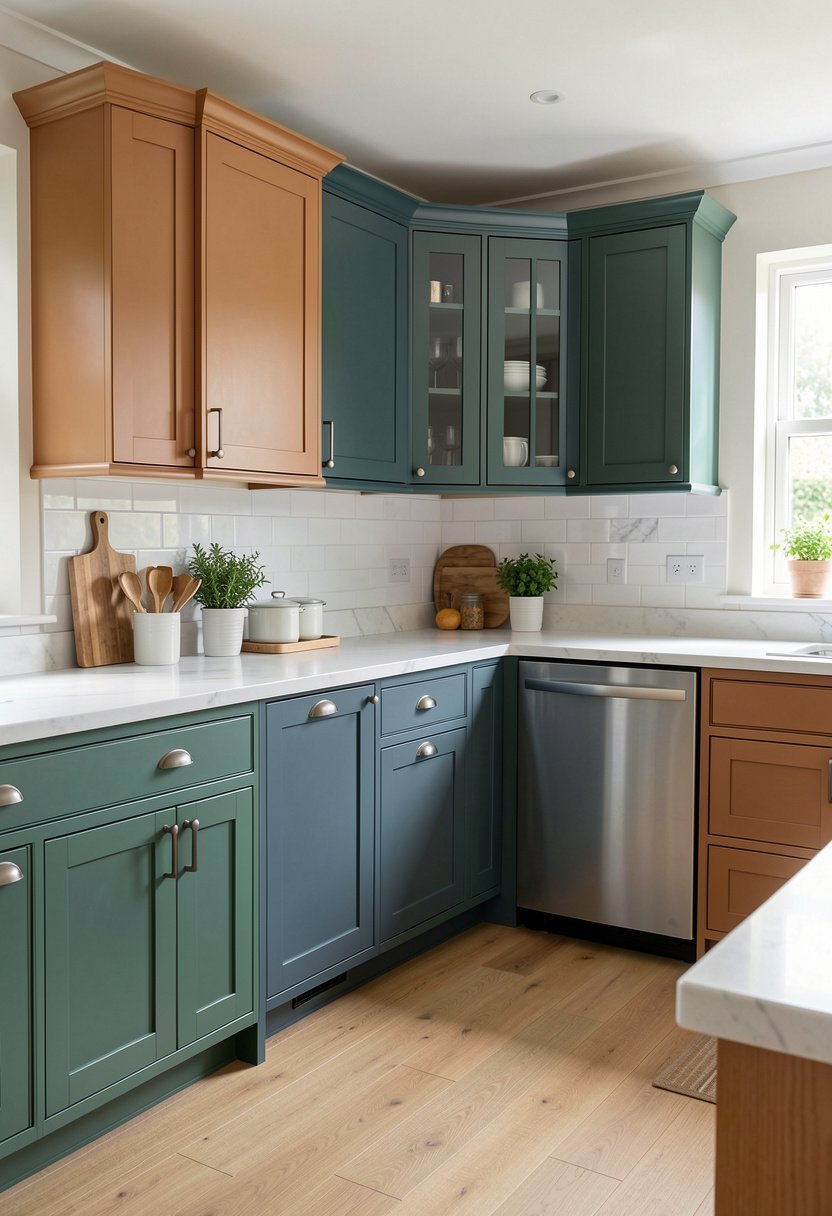
Why does everyone pick white? I am tired of seeing white kitchens everywhere. Use a bold color to make a statement, like a deep navy or a soft sage green. It adds so much life to the room, and it makes the space feel unique to you.
Pick a durable cabinet paint that can handle a damp kitchen environment. You want something that wipes clean without peeling off the wood. If you are scared of color, start with the lower cabinets first, and keep the uppers a neutral shade. It balances the room.
Do not listen to people who say you need expensive gear. A simple foam roller works wonders, as long as you use a good paint. Just take your time, and do not rush the drying process between coats.
- Choose a bold color.
- Try two-tone designs.
- Use a foam roller.
- Let the paint cure.
8. Add Under Cabinet Lighting
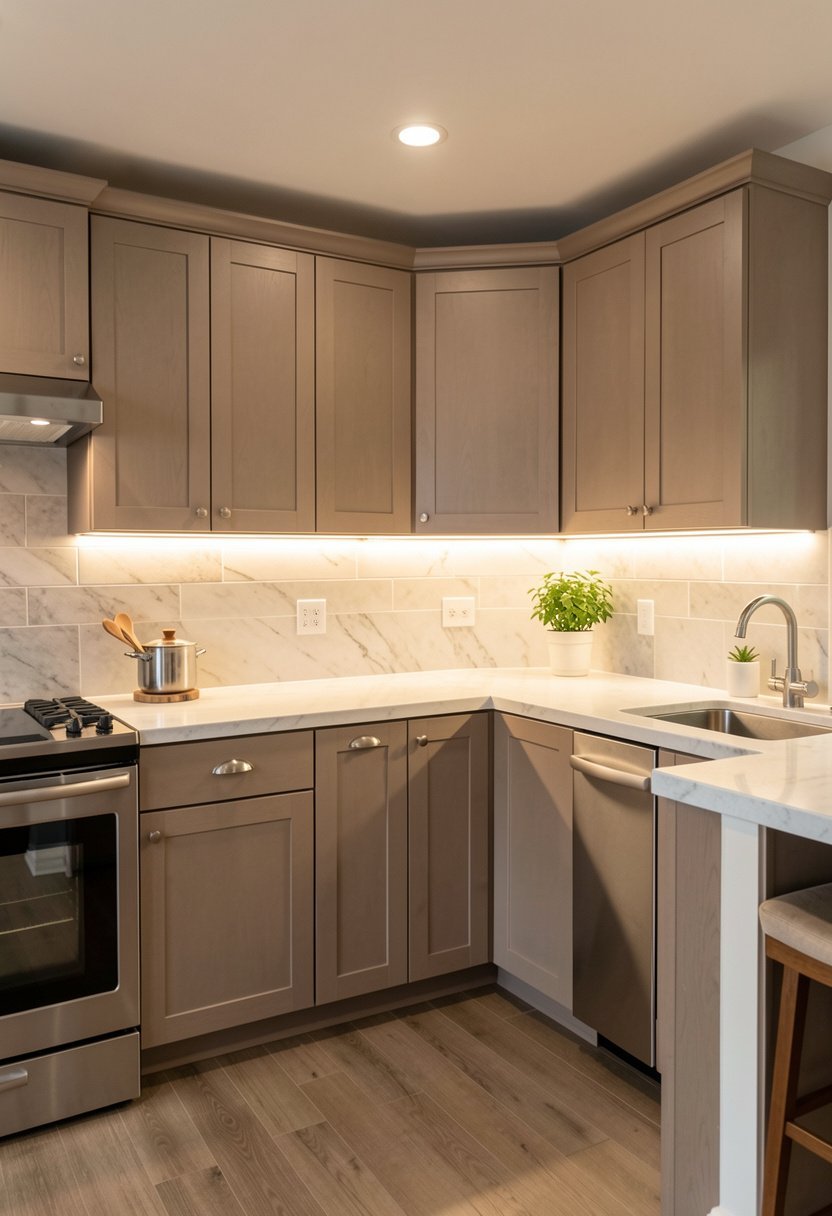
Lighting is the secret sauce that makes a cheap kitchen look like a million bucks. Your cabinets could be perfect, but if they are dark, they will never shine. Stick some thin LED strips under the upper cabinets to wash the counters in soft, warm light.
Most under cabinet LED kits are peel and stick, which is perfect for lazy weekends. You do not need an electrician to get this done. Just make sure you hide the wires behind the frame, or it will look like a total amateur job.
Avoid cold, blue light at all costs, unless you want your kitchen to feel like a hospital room. Always go for warm white bulbs. It makes your food look better, and it makes the whole house feel cozy.
- Pick warm white lights.
- Use peel and stick.
- Hide all loose wires.
- Check the plug location.
9. Apply Smooth Vinyl Wraps
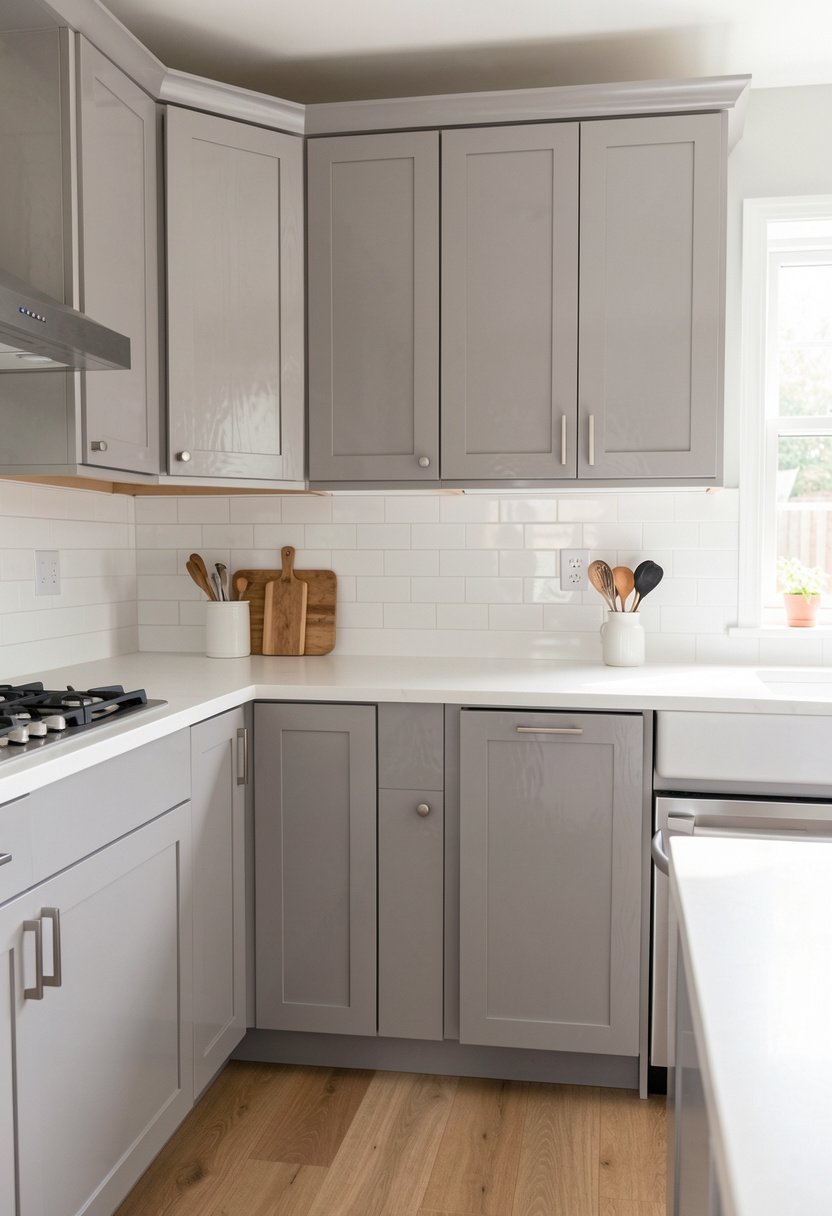
Vinyl wrapping is like a giant sticker for your cabinets. It sounds crazy, but it works surprisingly well if you have smooth, flat doors. It is a great way to get a glossy or matte finish that you just cannot get with a brush and paint.
Buy a professional grade wrap because the cheap stuff will bubble up in the heat. You need a heat gun to shrink it around the edges. It takes a little practice to avoid wrinkles, but once you get the rhythm, it goes on super fast.
If you ever get bored, you can peel it off and start over. It is very forgiving, and it does not ruin the doors underneath. Just be sure to wipe the surface with alcohol to remove any grease before you begin.
- Clean surface with alcohol.
- Use a good heat gun.
- Smooth out all bubbles.
- Trim edges very carefully.
10. Update Your Hinges

Nothing screams old kitchen louder than doors that sag or hang crooked. Old hinges get loose, they rust, and they make your life hard. Buy new, soft-close hinges, and install them on every single door. You will love how they feel when you close them.
Getting soft close door hinges is the best way to make a kitchen feel modern. It takes a few hours to swap them all, but the silence is worth every cent. Plus, you will stop slamming the doors when you are angry or just in a rush.
If the old hinges left big holes, fill them with a wood dowel and glue. Once it dries, drill your new holes for the hinges. It is a solid fix that will hold for a long time.
- Buy soft close hardware.
- Fix old screw holes.
- Use a level tool.
- Adjust for perfect gaps.
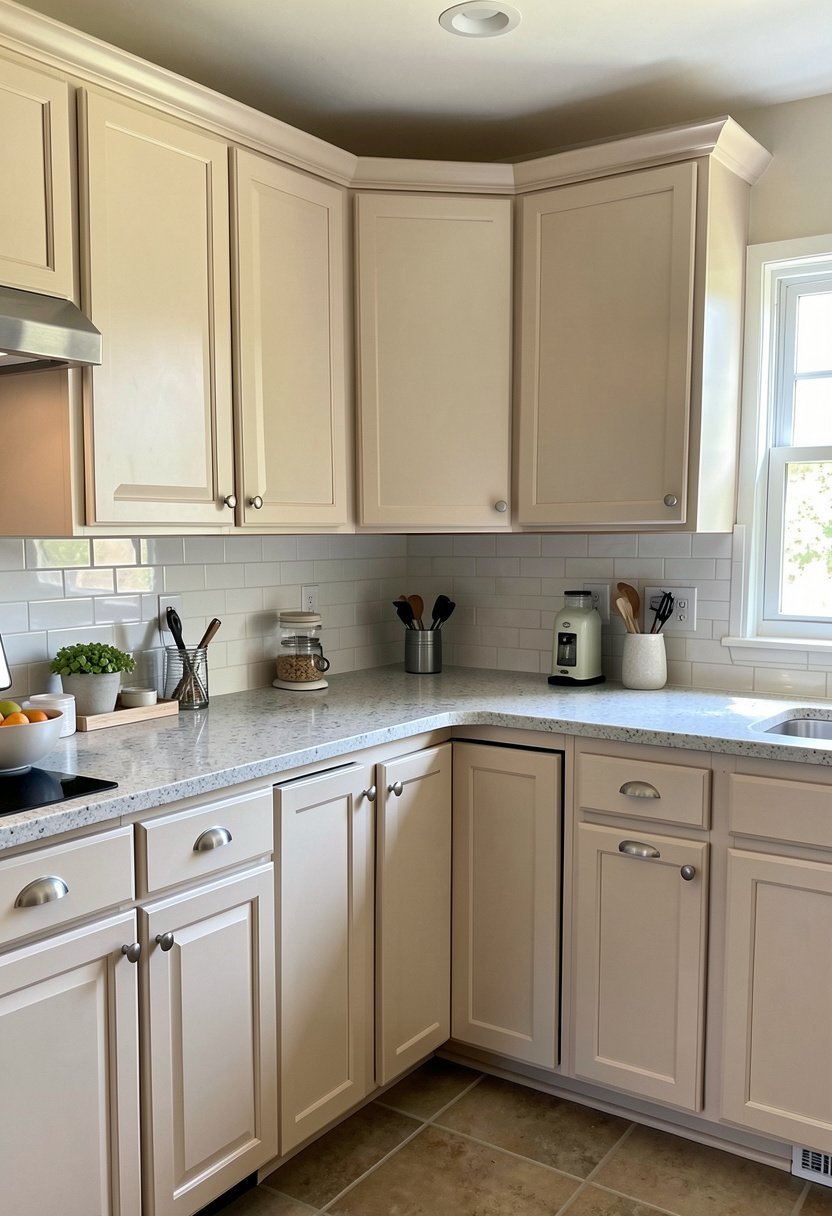
11. Add Decorative Moldings
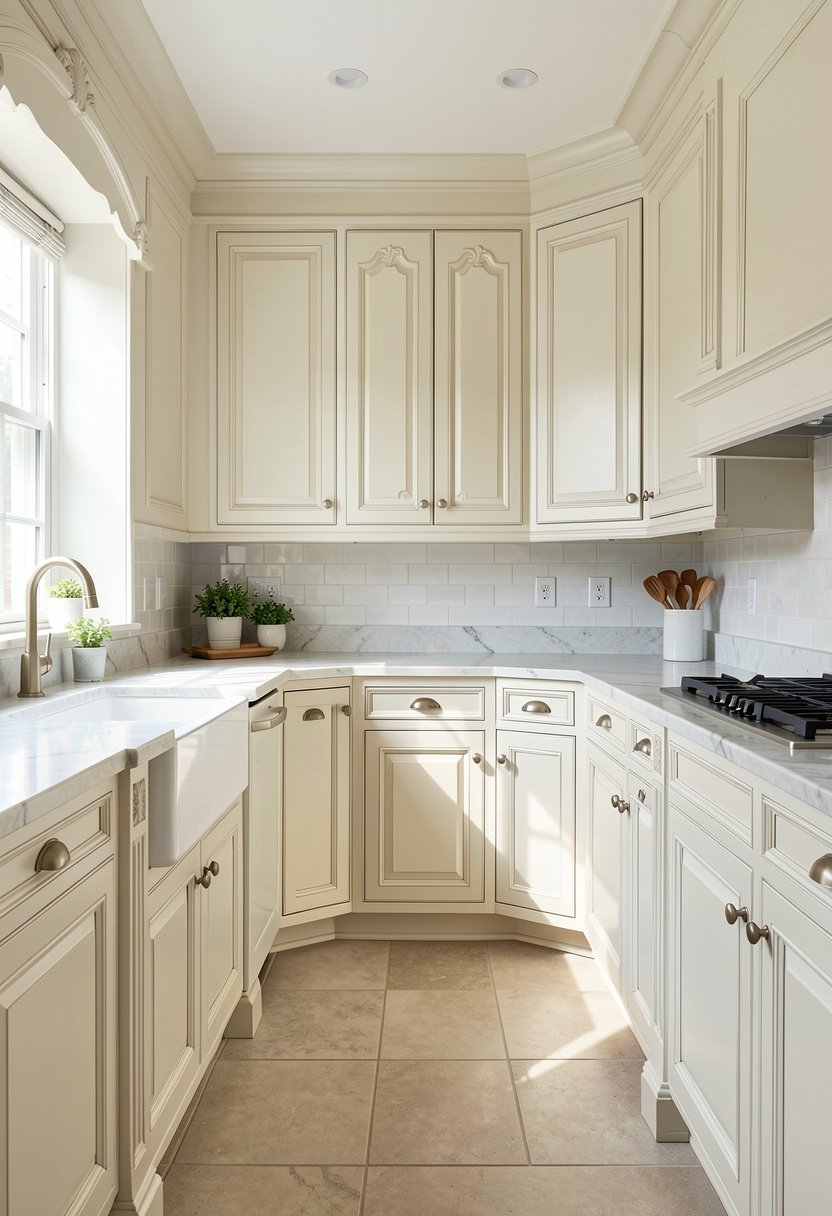
If your cabinets end at the ceiling and look thin, they will never look finished. Add some crown molding to the top to bridge that gap. It makes your cabinets look built-in and tall, even if they are just standard boxes from the store.
Use wood trim for cabinets that matches the style of your doors. You can nail it right into the frame, caulk the gaps, and paint it to match. It hides the uneven ceiling, and it makes your kitchen look like a million bucks.
Do not try to skip the caulk, or you will see the light shining through the cracks. Take a wet finger, smooth the bead out, and it will look seamless. It is a tiny step that finishes the whole room.
- Use crown molding pieces.
- Caulk all the seams.
- Paint to match frame.
- Cut corners at angles.
Final Thoughts
I hope these ideas show you that you do not need to spend all your savings to get a brand new kitchen. You have the power to change how your home feels with just a little bit of work and some patience. Stop waiting for the perfect moment, and just start with one door. You have got this, and your new kitchen is going to look absolutely amazing.
| Kitchen Project | Difficulty | Estimated Cost |
|---|---|---|
| Painting Cabinets | Medium | Low |
| New Hardware | Easy | Low |
| Glass Inserts | Hard | Medium |
| Floating Shelves | Medium | Low |
| Wood Veneer | Hard | Medium |
| Shaker Frames | Medium | Low |
| Color Change | Medium | Low |
| LED Lighting | Easy | Low |
| Vinyl Wrap | Medium | Low |
| New Hinges | Easy | Low |
| Crown Molding | Hard | Low |
| Countertop Seal | Easy | Low |
| Backsplash Tile | Hard | High |
| Drawer Slides | Medium | Medium |
| Sink Update | Hard | High |
Frequently Asked Questions
Is Refacing Better Than Replacing?
Refacing is almost always better if your cabinets are still strong. Replacing them costs a fortune, creates a mountain of waste, and keeps you from using your kitchen for weeks. Refacing gives you the same look for a fraction of the price and time.
Can I Paint Over Laminate Cabinets?
Yes, but you have to do it right. If you just grab paint and start, it will peel off in a day. You must use a high-quality bonding primer designed for slick surfaces. Once that sticks, your top coat will stay on for years.
Are Soft Close Hinges Worth the Money?
They are absolutely worth every penny. Once you have them, you will never want to go back to slamming doors. They stop the noise, they save your cabinet frames from damage, and they make even old, cheap cabinets feel like high-end furniture.
Do I Need to Remove the Doors to Paint?
You should always take the doors off. If you try to paint them while hanging, you will get drips in the corners, and you will get paint on your hinges. It takes extra time, but the finish will look professional instead of messy.
Can I Change My Cabinet Hardware Myself?
Anyone can change hardware. It is the easiest DIY project in the entire house. You just need a screwdriver and a tape measure. As long as you check your measurements before you buy the new pulls, you will be done in minutes.
Does Adding Glass Front Doors Look Messy?
It only looks messy if you keep a messy cabinet. This is a great excuse to finally organize your plates. If you love the look but hate the clutter, use frosted or textured glass. You get the airy feel without the visual chaos inside.
Should I Use Real Wood or Vinyl Wrap?
Real wood is beautiful and lasts a lifetime, but it is much harder to install. Vinyl wrap is fast, cheap, and very easy to apply, but it does not have the same texture. Pick wood if you want quality, pick vinyl for speed.
Will LED Lighting Damage My Cabinets?
Not at all. LED lights stay very cool, so they are perfectly safe for wood or laminate. They actually help you see better when you are cooking, and they add a warm, expensive glow that makes the whole room feel much larger.