As an Amazon Associate, I earn from qualifying purchases at no extra cost to you.
10 Pine Kitchen Cabinet Ideas (Everyone Loves Right Now)
 ByRayan

When you walk into a kitchen, you want to feel warmth, not like you are in a cold, white box. Most people are terrified of wood tones, but pine is actually a designer secret for a cozy home. I have ripped out plenty of cabinets in my time, and honestly, pine holds up way better than those cheap, fake laminates people buy today.
People get nervous about pine because they think of orange, sticky wood from their aunt’s cabin. That is just bad finishing, not a bad wood. You have to ignore the critics, because they do not know how to treat the grain, and they are missing out on a huge upgrade. Stop listening to people who tell you to paint everything gray, it is boring.
You are going to learn how to make 10 pine kitchen cabinet ideas work for your space, how to pick the right finish, and why this wood is a total hero. We will skip the fluff, talk about what actually looks good, and get your kitchen feeling like a home again. Grab a coffee, let us fix this space, and make it yours.
1. Keep the Grain Natural
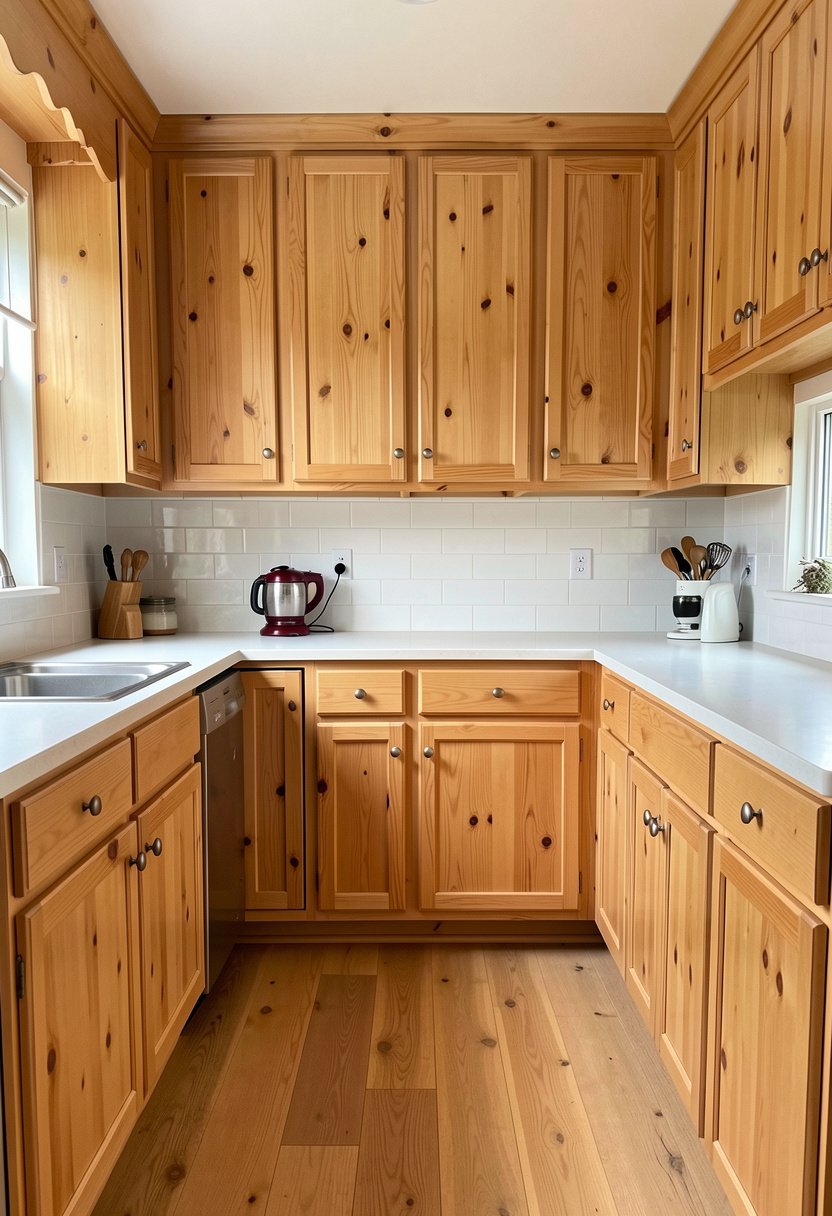
Most people buy cheap pine, slap on a shiny varnish, and then act surprised when it looks like a craft project. You need to keep things raw, clean, and honest. Use a matte sealer that lets the wood breathe, and skip that yellow tint, which ruins the look. A flat, matte finish makes the wood feel expensive, grounded, and very soft to touch.
If you choose to keep the grain, you need to commit to the texture, so do not try to hide it. I once saw someone sand the soul out of their cabinets, and it was a total disaster, so just embrace the natural knots. The knots add character, depth, and a story to your kitchen, which is exactly what you want for a lived-in, happy space.
Do not be afraid of the wood showing its age, because it only gets better with time, unlike those plastic cabinets that peel. Keep it simple, apply a clear wax, and enjoy the organic texture of your hard work. You deserve a kitchen that feels real, warm, and inviting every single morning.
- Use matte sealers only.
- Avoid any orange stains.
- Embrace all the knots.
- Apply a clear wax.

2. Go for a Whitewash
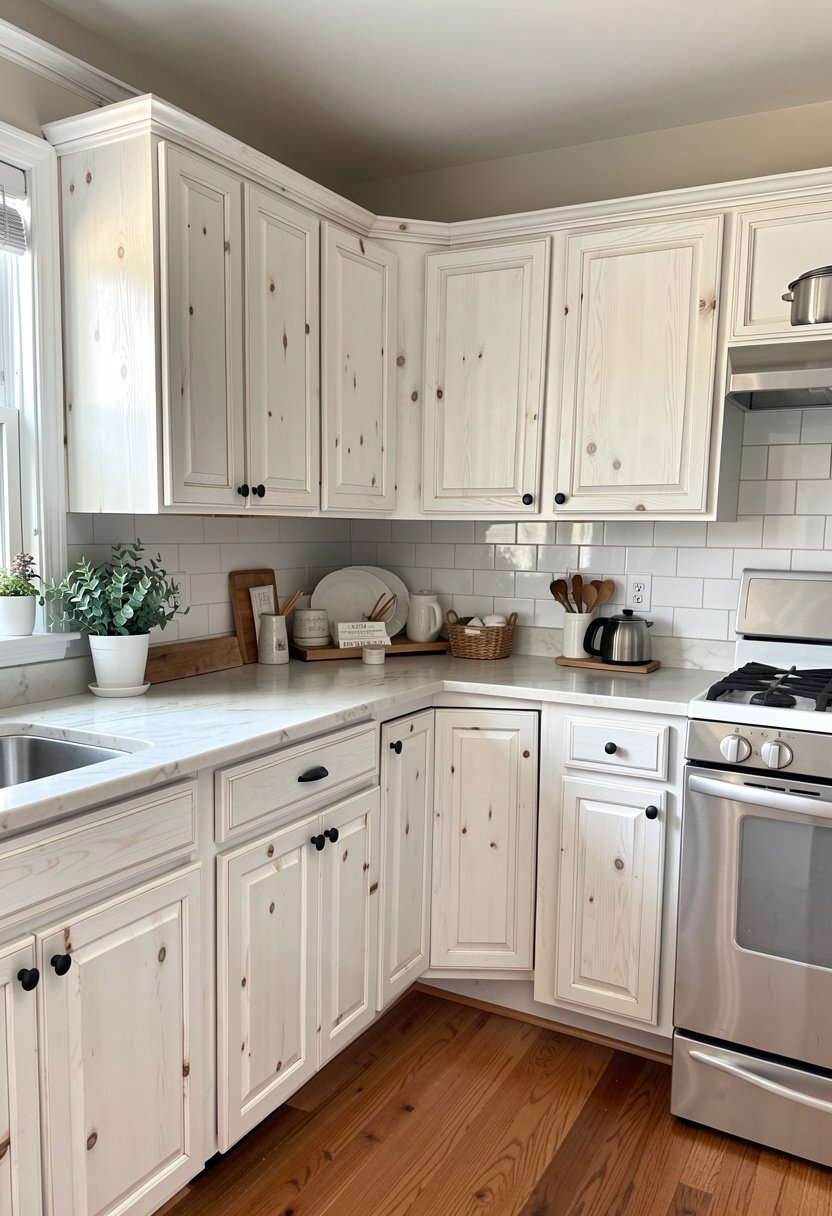
Whitewashing is the easiest way to tone down that yellow pine look, and it works like a charm. You dilute some white paint with water, wipe it on the wood, and let the grain show through. It feels bright, airy, and very clean, which is perfect if your kitchen is a bit small. Do not use full paint, or you will hide the beauty.
The biggest mistake is adding too much white, which makes it look like a cheap fence, so go slow. I started with a very thin mix, added a second coat only where it was needed, and it turned out great. It gives you that Scandinavian vibe without needing to spend a ton of money on fancy new wood.
You can mix this with brass hardware to make it pop, which makes the whole space feel very modern and fresh. This is a great choice if you love the idea of wood, but you are scared it will be too dark. Just take your time, test your mix on a scrap piece, and have fun with it.
- Dilute paint with water.
- Apply in very thin layers.
- Mix with brass pulls.
- Test on scrap wood.
3. Darken the Wood Deeply
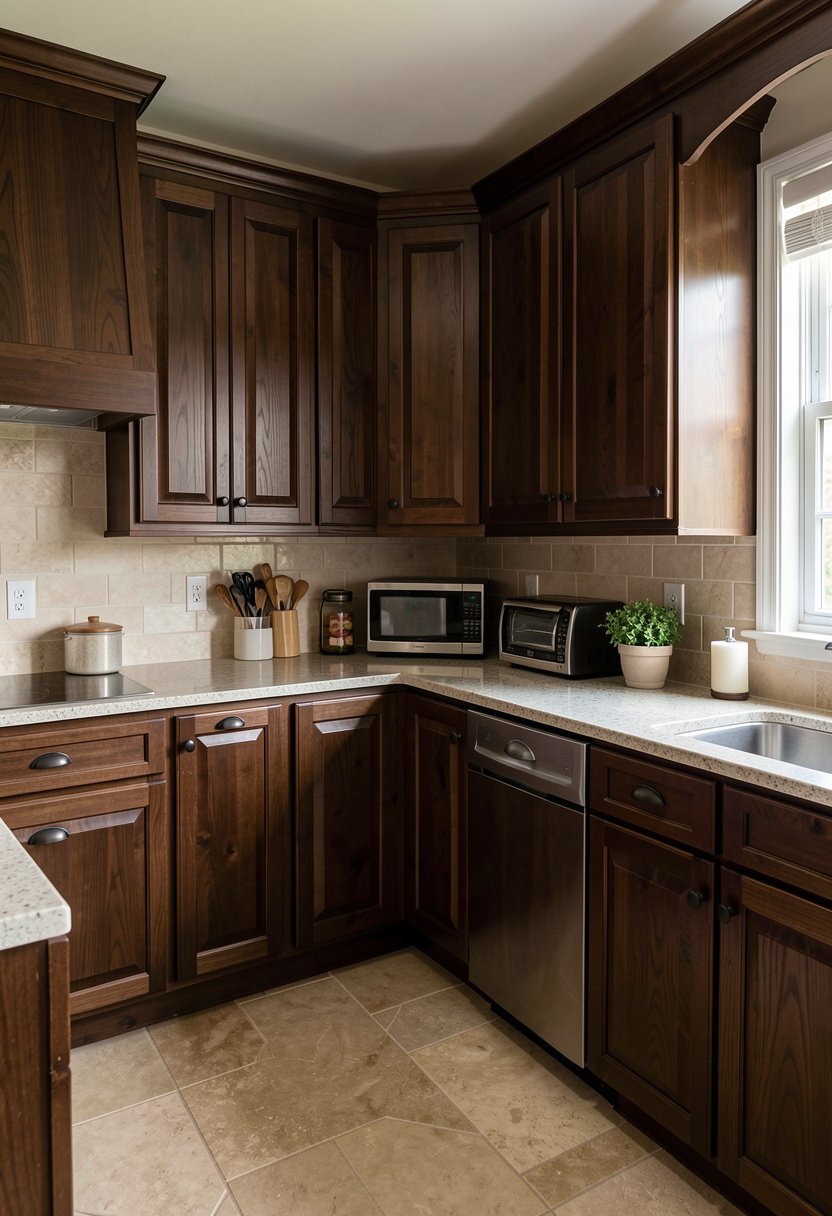
If you have a large kitchen, a deep, dark stain on your pine cabinets can look incredibly high end and sharp. Many people skip dark stains because they are afraid of the kitchen feeling like a cave, but that is just plain wrong. A dark, rich stain hides imperfections in the wood, looks very professional, and adds instant weight to the whole room.
You need to use a high-quality stain, wipe it on, and wipe it off quickly to keep it even. I prefer a dark walnut tone, as it makes the pine look like expensive timber, and it works beautifully with modern lighting. Do not use those cheap, all-in-one stain and poly mixes, because they look plastic and messy every single time.
Invest in a good brush, take your time with the edges, and you will have a look that lasts for years. Dark cabinets look amazing when paired with white stone countertops, because the contrast is crisp, clean, and very elegant. It changes the whole vibe of your home from basic to bold.
- Choose dark walnut tones.
- Avoid all-in-one products.
- Use nice, natural brushes.
- Contrast with white stone.

4. Paint Only the Frames
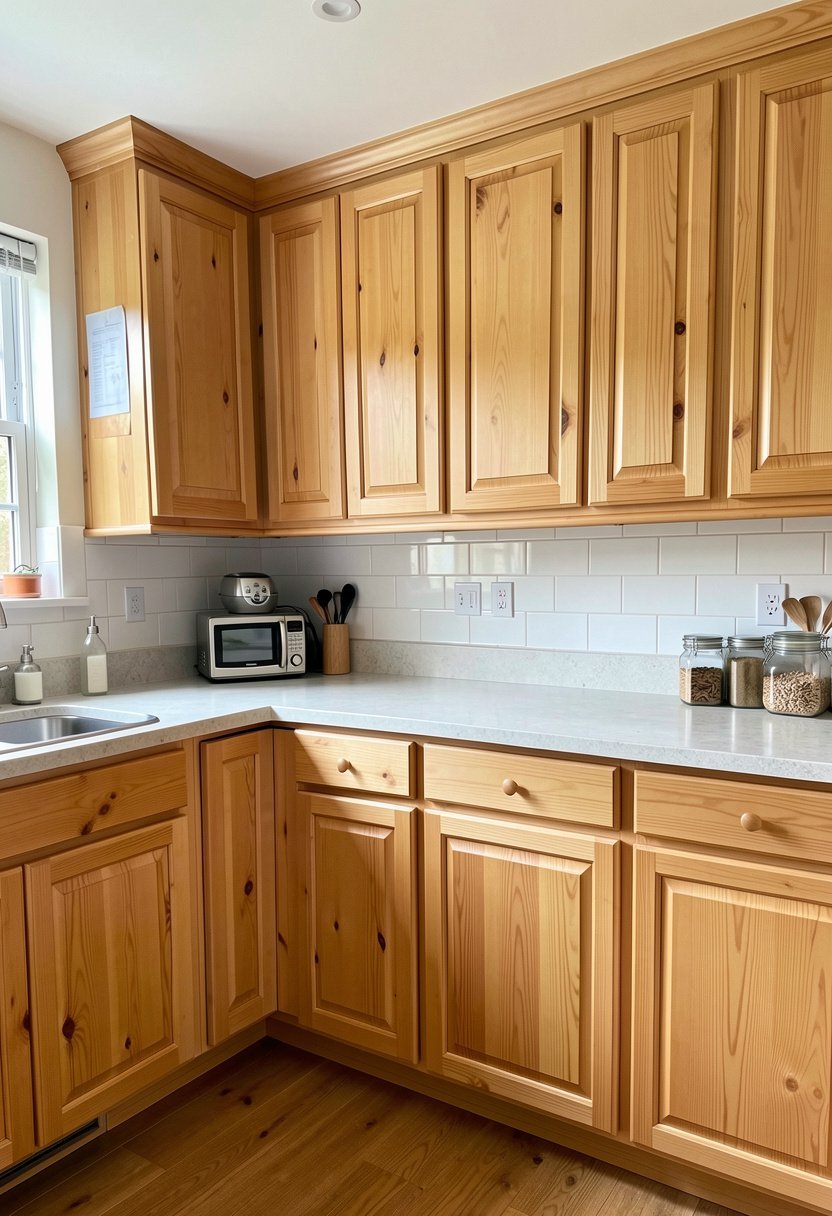
If you want a custom look without replacing your entire kitchen, just paint the frames and leave the doors wood. This trick adds a nice graphic edge, breaks up the wall of wood, and makes your kitchen feel like a designer piece. Most people paint the whole thing, which is a boring waste of beautiful wood grain.
I love using a deep navy or a matte black for the frame, as it makes the wood doors pop and feel intentional. It looks like you spent a fortune on custom cabinetry, even if you just used some paint and a bit of focus. Keep the paint finish matte, as gloss will make it look like a cheap toy.
This design choice shows off your personality, breaks up the monotony, and turns your kitchen into a talking point. It is a bold move, but it is one that always pays off if your lines are clean. Just tape off those wood doors well, paint the frames with confidence, and enjoy the look.
- Use navy or black.
- Keep the paint matte.
- Tape off wood well.
- Focus on clean lines.

✅ See Also: 12 Pink Kitchen Cabinet Ideas (Anyone Can Copy)
5. Add Shaker Style Doors
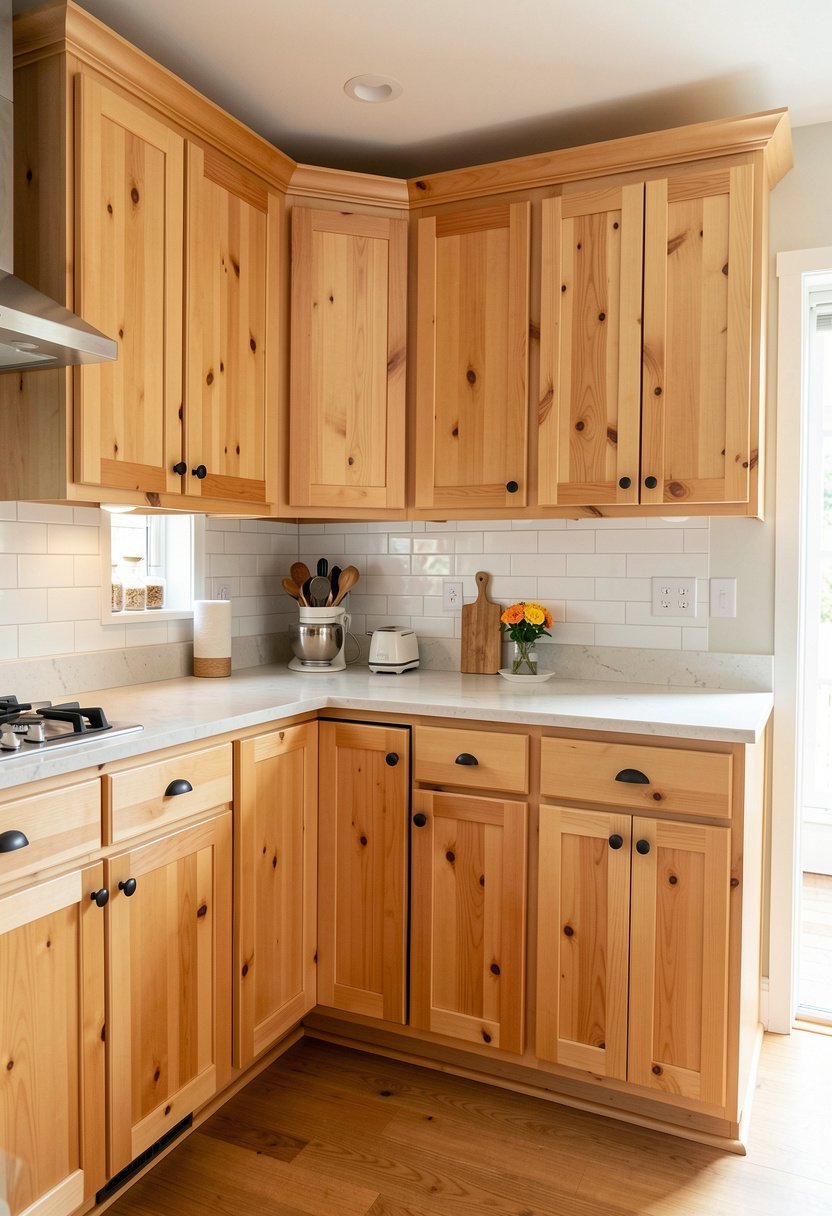
Pine cabinets look their best when they are simple, so skip the ornate carving and stick to a clean Shaker style. Shaker doors are flat, honest, and they let the wood grain be the star of the show. People spend way too much on fancy doors that just collect dust, which is a massive headache to clean, so keep it simple instead.
I have installed these doors in several homes, and they never go out of style because they are so classic. They work in a rustic cottage or a city apartment, which makes them the most versatile choice for anyone on a budget. You want clean lines, not complicated details, so just buy the basic panels and finish them yourself.
If you are handy, you can make these panels easily, but buying them ready to finish is a huge time saver. They show off the beauty of pine without looking like a dated cabin, which is the main goal. Keep it minimal, keep it functional, and stop overthinking the door design.
- Stick to flat panels.
- Skip the fancy trim.
- Buy doors ready-made.
- Focus on simple hardware.

6. Mix Pine with Color
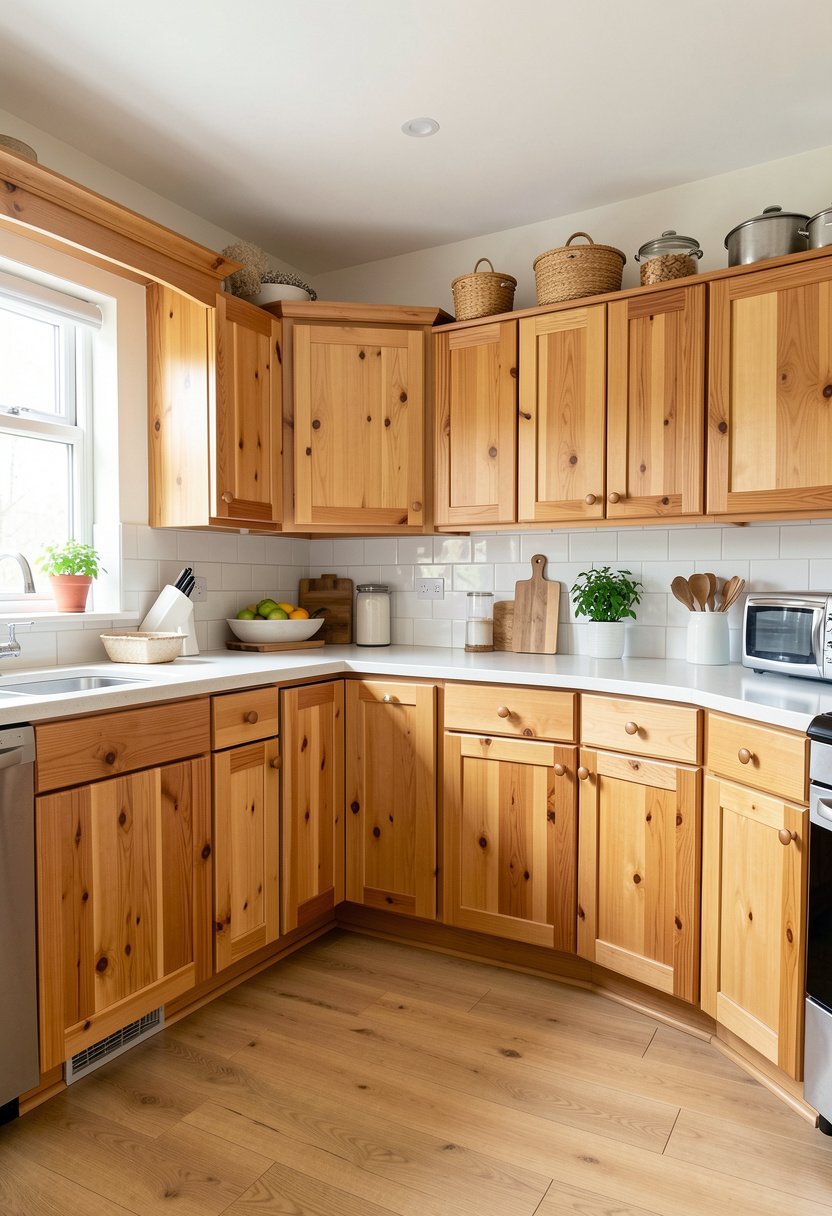
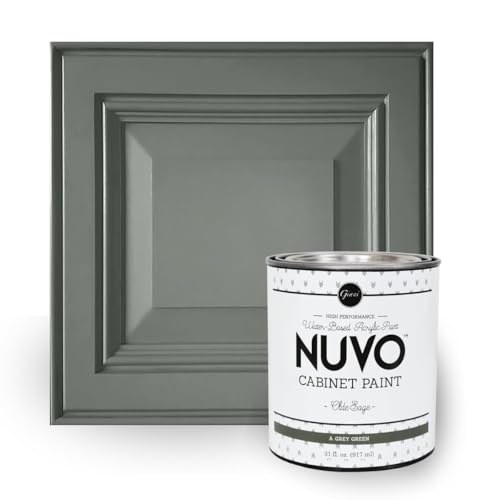
You do not have to pick just one look, so mix your pine with a bold, painted cabinet set elsewhere. Keep the lower cabinets in natural pine, and paint the upper cabinets a fun, soft color like sage green. This grounds the kitchen, makes it feel cozy at the bottom, and brightens it up at the top. It is the best of both worlds.
Most people are too scared to mix materials, but I promise it is the best way to get a custom feel. If you paint everything one color, your kitchen looks like a showroom, and not in a good way. I suggest choosing muted tones that complement the warm golden color of the pine, so everything feels tied together nicely.
This mix looks great if you have open shelves, because you can tie the wood tones together with your decor. It feels personal, interesting, and very balanced. You are creating a space that feels curated, not like you bought a set from a big store, so start playing with your paint samples today.
- Paint the upper cabinets.
- Keep lowers in pine.
- Use soft, muted colors.
- Balance with wood shelves.
7. Use Matte Hardware

Pine cabinets need hardware that does not distract from the grain, so avoid shiny chrome at all costs. Matte black or antique brass hardware is the only way to go if you want a look that feels finished. Shiny metal looks cheap next to the warmth of wood, and it always shows every single fingerprint, which is a total pain.
I always tell my friends to pick a heavy, matte pull that feels good in the hand. It makes the cabinets feel more expensive, even if you bought the cheapest pine panels you could find. A simple, minimalist handle is the best choice because it does not fight with the natural beauty of the wood, which should be the main focus.
If you are on a budget, just swap out your old, ugly handles for some new matte ones. It is the cheapest, fastest way to make your kitchen look like you spent thousands, even if you did not. Put down the chrome, grab something solid, and feel the difference immediately.
- Avoid shiny, cheap chrome.
- Buy heavy matte pulls.
- Use antique brass finishes.
- Focus on minimalist shapes.

8. Install Open Shelving
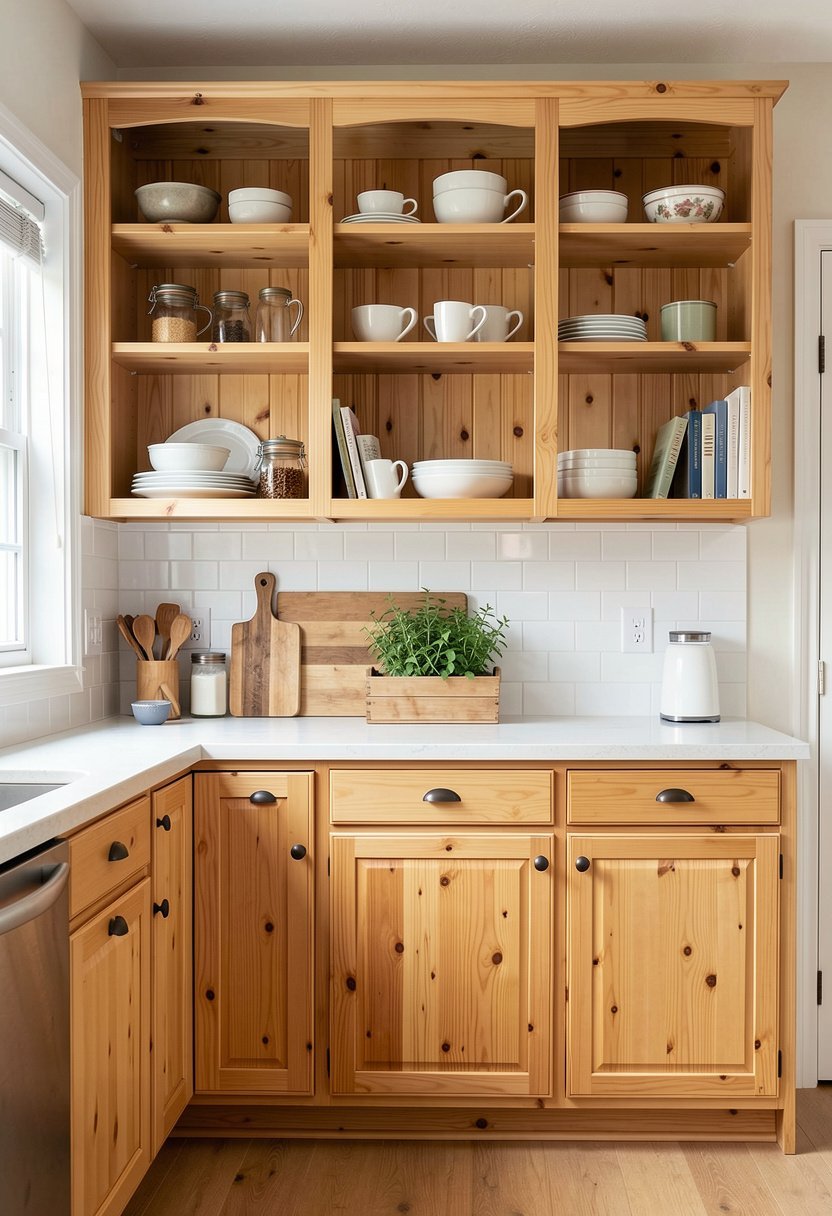
If you have a small kitchen, replace a few cabinet doors with open shelves to show off your pine. This makes the kitchen feel twice as big, adds a spot for your favorite plates, and highlights the beautiful wood texture. People hide everything behind solid doors, but that is a waste of a good aesthetic, and it makes the room feel tight.
I use pine boards for the shelves to match the cabinets, which creates a seamless, built-in look that I adore. It is functional, easy to access, and it forces you to keep your kitchen clutter to a minimum, which is a win-win. Don’t worry about it being messy, just stack your dishes neatly, and it will look like a magazine shoot.
If you are worried about dust, just keep your everyday items on the shelves, and hide the weird stuff in the lower cabinets. It is a smart way to use your space, it breaks up the wall of cabinetry, and it brings a lot of warmth into your home. You will never want to go back to solid walls.
- Match wood to cabinets.
- Keep dishes stacked neatly.
- Remove only top doors.
- Reduce visual kitchen clutter.

9. Add Under Cabinet Lighting
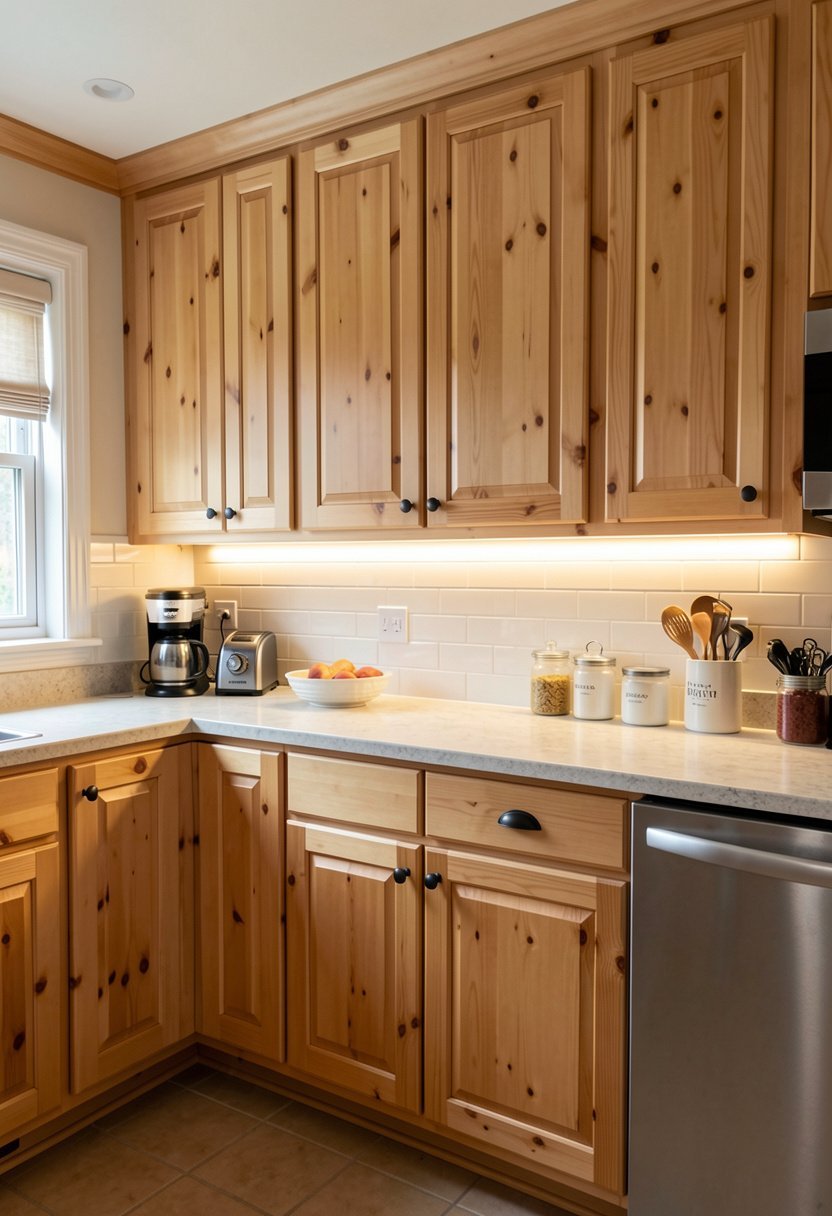
You must add lights under your cabinets, or the pine will look flat, dark, and boring. Wood needs light to show off its grain, its knots, and its warmth, so do not skip this step. People spend all day picking the right wood, and then they leave it in the dark, which is just a massive shame.
I put warm, LED tape lights under my cabinets, and it completely changed the mood of the room at night. It feels like a high-end restaurant, cozy and inviting, and it helps you see what you are doing while cooking. Don’t use those blue-toned bulbs, because they make the pine look gray and sad, so choose warm light settings every time.
This is a cheap fix that makes a huge impact, so do not let your beautiful cabinets sit in the shadows. It is an easy DIY project that you can finish in an hour, and you will thank yourself every time you flip the switch. Good light is everything when you work with natural wood.
- Use warm LED tapes.
- Avoid cool blue light.
- Hide lights under cabinets.
- Highlight the wood grain.

10. Use Vertical Boarding
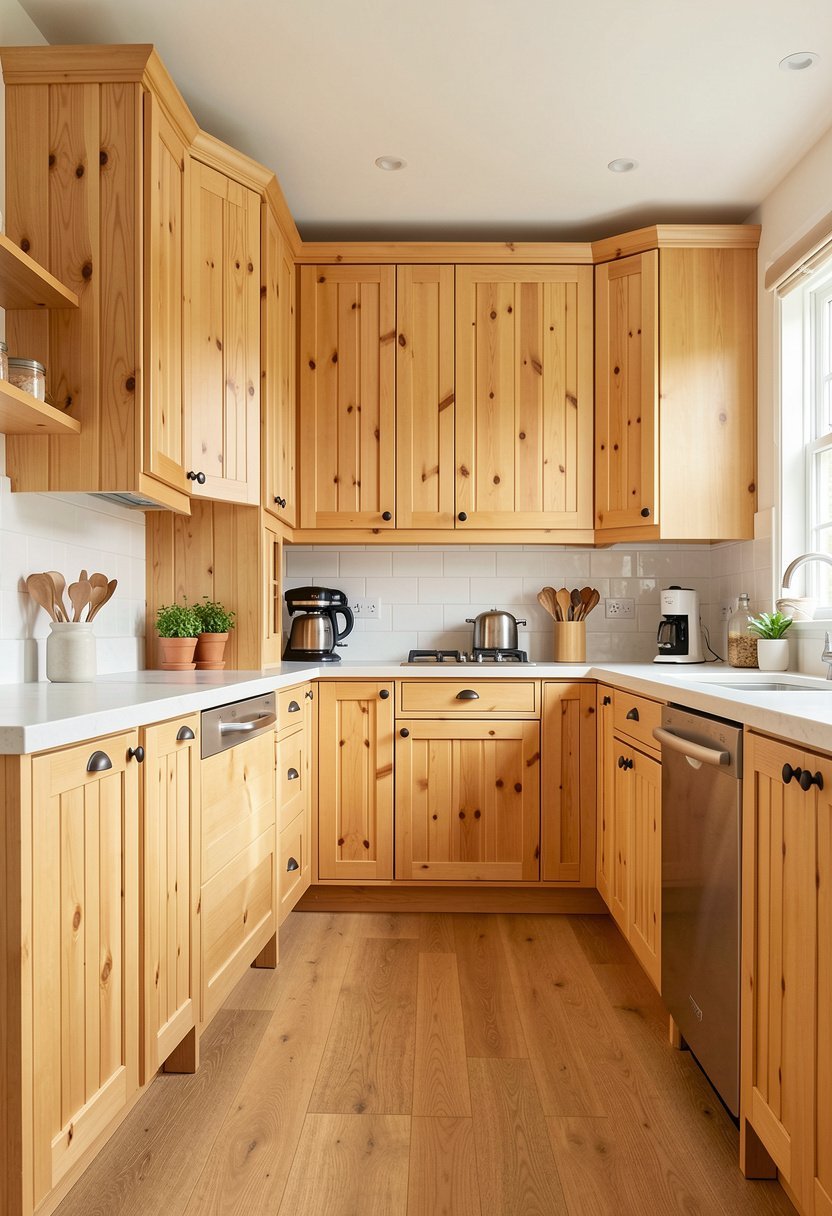
If your pine cabinets feel too plain, use vertical boarding on the panels for a bit of texture. It looks like a custom Shaker detail, it adds height to your kitchen, and it makes the wood feel more intentional. Most people settle for flat, boring doors, but adding this small detail sets your kitchen apart from every other house on the block.
I have done this by adding thin wood strips to standard panels, and it looks like I spent a fortune on cabinetry. It is a simple way to get that custom farmhouse style without having to pay a professional for it. Make sure your lines are perfectly straight, as crooked strips will look like a disaster, so take your time measuring.
This detail adds a shadow line that makes the wood look more interesting, especially when the light hits it. It is a small change, but it makes a massive difference in how the kitchen feels overall. Give it a shot if you want your kitchen to have some real character and charm.
- Use thin wood strips.
- Ensure perfect, straight lines.
- Add texture to doors.
- Create interesting shadow lines.

Final Thoughts
I hope these ideas help you see pine in a totally different way. Most people treat pine like a budget mistake, but you have the vision to turn it into the heart of your home. Stop worrying about what is trendy and focus on what feels warm, real, and right for your space. Keep it simple, trust your gut, and you have got this.
| Kitchen Detail | Why It Works | Recommended Use |
|---|---|---|
| Matte Sealer | Prevents Shine | Daily Wear |
| Whitewash | Brightens Wood | Small Spaces |
| Dark Stain | Looks Expensive | Large Kitchens |
| Navy Frames | Adds Drama | Contrast Style |
| Shaker Doors | Classic Appeal | Every Style |
| Sage Green | Adds Color | Mixed Cabinetry |
| Matte Black | Modern Feel | All Hardware |
| Open Shelves | Adds Depth | Upper Walls |
| Warm Lighting | Enhances Grain | Under Cabinets |
| Vertical Trim | Adds Texture | Door Panels |
| Natural Wax | Soft Finish | Low Maintenance |
| Brass Pulls | Warm Contrast | Dark Stains |
| Flat Panels | Clean Look | Minimalists |
| Soft Close | Functional | Every Hinge |
| Wood Shelves | Continuity | Matching Wood |
Frequently Asked Questions
Is Pine a Good Wood for Kitchen Cabinets?
Yes, pine is a very good choice if you love warmth and natural texture. While it is softer than oak, it is very easy to work with and fix if it gets a scratch. It is a great value, and it ages beautifully if you finish it with care.
Can I Paint Pine Cabinets Later If I Get Tired of the Wood?
You can absolutely paint them later, but you need to be careful with the knots. Pine sap can bleed through paint, so use a high-quality primer to seal it first. If you prep it right, you can change your look whenever you want to.
Are Pine Cabinets Too Rustic for a Modern Home?
Pine is not just for rustic cabins, as the finish defines the style. If you use a matte sealer and clean, minimalist hardware, pine fits perfectly in a modern space. It brings a necessary warmth that keeps your modern home from feeling cold.
Do Pine Cabinets Turn Orange Over Time?
Pine will darken and turn golden as it ages from the sun, but it does not have to be orange. Avoid oil-based varnishes that start yellow, and choose high-quality water-based sealers instead. This keeps the wood looking fresh and natural for years.
Should I Choose Pine Over Expensive Hardwoods?
If you are on a budget and love the look of natural wood, pine is the best way to save money without losing character. Hardwoods are harder, but pine is much cheaper and easier to find. It is a smart choice for most homes.
Can I Mix Pine with Other Cabinet Colors?
Mixing pine with other colors is a great way to add style to your kitchen. I love pairing natural pine lower cabinets with white or green upper cabinets. This creates a balanced look that feels custom, layered, and very professional indeed.
Does Pine Require Special Cleaning Products?
You do not need fancy cleaners for pine cabinets, just use a damp, soft cloth. Avoid harsh chemicals that strip the finish, and keep the wood dry to prevent water damage. Simple is best, as it keeps the wood grain looking healthy.
Will Pine Cabinets Show Scratches Easily?
Pine is softer than oak or maple, so it will show dings over time. However, this is part of the charm of real wood in a busy kitchen. You can easily sand out any deep marks or re-oil the spot to keep it looking great.