As an Amazon Associate, I earn from qualifying purchases at no extra cost to you.
12 Rustic Kitchen Island Ideas (That Feel So Fancy)
 ByRayan

Always start your kitchen remodel by looking at the heart of the room, the island. I have seen so many people pick boring, white boxes that feel like a cold hospital room, and it hurts my soul. You want warmth, texture, and character in your home, especially where you cook. These 12 rustic kitchen island ideas will fix your kitchen, give it soul, and make it the best room in your house.
Most folks try to match their island to their cabinets perfectly, but that is a massive mistake. It makes the kitchen look like a showroom, not a place where life happens. You want contrast, depth, and a story behind your furniture. If you buy a matching set, you are settling for safe, boring, and predictable. Please, stop doing that, and trust me on this one.
We will walk through 12 ways to add rustic charm to your kitchen island, from wood finishes to stone accents. I will show you how to pick materials that age well, look expensive, and actually handle a messy family dinner. You will learn how to choose stools, lighting, and finishes that tie everything together. Stop guessing, start designing, and let us get your kitchen looking incredible.
1. Reclaimed Wood Panels for Texture
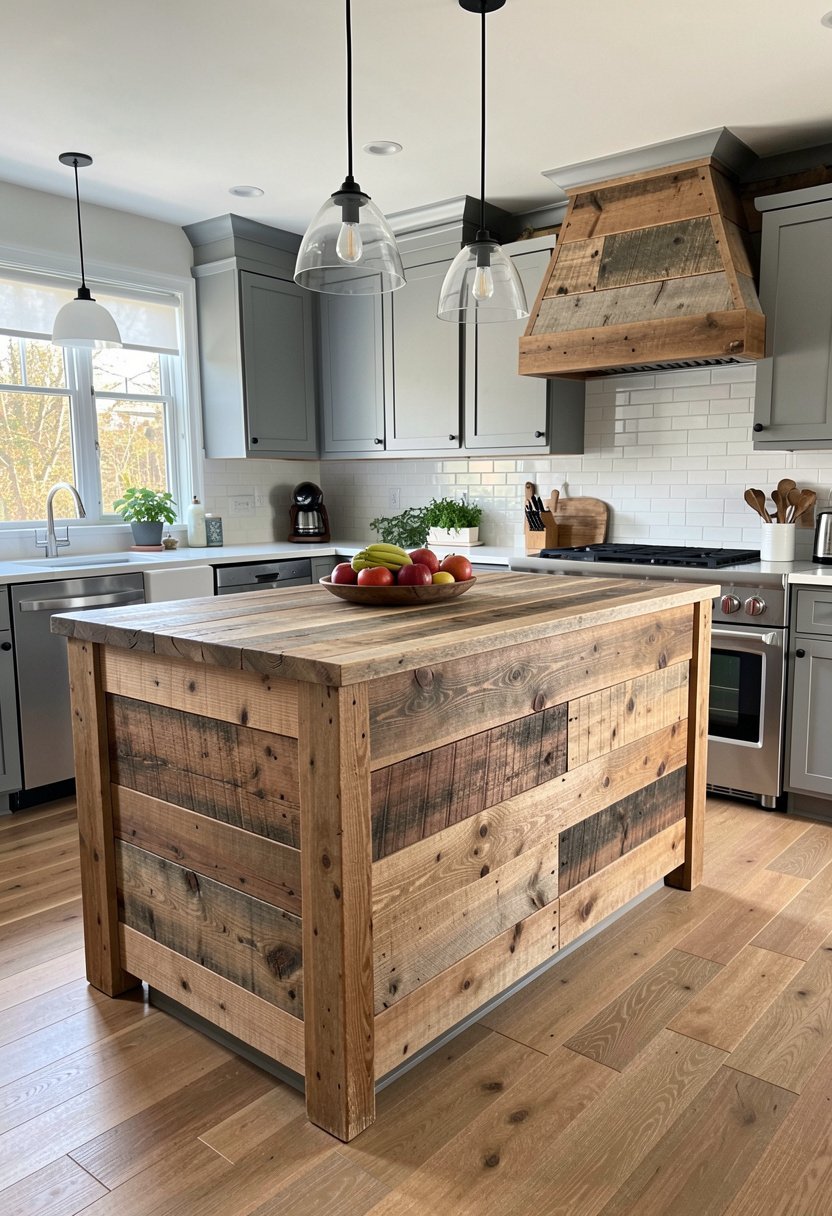
Start by looking for old, barn-wood planks to wrap around your island. This adds instant age, history, and warmth to a space that might feel too new. People always try to paint over wood, which hides the grain, but keeping it raw is the secret to a high-end look. Just seal it well, protect it from water, and watch how it transforms the whole room.
Many stores sell thin, fake veneers, but those look like plastic garbage, so stay away from them. You need real wood, with knots, nails, and natural history, because that is what feels authentic. If you want a kitchen that feels collected, not bought from a catalog, this is the path. I have used this trick many times, and it never fails to add that cozy, cabin vibe.
This look works best when you keep the counters simple, like plain stone or butcher block. Let the wood speak, keep the clutter away, and focus on the texture. It is a bold move, but it is one that makes every visitor ask where you found such a cool piece. Go find some wood, nail it up, and enjoy the result.
- Find real reclaimed barn wood planks.
- Seal the surface for water protection.
- Avoid plastic looking wood veneers.
- Pair with simple, clean countertops.
2. Antique Farmhouse Worktables
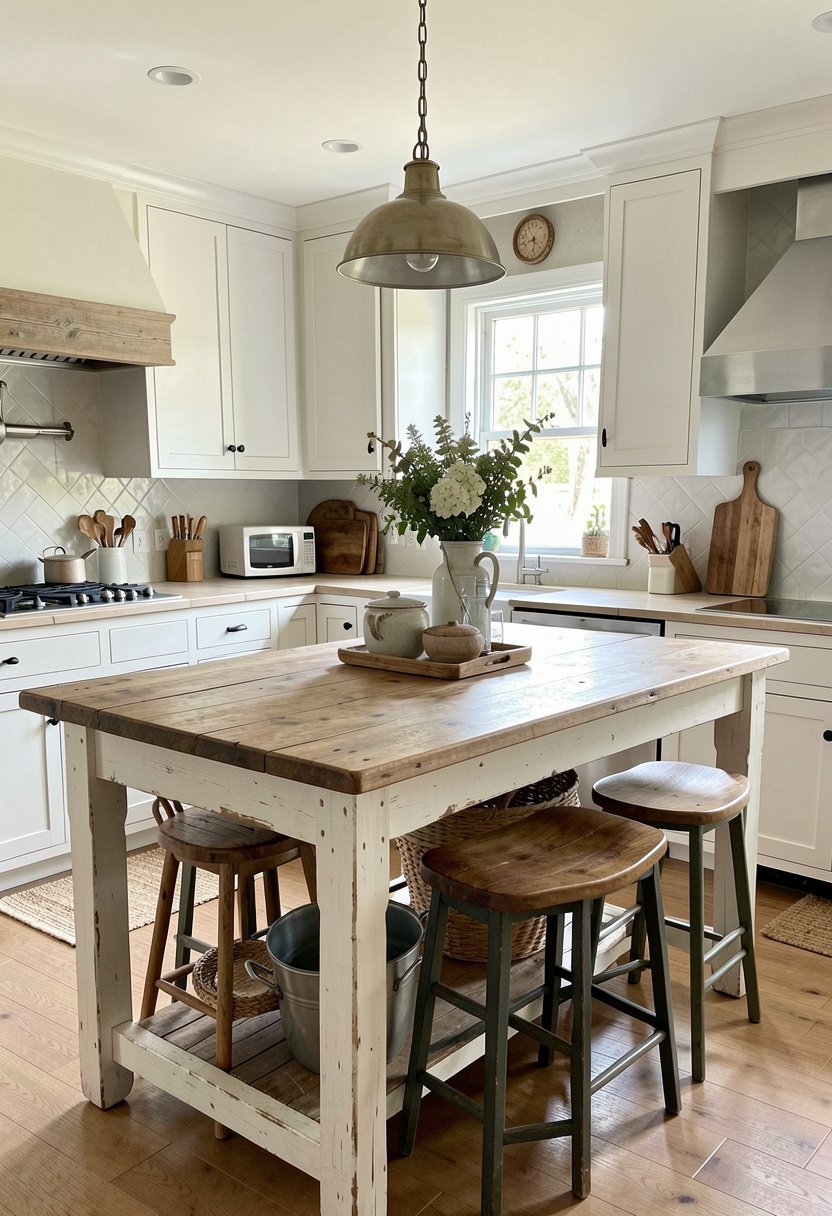
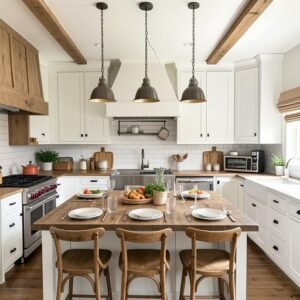
Instead of building a fixed island, try using an actual antique farmhouse table. I have seen people hunt for months to find the perfect table, and it is always worth the effort. It creates a space that feels loose, airy, and very custom. You can even add a matching wood top or stone slab if you need more prep room for your cooking.
Most people waste money on heavy, built-in cabinets that trap you in one layout forever. A table feels light, allows for foot room, and gives the room a human scale. If you hate how it feels later, you can move it, sell it, or swap it out. That is freedom, and that is how I prefer to live in my own home.
You need to make sure the height is right, so watch your measurements. You might need to add a thick butcher block top to reach standard counter height. It adds a bit of work, but the payoff is a kitchen that looks like it came from a design magazine. Do not settle for a heavy box when you can have a piece of history.
- Look for sturdy, old wooden tables.
- Check heights to match your kitchen.
- Add butcher block for extra height.
- Keep the floor space open underneath.
✅ Also Read: 14 Large Kitchen Island Ideas (Pros Swear By)
3. Exposed Brick Base
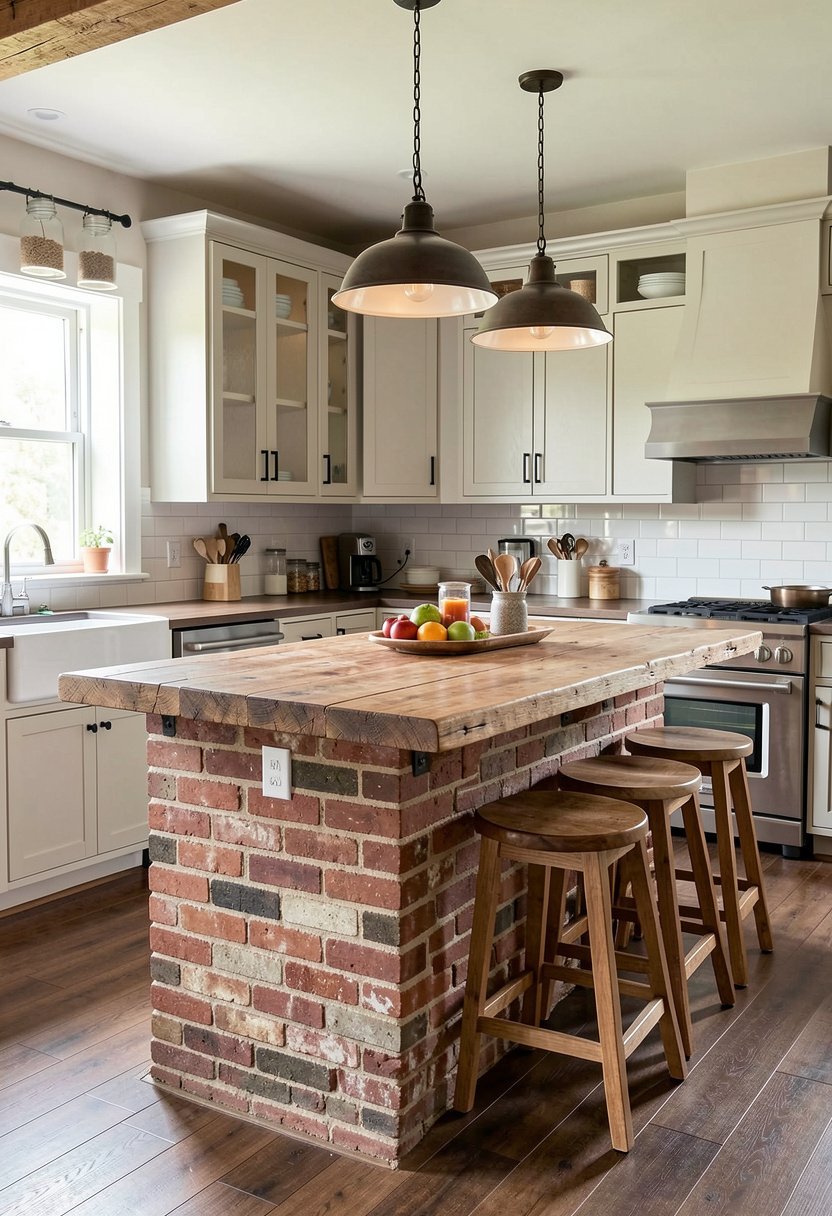
Brick brings a weight and a history that nothing else can match. I have used thin brick tiles to face an island, and it looks like it was there for a hundred years. It anchors the room, creates a beautiful focal point, and works with almost every color of cabinets you might have. It is a classic look for a reason.
Stop buying those cheap, plastic-looking brick panels because they look fake from a mile away. You need real, kiln-fired brick tiles, which offer texture that you can actually feel. It might cost a bit more, but it is worth the extra cash. If you want the kitchen to feel solid and rooted, this is the way to do it.
Keep the mortar lines messy, or use a soft white wash to blend it into your space. It should feel like a ruin that you turned into art. If you make it too perfect, you lose the charm of the rustic style. Be brave, use real materials, and make sure the lighting highlights the texture of the brick at night.
- Use real, kiln-fired brick tiles.
- Avoid cheap, fake brick panels.
- Apply white wash for softer looks.
- Light it well to show texture.
4. Heavy Duty Butcher Block
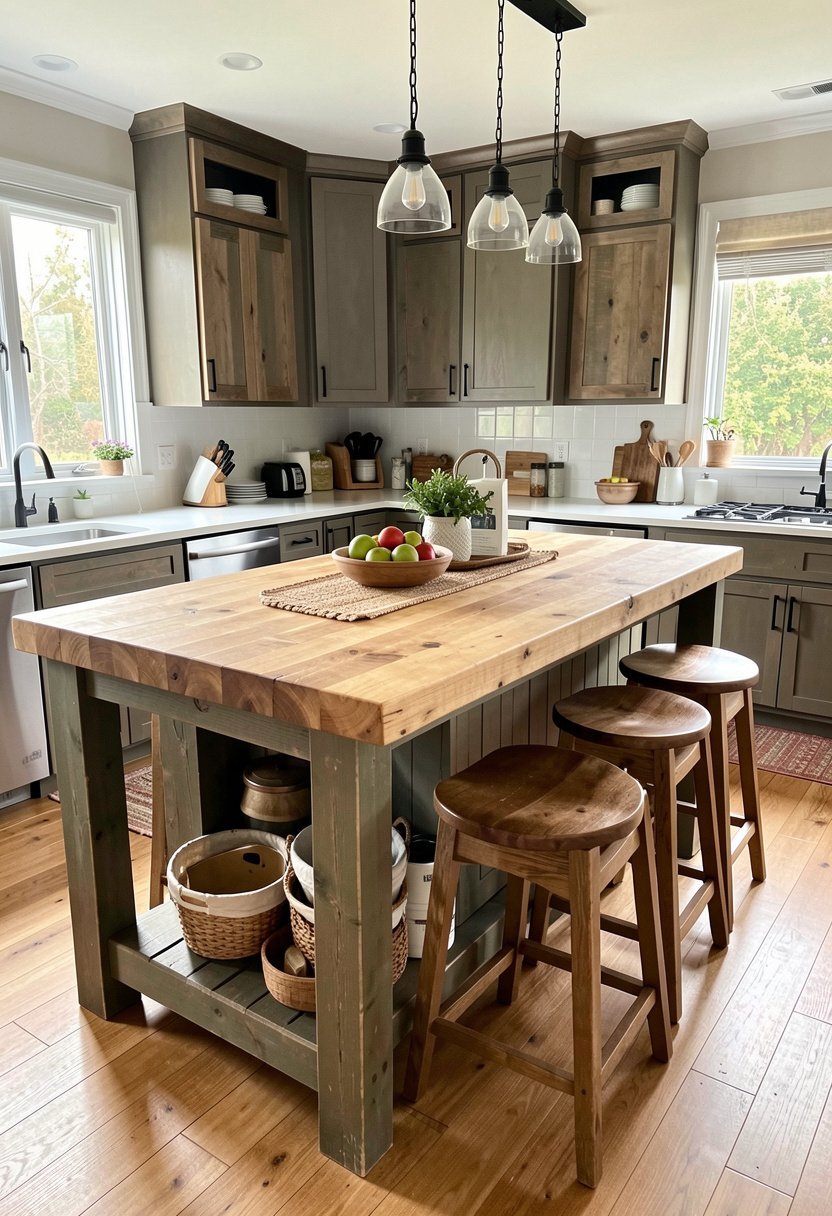
Nothing beats a massive, thick piece of end-grain butcher block for a kitchen island. It is the ultimate tool for a real cook, it looks stunning, and it only gets better with a few scratches. I have worked on many kitchens, and this is the one feature people actually use every single day. Forget marble, which stains, and get wood.
You need to treat it with mineral oil often, or it will dry out and crack on you. If you skip this step, you are wasting your money on a beautiful piece of wood. It takes five minutes once a month, so do not tell me you are too busy. This is about caring for your tools, and your home, the right way.
Go for a dark walnut or a rich cherry to make the island pop against lighter cabinets. It adds a deep, natural tone that makes the whole room feel grounded. I have seen tiny kitchens transformed by a slab of dark wood, and it is a trick I use whenever I need to add serious style without buying new cabinets.
- Choose thick, end-grain butcher block.
- Apply mineral oil every single month.
- Pick dark woods for deep contrast.
- Avoid materials that stain or crack.
✅ See Also: 11 Ikea Kitchen Island Ideas (That Fix It Fast)
5. Salvaged Industrial Metal Accents
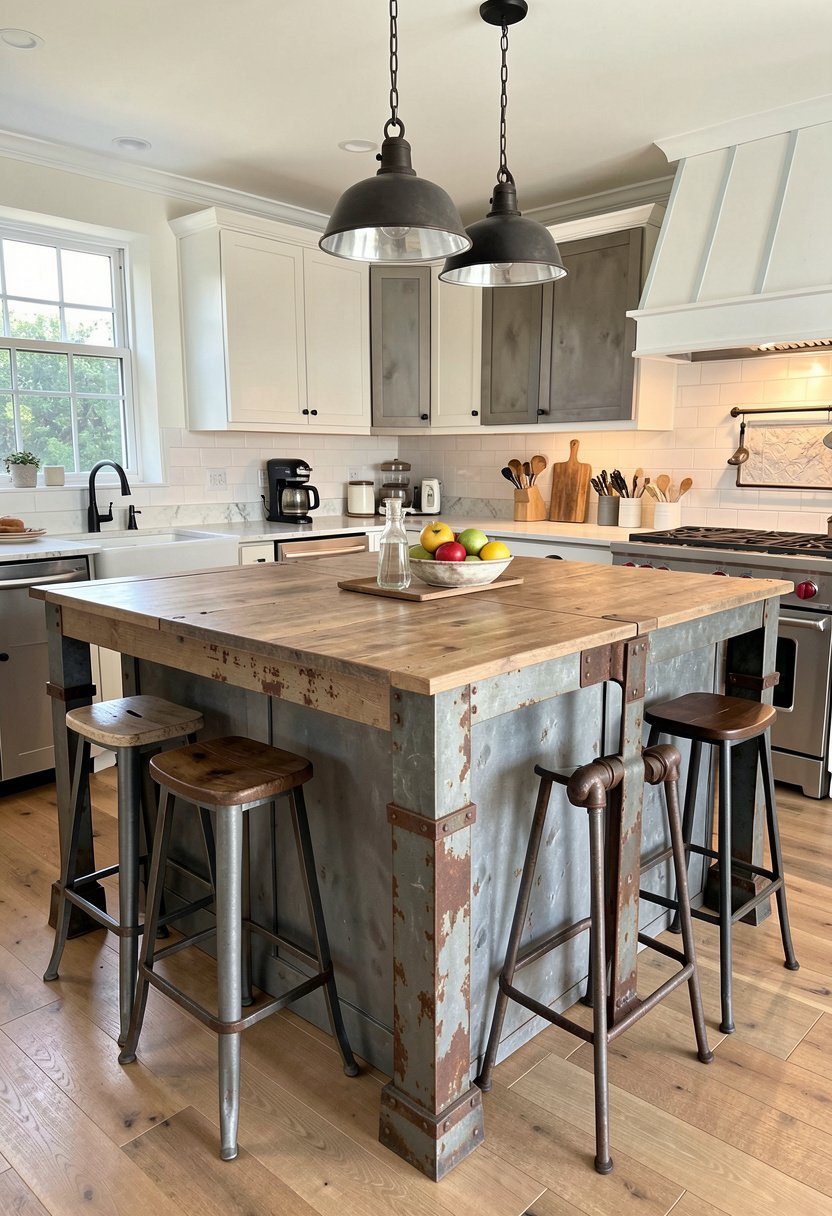
Mixing rustic wood with raw metal creates a vibe that feels like an old workshop. I love using black iron pipes, or metal corner guards, on a rustic wood base. It gives the island a tough, reliable feel that says this kitchen works for a living. Most people go too soft with decor, but this adds some necessary grit.
Do not use shiny, fake chrome finishes because they look tacky and cheap. You want matte black, or brushed steel, that looks like it has been in a garage for years. It is a small detail, but it changes the mood of the room entirely. I have used this trick to make a bland island look like a designer piece.
You can add metal stools, or iron light fixtures, to pull the theme together. Just be careful not to overdo it, or your house will feel like a hardware store. Keep the metal subtle, focus on the quality of the joints, and let the wood be the star of the show. It is about finding the right balance in your home.
- Use matte black iron accents.
- Avoid shiny or chrome finishes.
- Balance wood with industrial parts.
- Keep the overall design look simple.
6. Weathered Paint Finishes
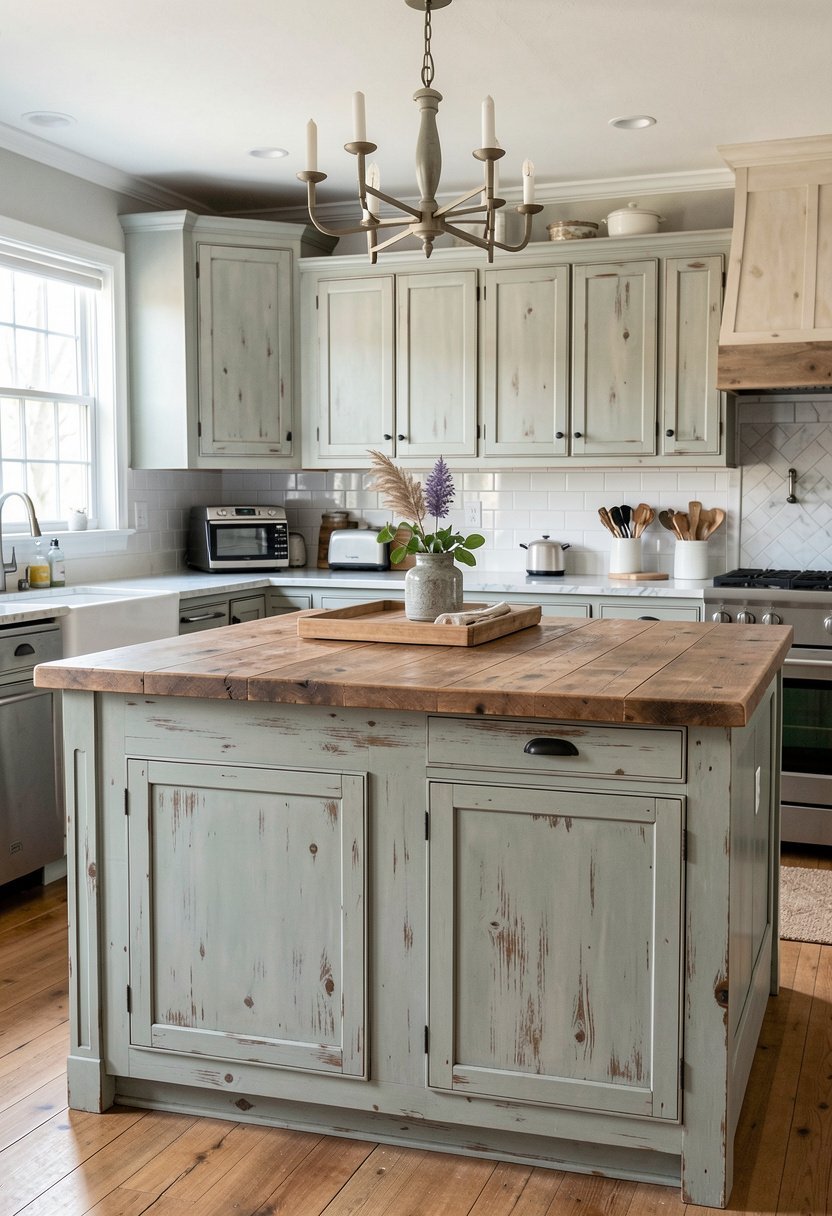
If you have a plain, boring island, paint it with a chalky, weathered finish. I have spent many weekends sanding down layers of paint to reveal the colors underneath. It makes a new island look like a family heirloom that passed through three generations. People always ask me where I found my antique pieces, and I just smile.
Do not use high-gloss paint because it looks like a cheap toy. You want a flat, matte finish that feels dry and aged. Use a dark wax to highlight the corners, and the places where the paint would naturally rub off over time. It creates depth, character, and a softness that high-gloss paint just cannot mimic in any room.
This is a cheap, fun project that you can finish in one afternoon. If you mess up, you just sand it down and try again. That is the beauty of a rustic finish. It is not about perfection, it is about creating something that feels lived-in and real. Grab a brush, pick a soft grey or blue, and get to work.
- Select matte or chalk-style paint.
- Use dark wax for aged details.
- Sand edges to show old layers.
- Avoid high-gloss paint at all costs.
7. Woven Basket Storage
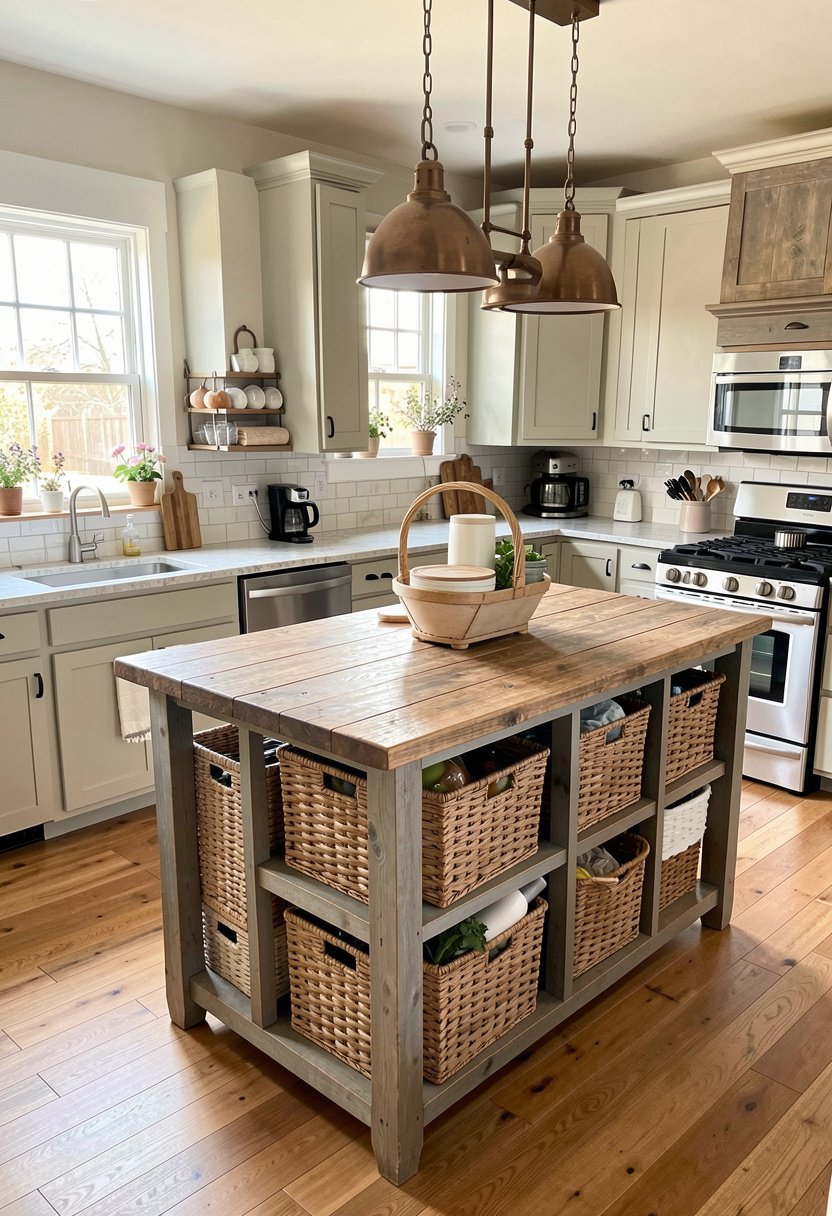
Instead of drawers, use big, woven baskets under your island. It adds natural texture, provides hidden storage, and makes the kitchen feel like a cozy, country pantry. I use this in my own home for linens, potatoes, or snacks, and it is a total game changer. It is practical, looks great, and keeps your counters clean of clutter.
Most people hide things behind heavy cabinet doors, which look stiff and formal. Baskets add a layer of warmth, soften the hard lines of the island, and make it easy to grab what you need. Buy high-quality, thick reed or seagrass, because the cheap, thin stuff breaks after two weeks. Do not be that person who buys junk.
Keep the baskets organized by type, or the whole thing will look like a disaster zone. It is a rustic look, but that does not mean it has to be messy. I love how it makes a modern kitchen feel approachable, friendly, and very warm. It is the easiest way to add a bit of country style to your living space.
- Choose thick, sturdy seagrass baskets.
- Use them for easy access storage.
- Keep the items inside very neat.
- Avoid flimsy, cheap basket materials.
8. Open Shelving Base
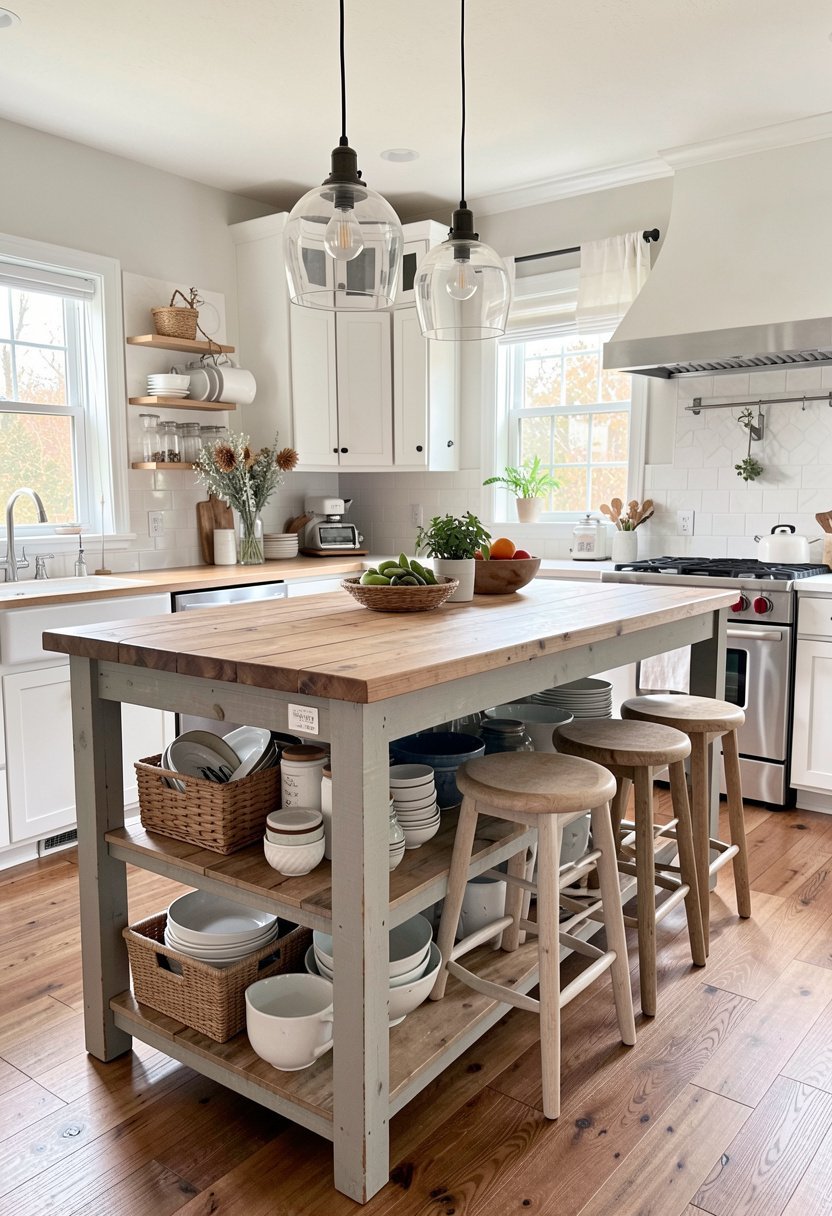
If you want a kitchen that feels open, skip the doors and use open kitchen shelving. I love being able to see my favorite bowls, wood boards, and jars right where I cook. It makes the room feel much larger, and it forces you to keep your stuff organized, which is never a bad thing in my book.
Some people hate this because they fear the dust, but that is a lazy excuse. If you use your kitchen, your stuff does not get dusty. Just keep things neat, stack them with care, and embrace the look. I have seen kitchens that felt like a cave until someone tore the doors off and added shelves. It is light, airy, and beautiful.
Make sure your shelves are thick and solid, not those flimsy, bowing boards that look ready to snap. Use reclaimed wood or thick, painted pine to support your gear. It turns your plates and bowls into part of the decor, which is a very smart design move. Just keep it simple, clean, and styled for a great look.
- Use thick, solid wood shelving.
- Keep your stored items very organized.
- Style the shelves like a display.
- Avoid thin, bowing shelf boards.
9. Stone Veneer Wrap
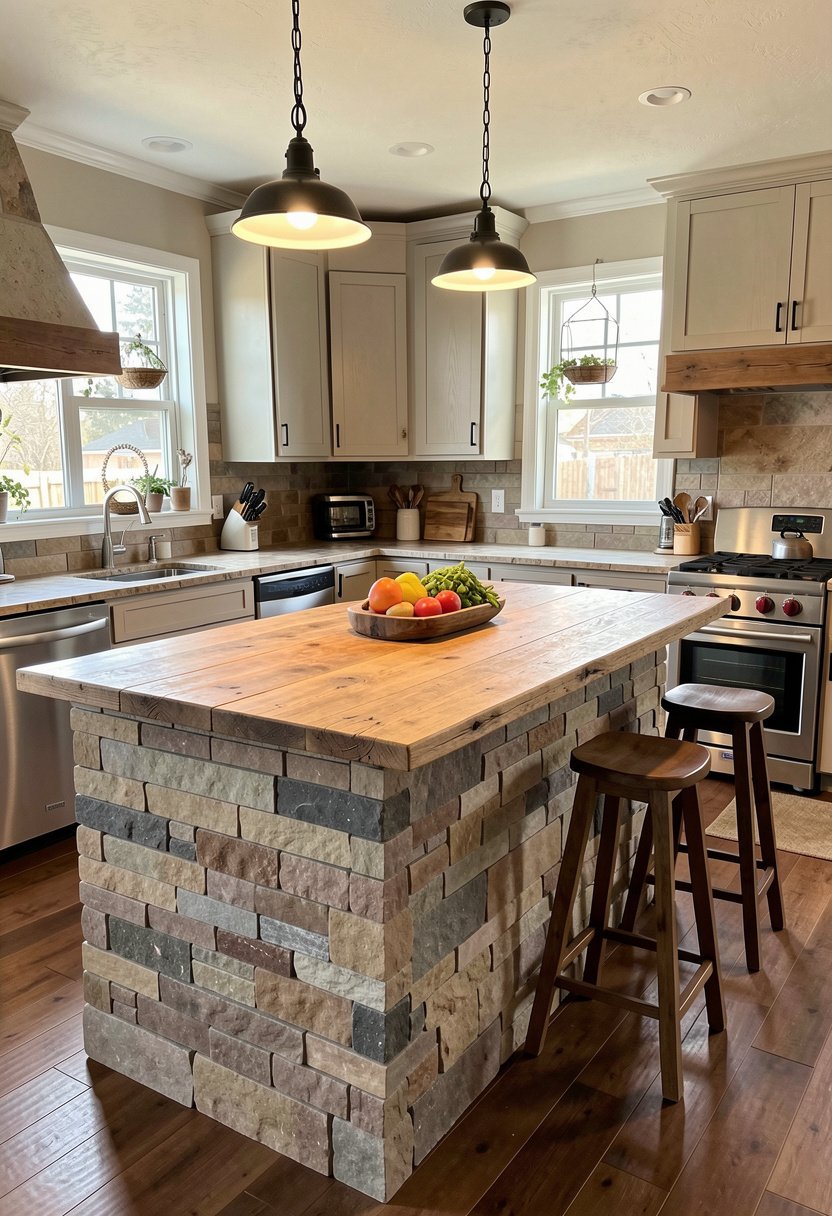
If wood feels too warm, use a rugged stone veneer around the base of your island. I once used river stone, and it made the island feel like a solid block of nature. It brings the outdoors inside, which is the heart of a good rustic home. It looks expensive, feels incredibly sturdy, and lasts for a very long time.
Do not try to install heavy, thick rocks unless you have a pro helping you. Stone veneer is thin, light, and gives the same look with way less work. You can do this yourself if you have a bit of patience. Just make sure the corners look clean, because that is where people usually mess up the whole job.
Choose a natural color palette, like grey, tan, or soft brown. Stay away from those weird, unnatural colors that some manufacturers try to sell. You want your kitchen to feel classic, not like a cartoon. It creates a stunning, natural foundation for your kitchen, and it is a choice you will love for years to come.
- Use light stone veneer panels.
- Focus on clean, professional corners.
- Stick to natural, earthy colors.
- Avoid fake or overly bright shades.
10. Turned Wood Legs
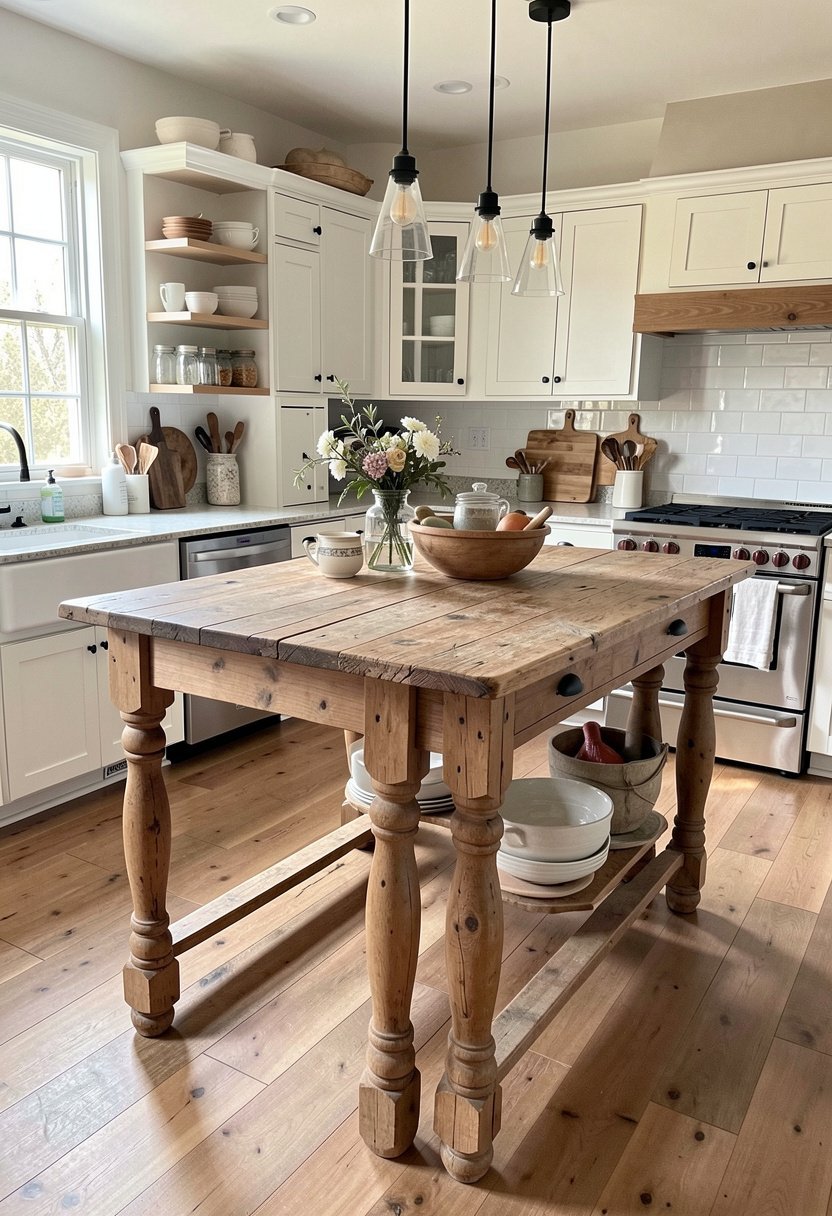
Adding beautiful, turned wood legs to your island changes the entire look instantly. It turns a boring box into a piece of fine furniture. I always look for legs with classic, simple details, nothing too fancy or modern. It grounds the island, gives it a traditional feel, and makes the kitchen look like a custom build.
Most people ignore the legs, but they are the jewelry of the kitchen island. Do not buy those thin, cheap legs that look like a toothpick. You want substantial, thick wood that looks like it can hold up a castle. If you paint the base a dark color, the wood grain of the legs will really stand out.
You can even add a bottom shelf between the legs for more storage. It makes the island feel more connected to the floor and adds extra space for your kitchen tools. I love this trick because it is simple, effective, and makes the island look much more expensive than it really is. It is pure design genius.
- Buy thick, substantial wood legs.
- Use classic, simple turned designs.
- Add a shelf between the legs.
- Avoid thin, weak looking table legs.
11. Copper or Brass Hardware
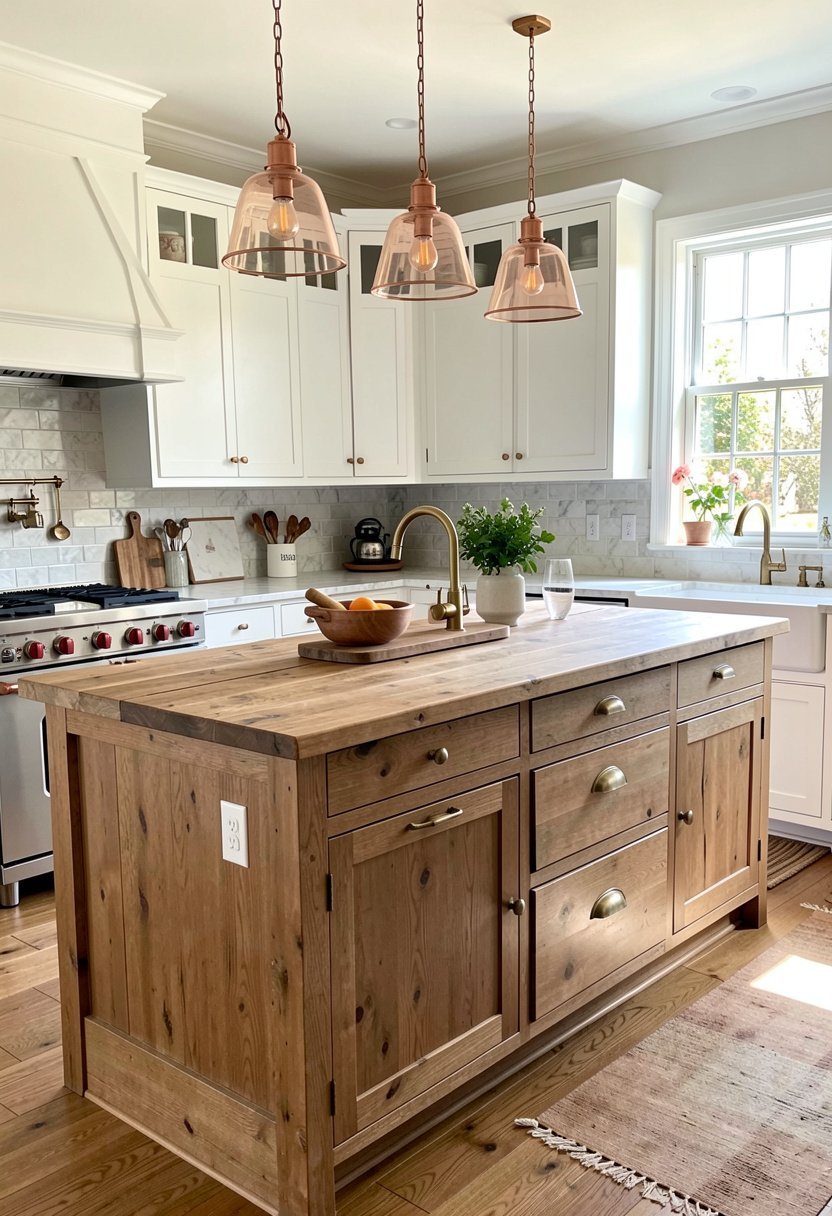
Adding some warm, glowing hardware to a rustic island changes the vibe from cold to cozy. I love using copper knobs, or brass pulls, on a dark wood base. It adds a bit of sparkle, reflects the light, and makes the kitchen feel really special. It is a small change, but it makes a massive difference in the room.
Do not use shiny, bright brass that looks like it belongs in a cheap hotel. You want an unlacquered or antique finish that will age with your kitchen. It will develop a patina over time, which looks better every single day. If you want a kitchen that looks like it was designed by a pro, this is a must-have detail.
Make sure your hardware is heavy and feels solid in your hand. If it feels light and hollow, skip it. You want something that will last a lifetime, because you do not want to replace it in two years. Go for quality, pick a warm metal tone, and watch how it lifts the whole room's energy to a new level.
- Select heavy, quality metal pulls.
- Pick unlacquered finishes for aging.
- Avoid cheap, bright, shiny brass.
- Use copper to add warm light.
12. Beadboard Paneling
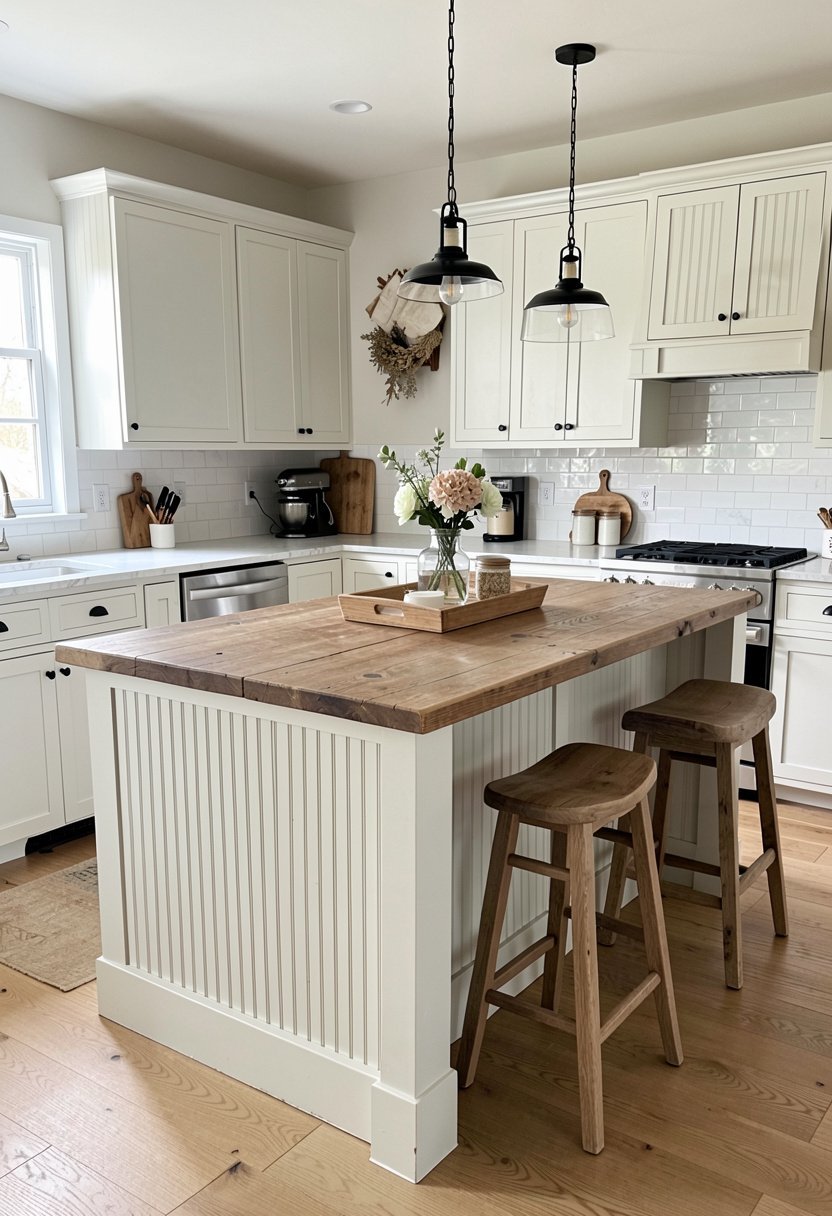
Beadboard is the classic way to get a farmhouse kitchen look without spending a fortune. I have covered many plain islands with it, and it always works. It adds rhythm, texture, and a sense of history to any kitchen. Most people paint it white, but I love it in soft sage or navy blue for a punch of color.
You need to make sure the beadboard is installed straight, or it will drive you crazy every time you look at it. Use a level, measure three times, and take your time with the cuts. It is a simple material, but the execution makes or breaks the result. If you rush, it will look like a cheap DIY project.
This is the perfect way to hide an ugly island base that is just too plain. It is thin, easy to paint, and creates a clean, vertical line that draws the eye upward. I have seen thousands of kitchens, and this remains one of my favorite, most reliable ways to add instant rustic charm to a home. You cannot go wrong here.
- Measure twice, then cut carefully.
- Use a level for straight lines.
- Try soft paint colors like sage.
- Avoid rushing the installation process.
Final Thoughts
I hope these ideas help you build the kitchen you have always dreamed of having. It does not have to be complicated, and it certainly does not have to cost a fortune to look great. Just pick one of these styles, commit to the vision, and watch your space transform into something truly special. Take it step by step, stay patient, and remember that you have got this.
| Idea | Material | Rustic Feel |
|---|---|---|
| Wood Panels | Reclaimed Pine | High |
| Worktable | Antique Oak | Very High |
| Brick Base | Kiln Tiles | High |
| Butcher Block | End-Grain | Medium |
| Metal Parts | Matte Iron | High |
| Paint Finish | Chalky Paint | Medium |
| Baskets | Seagrass | High |
| Open Shelves | Raw Wood | High |
| Stone Wrap | Veneer Stone | Very High |
| Turned Legs | Turned Wood | Medium |
| Hardware | Copper Pulls | Medium |
| Beadboard | Pine Board | Low |
| Counters | Butcher Block | High |
| Lighting | Metal Pendants | High |
| Stools | Wood Stools | Medium |
Frequently Asked Questions
Is It Hard to Install Stone Veneer On an Island?
It is not hard if you have the right tools and patience. You just need to prep the surface, use the right adhesive, and cut the tiles carefully. Take your time with the corners to get a clean look, or it will look messy. If you are not good with tools, hire a pro to do the job for you.
Can I Mix and Match These Rustic Ideas?
You should mix and match them to create your own unique look. A wood base with brass hardware looks great, and adding baskets to an island with turned legs works well too. Just keep the colors and materials similar so the whole thing feels like it belongs together. Do not add too much at once.
Are Open Shelves Under the Island Practical for Families?
They are practical if you use them for the right things. Keep your everyday plates, bowls, and pots there. If you have small kids, put the heavy stuff on the bottom and the breakables on top. It makes the kitchen feel more open and easier to use while you are cooking dinner.
Do I Need to Seal Reclaimed Wood for a Kitchen Island?
You must seal reclaimed wood if you want it to last. The kitchen is a wet, messy place, and raw wood will soak up spills and stains instantly. Use a clear, matte sealer that protects the wood without changing the color too much. It will keep the wood looking great for many years.
Can a Rustic Island Work in a Modern Home?
It actually works better in a modern home because it adds warmth and soul to a cold space. Just keep the lines of the island clean and simple to match the rest of your modern kitchen. It creates a beautiful balance that makes the room feel much more comfortable and inviting for everyone.
Does Beadboard Go Out of Style?
Beadboard is a classic that never really goes out of style. It has been used for centuries because it is simple, clean, and adds great texture to a room. You can update it anytime with a fresh coat of paint. If you pick a timeless color, it will always look fantastic in your home.
Should I Use Real Antique Furniture for an Island?
If you can find a sturdy, antique piece that fits, it is the best way to get a one of a kind look. Just ensure the frame is solid and the wood is not rotting. You might need to add a new top or reinforced legs to make it safe for daily use.
Will a Dark Butcher Block Show Scratches?
It will show scratches, but that is the beauty of butcher block. It looks better as it ages and shows the history of your cooking. If you hate scratches, you should choose stone, but you will lose the warmth of wood. I personally think a few scratches just add character to the home.