As an Amazon Associate, I earn from qualifying purchases at no extra cost to you.
11 Ikea Kitchen Island Ideas (That Fix It Fast)
 ByRayan

It is a tragedy to cook in a tiny, cramped kitchen, where you have nowhere to chop your onions, and your spices live in a pile on the floor. I remember when I had that problem, and it drove me absolutely wild every single night.
Most people just buy a fancy, expensive island, which ends up being too big or just looks wrong. They waste so much money on custom cabinets, that just gather dust, while the kitchen stays a total mess.
I found these 11 ikea kitchen island ideas, to save your sanity, and your wallet too. You will learn how to turn simple shelves, into a work station, that actually functions, and looks like a million bucks.
Use Two Kallax Units Back to Back
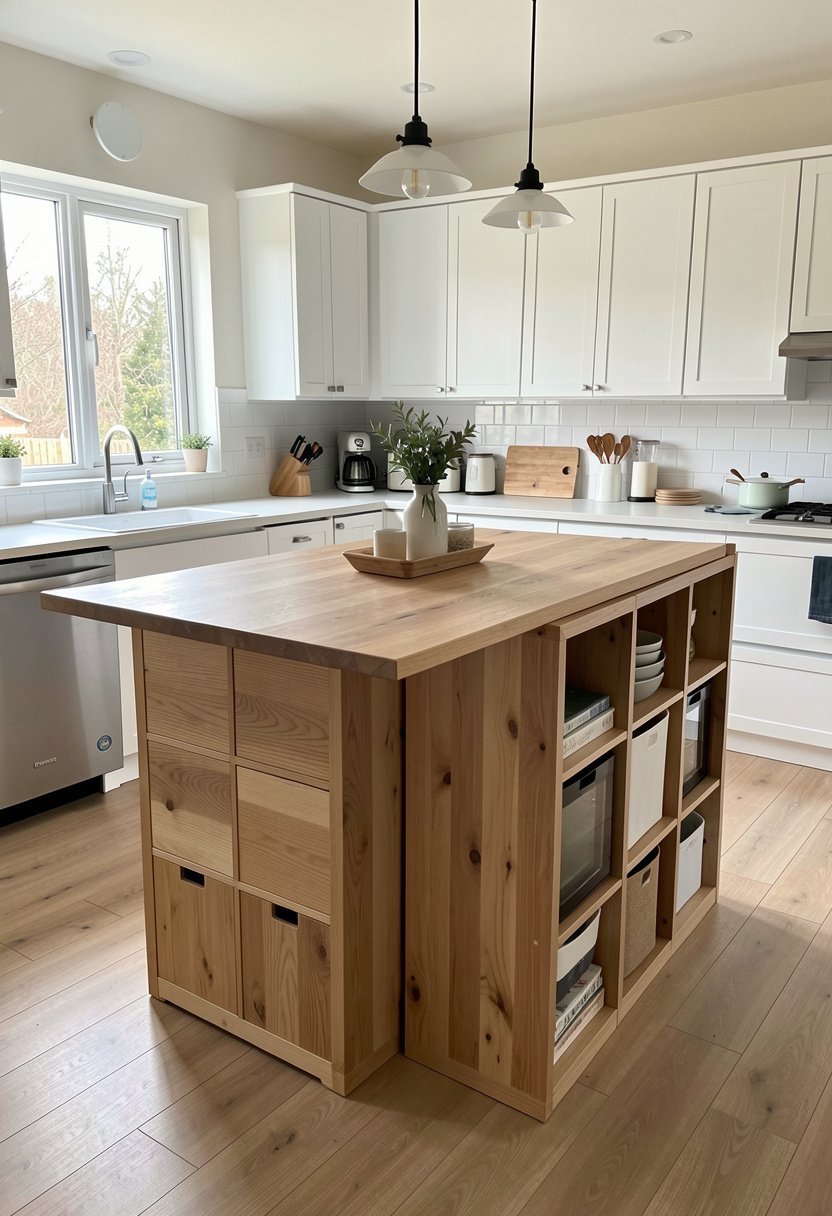
The Kallax is a classic for a reason, but using it as an island is a total game changer. You just push two of them together, and bolt them tight, so they do not wiggle. It gives you open storage on both sides, which makes grabbing plates, or pots, super fast, and easy.
I see people leave these plain, which is a mistake, because they look cheap without a proper top. You really need to add a heavy, wood butcher block, to hide the seams, and give yourself a solid surface for chopping. Do not use thin board, or it will warp, and ruin your hard work in a week.
This setup is perfect if you like to see your things, but hate clutter. Keep your daily dishware inside, or grab some nice bins, to hide the chaos. It is stable, smart, and cheap.
- Bolt two units together.
- Use a wood top.
- Hide wires inside cubes.
- Add nice sturdy bins.

Hack a Simple Bekvam Cart
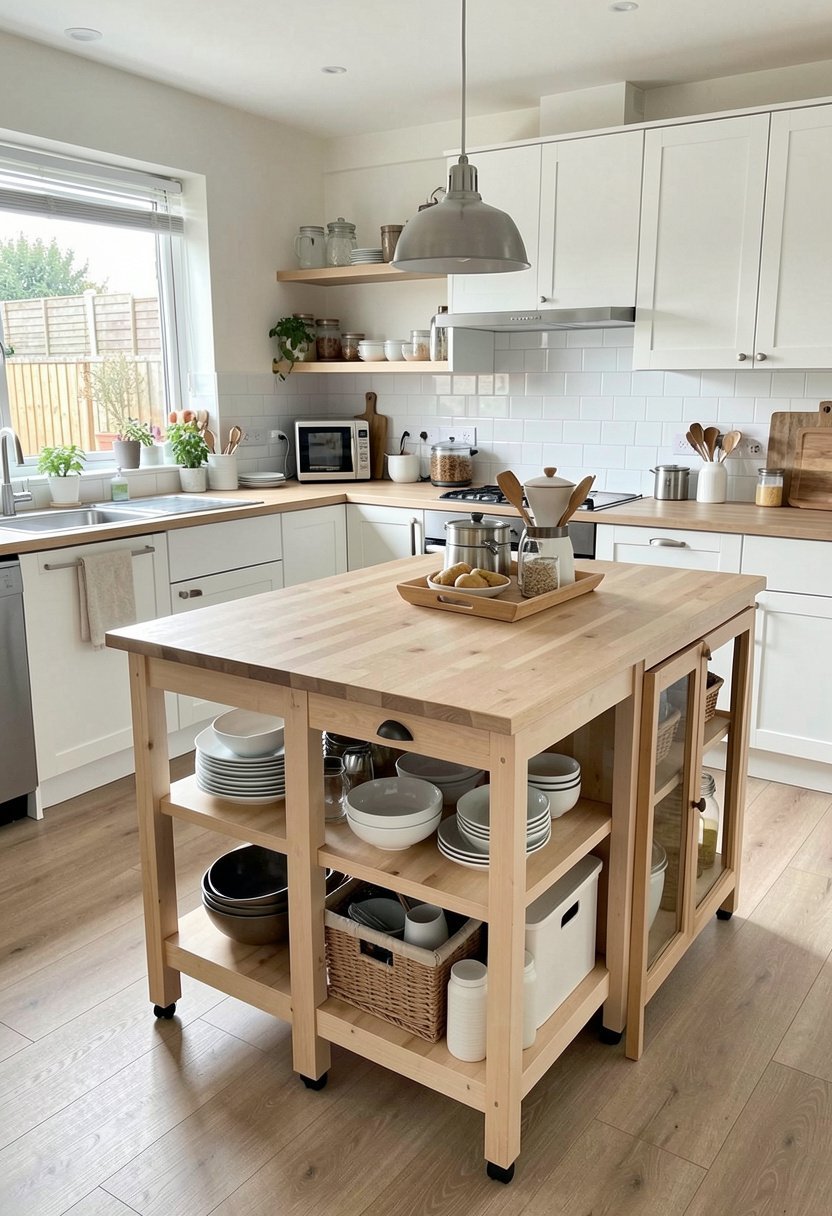
The Bekvam cart is tiny, but it has a big heart, if you know how to use it. Many folks ignore it, because it looks too small, but that is exactly why it works in a narrow, galley space. You can tuck it away when you are done, or keep it near the stove, for extra reach.
I painted mine a bold, deep navy blue, and swapped the hardware for brass pulls. The wood top takes a beating, so sand it down, and seal it well, every few months. Do not let the wood get dry, or it will stain the first time you spill red wine.
It is a workhorse, not a showpiece, but you can make it look classy, with a little paint. Use it to hold your cooking oils, or a tall plant, to add life to the room.
- Paint the wood frame.
- Swap out basic knobs.
- Seal the top often.
- Use it for prep.

Build a Waterfall Edge with Shelves
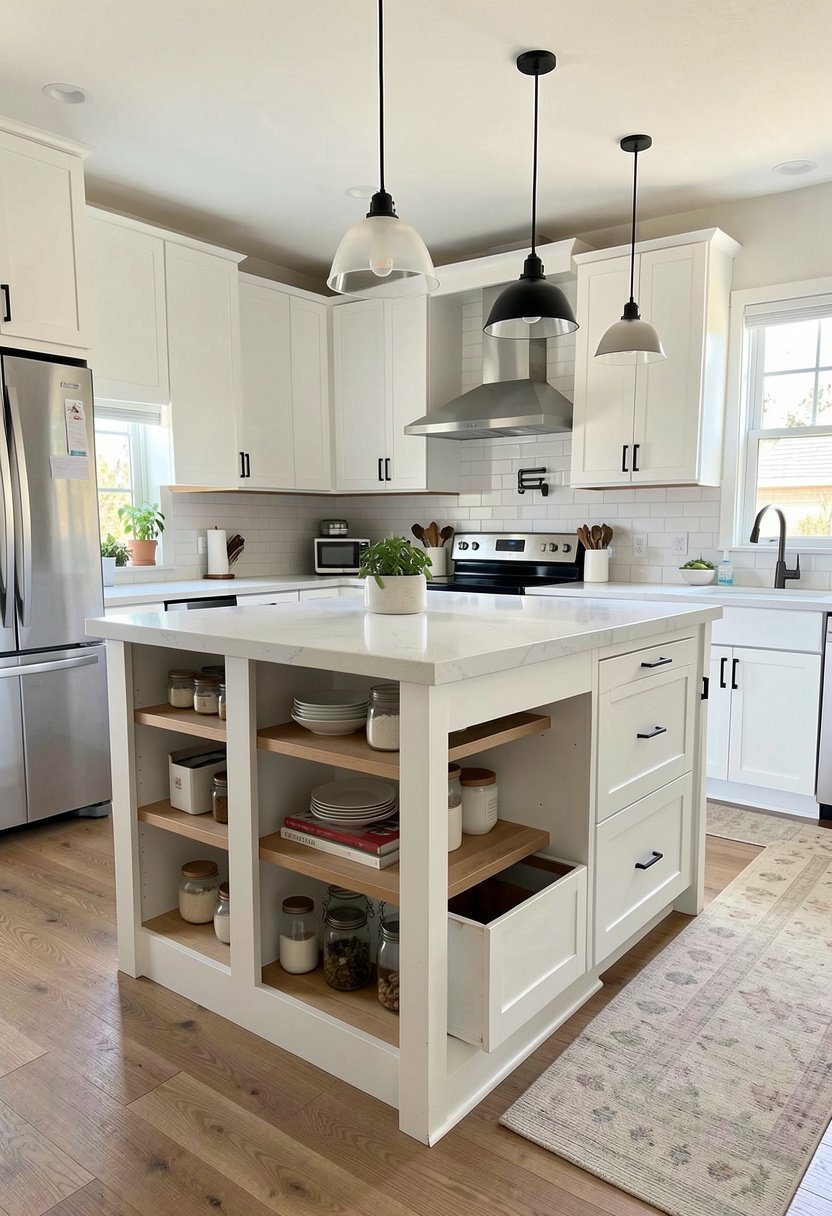
You can make a island look high end, by using shelves, to create a waterfall effect. This is a pro move, that hides the messy edges of your kitchen cabinets, and makes the whole thing look like one solid piece. It is fancy, but actually quite simple, if you measure twice.
Most people try to glue these on, which is a disaster, because the wood will shift. You must use sturdy brackets, or screws, to keep the panels locked in place. If it wobbles, it will look cheap, and drive you crazy, every time you lean on it for a chat.
Go for a clean, white finish, or a warm, light wood, to make the space feel bright. It changes the whole vibe, from a DIY project, to a custom kitchen design, in one afternoon.
- Measure every corner twice.
- Use thick side panels.
- Fasten the edges well.
- Keep the color light.

✅ See Also: 12 Diy Kitchen Island Ideas (That Actually Work)
Add Wheels for Total Control
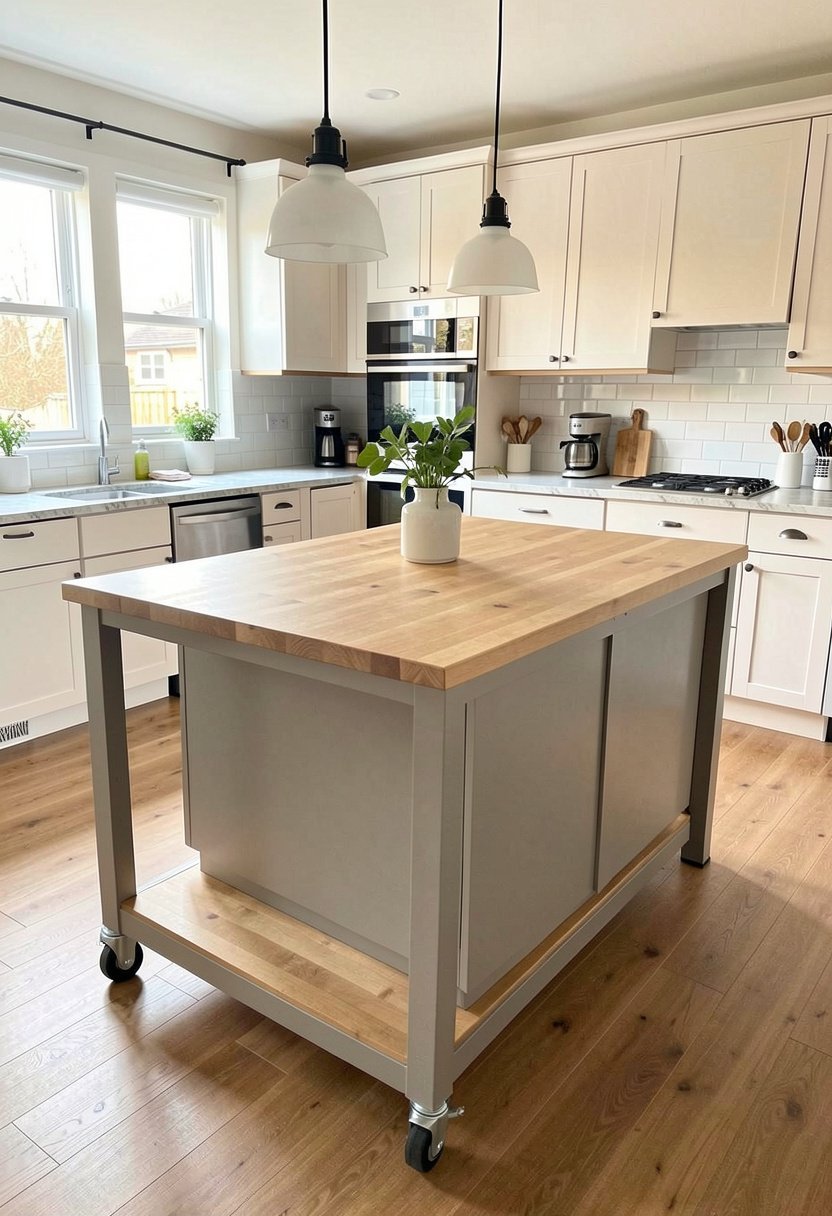
If your floor plan is a nightmare, you need an island that can move, and roll away. Adding heavy duty, locking casters to any unit is the smartest thing you can do. Most store bought islands stay stuck, but your island should go, wherever the cooking flow takes you.
I see people buy cheap plastic wheels, which snap under pressure, so please buy metal ones. You want to lock them tight, so the island does not slide, while you are trying to chop heavy veggies. It is not fun to chase your dinner, across the room, while holding a sharp knife.
It makes cleaning easy too, since you can just roll it away, to reach those dusty corners. This is the ultimate flexible layout hack, for any home chef, who likes to rearrange things.
- Pick metal locking casters.
- Check the floor height.
- Make sure it levels.
- Roll it with ease.

Frame the Base with Wood Trim
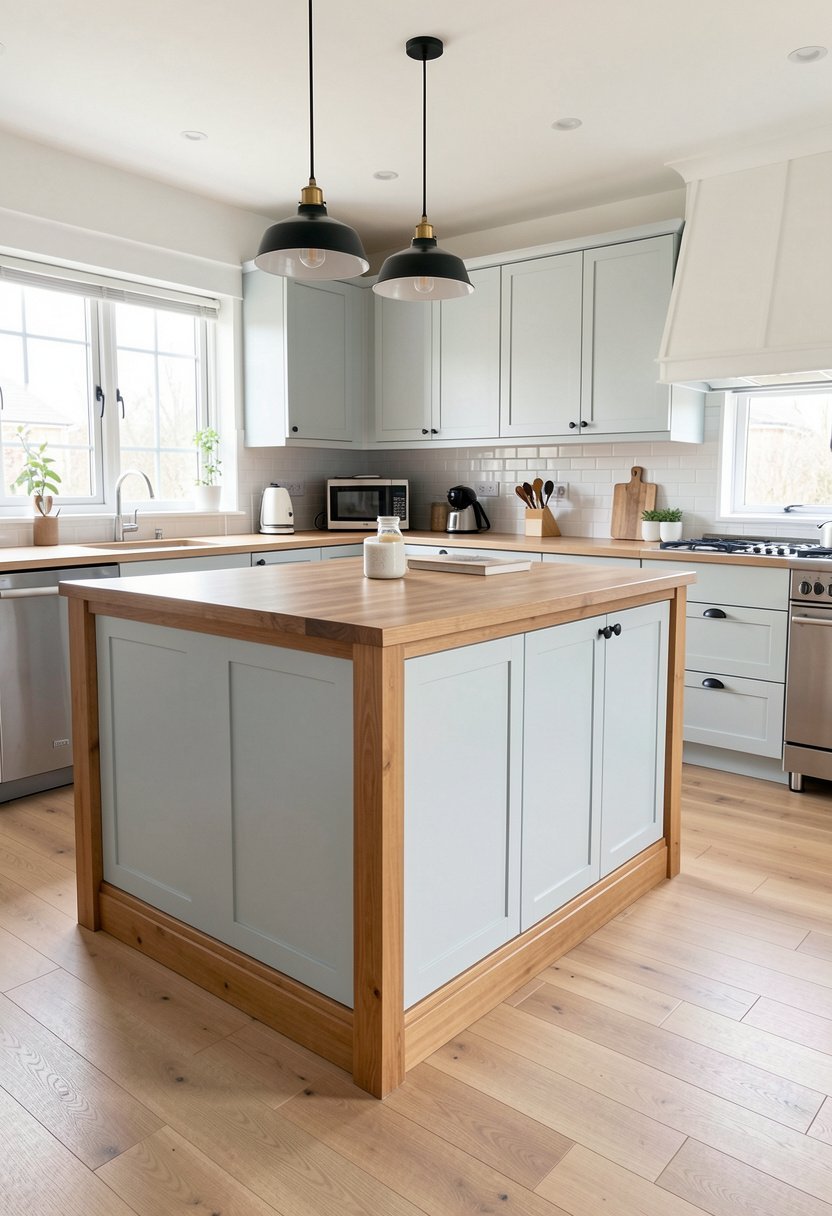
A plain unit looks like a box, but trim makes it look like furniture. Use simple, flat wood pieces, to frame the bottom, and top, of your island base. It hides the gap, between the floor and the cabinet, which keeps it from looking like a sad, floating block.
Don’t settle for plastic trim, because it looks like a toy, and peels off. Use real wood, paint it to match, or stain it, to add a bit of texture. This small detail tells people you actually care about home interior styling, and it elevates the room, in ways you would not expect.
Keep it simple, and clean, because busy trim will just collect grease. Your kitchen should be a place to work, not a place to dust, all day long.
- Choose clean wood strips.
- Paint to match perfectly.
- Use strong wood glue.
- Keep the trim simple.

✅ See Also: 14 Large Kitchen Island Ideas (Pros Swear By)
Put a Wine Rack in the Middle
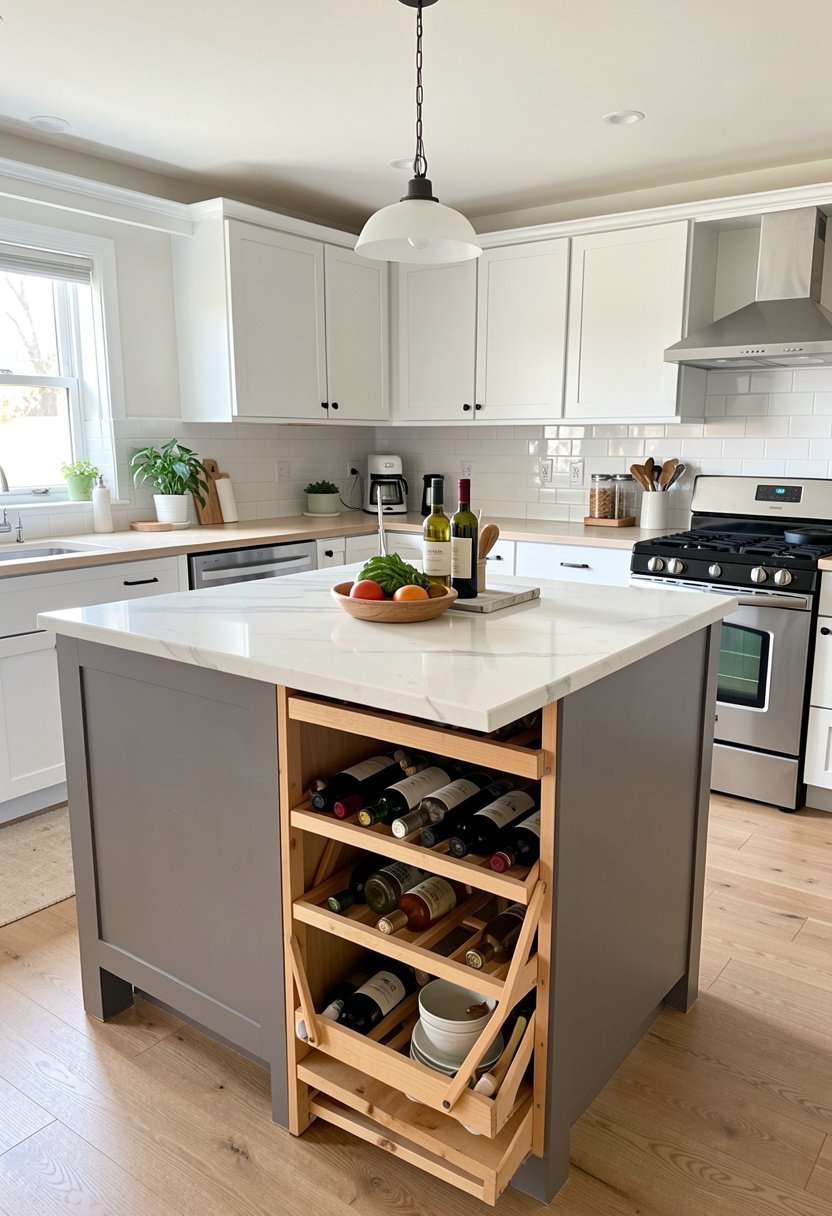
If you have a gap between cabinets, fill it with a wine rack insert. It looks intentional, and it keeps your bottles off the counter, where they just take up space. It is a classy way, to use dead air, and it looks like you spent a fortune, on a wine cellar display.
Do not put this too close to the oven, because heat kills wine, and that is a total waste of money. Keep it tucked in a cool, dark side, away from the steam. I love how it adds height, and visual weight, to a boring, flat island base.
It makes a great spot, for your favorite wine bottles, or even rolled up towels. It serves a purpose, looks great, and makes your kitchen feel like a wine bar.
- Check for heat sources.
- Keep the rack level.
- Use for wine storage.
- Add towels as backup.

Create a Breakfast Bar with Overhang
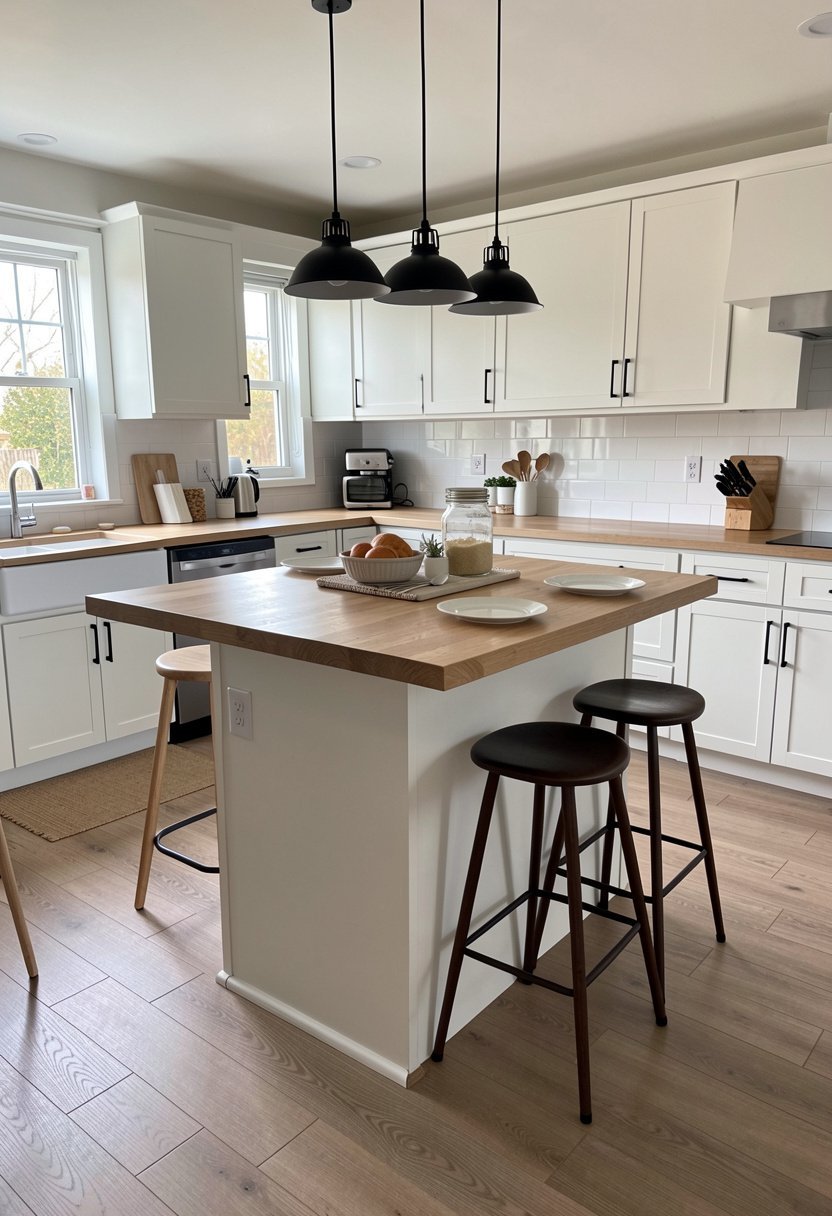
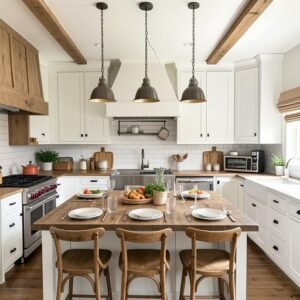
Everyone wants a place to sit, and chat, while the meal is being prepped. You can easily create this, by attaching a deep butcher block, that hangs over the edge. Use long, heavy duty metal brackets, to keep it from tipping, when someone leans on it.
A lot of folks forget about leg room, which is a mistake, because it makes sitting there painful. Make sure the top extends enough, so your knees do not hit the cabinets. If people are uncomfortable, they will not sit, and your breakfast nook ideas will just go to waste.
It creates a perfect spot, for morning coffee, or a glass of wine, while you cook. It is social, fun, and turns your kitchen, into the heart of the house.
- Extend top for knees.
- Use deep, sturdy brackets.
- Match stools for style.
- Keep the surface clean.

Mix and Match Drawer Colors
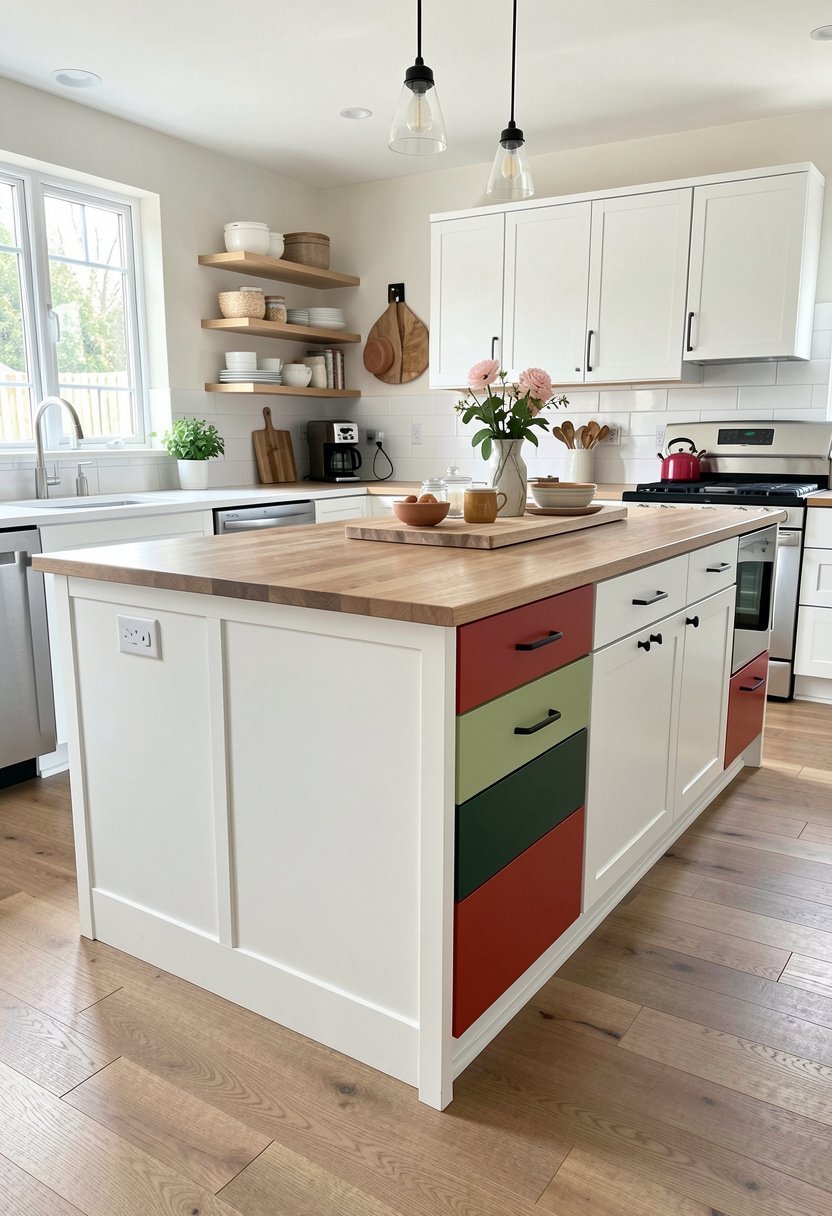
Do not be scared to use different colors, on the doors and drawers of your island. It adds personality, and breaks up the monotony, of a single color kitchen. I painted my island doors, a deep sage green, while the rest stayed white, and it looks amazing.
Most people play it too safe, with all white or gray, which makes the room feel cold. Use a color that makes you happy, like a soft blue, or even black. It is just paint, so if you hate it later, you can always change it, with a quick coat.
It makes your island a focal point, rather than a background piece. Use stylish cabinet hardware, in gold or brass, to tie the whole colorful look together, with style.
- Use bold paint colors.
- Contrast with the room.
- Add brass modern pulls.
- Keep the finish smooth.

Install a Towel Bar On the Side
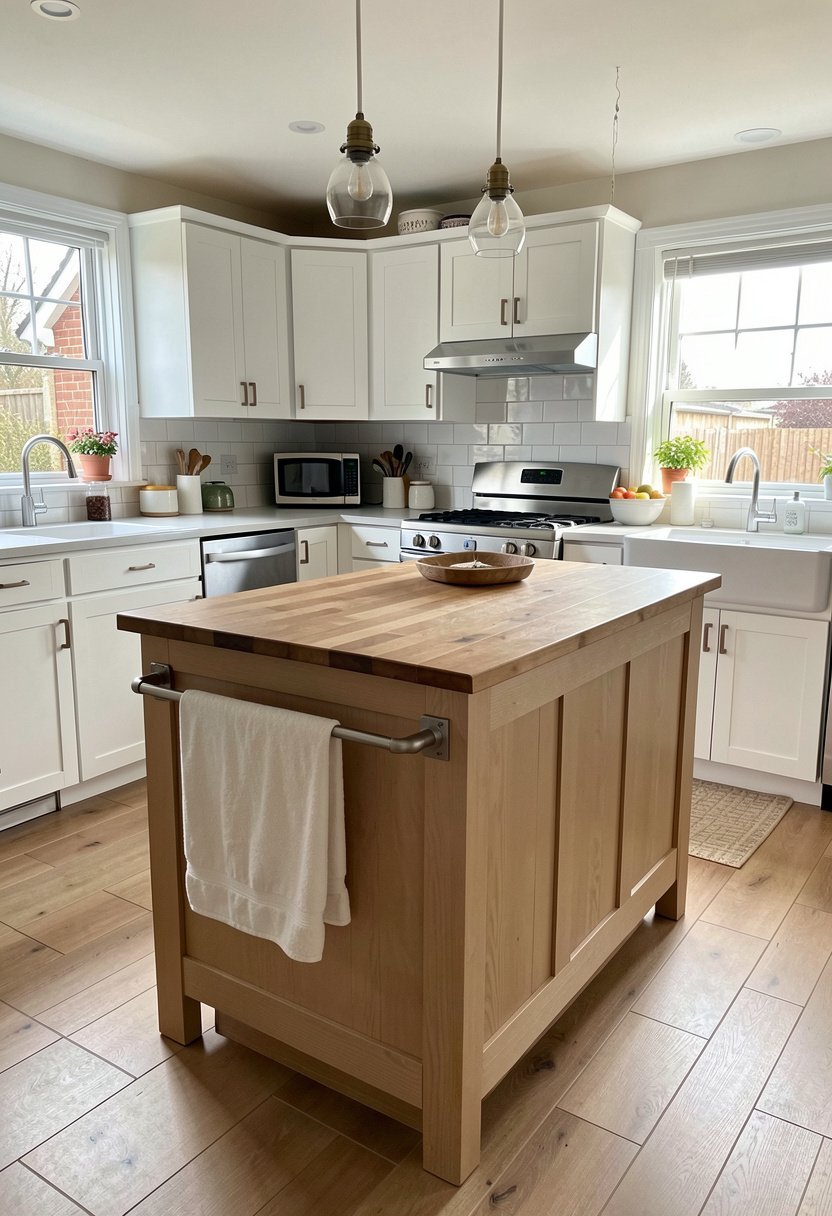
This is the cheapest, and most useful, upgrade you can make. Just screw a sturdy bar onto the end of your island, to hold your dish towels. It keeps them dry, easy to find, and stops them from sitting, in a wet, gross pile on the counter.
Don’t use those sticky hooks, because they fall off, the second you grab a towel. Use real screws, into the side panel, for a permanent fix. It is a tiny, tiny detail, but it makes a huge difference, in how your kitchen workspace functions, on a busy Tuesday night.
I like to use a black, or matte metal bar, to contrast against a light island. It looks sharp, keeps things tidy, and saves your counter space for, you know, actual food.
- Bolt the bar down.
- Pick a sturdy finish.
- Place it within reach.
- Keep towels folded nicely.

Add Lighting Under the Counter
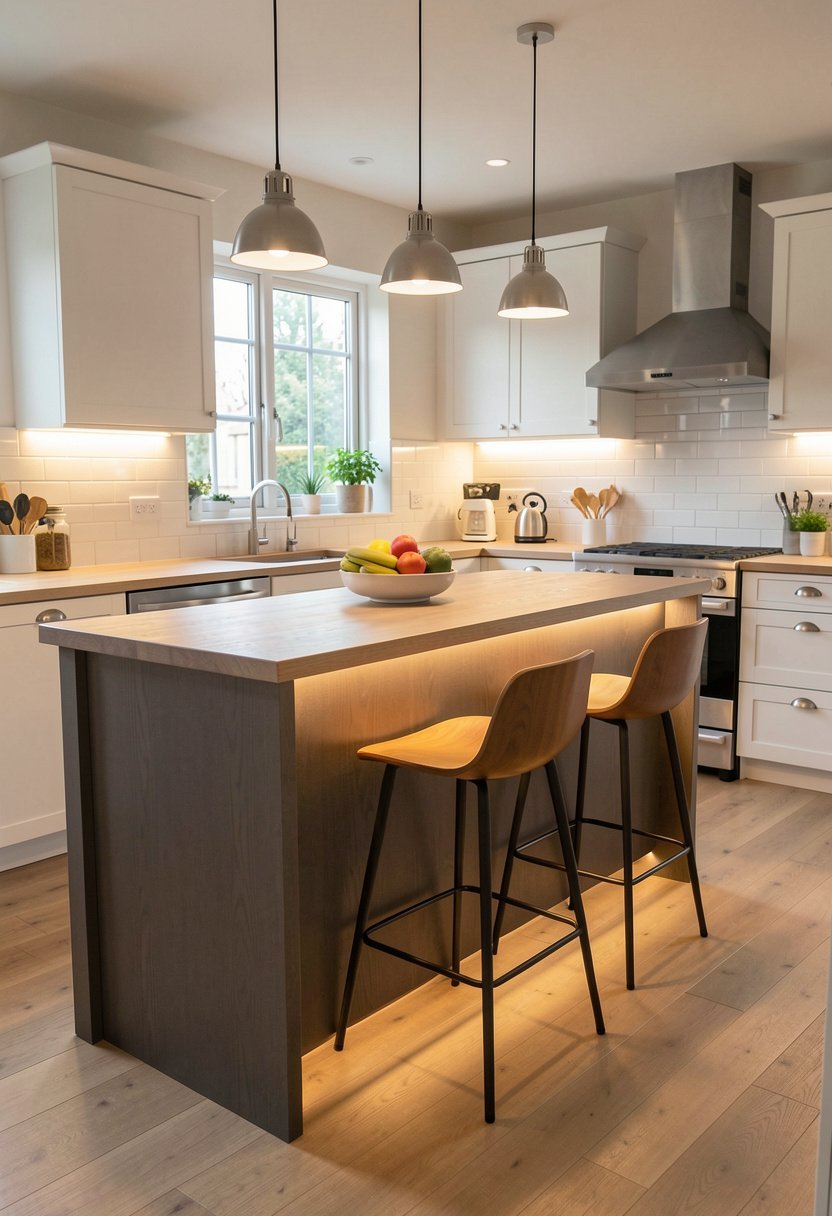
Lighting makes everything look expensive, even a simple ikea island. Use battery, or corded led strips, under the overhang, for a soft glow. It looks incredible at night, and it creates a mood, that bright overhead lights just cannot match, in any space.
Most people put these in the wrong spot, where you can see the ugly tape. Hide them behind a piece of wood trim, so you only see the light, not the gear. It is a clever decor trick, that makes the island look like it is floating, which is pretty cool.
Use a warm light, not a clinical white one, or it will look like a hospital room. Keep it soft, and inviting, for those late night snacks.
- Use warm led strips.
- Hide them behind trim.
- Check for battery life.
- Keep the light soft.

Hang a Pot Rack Above It
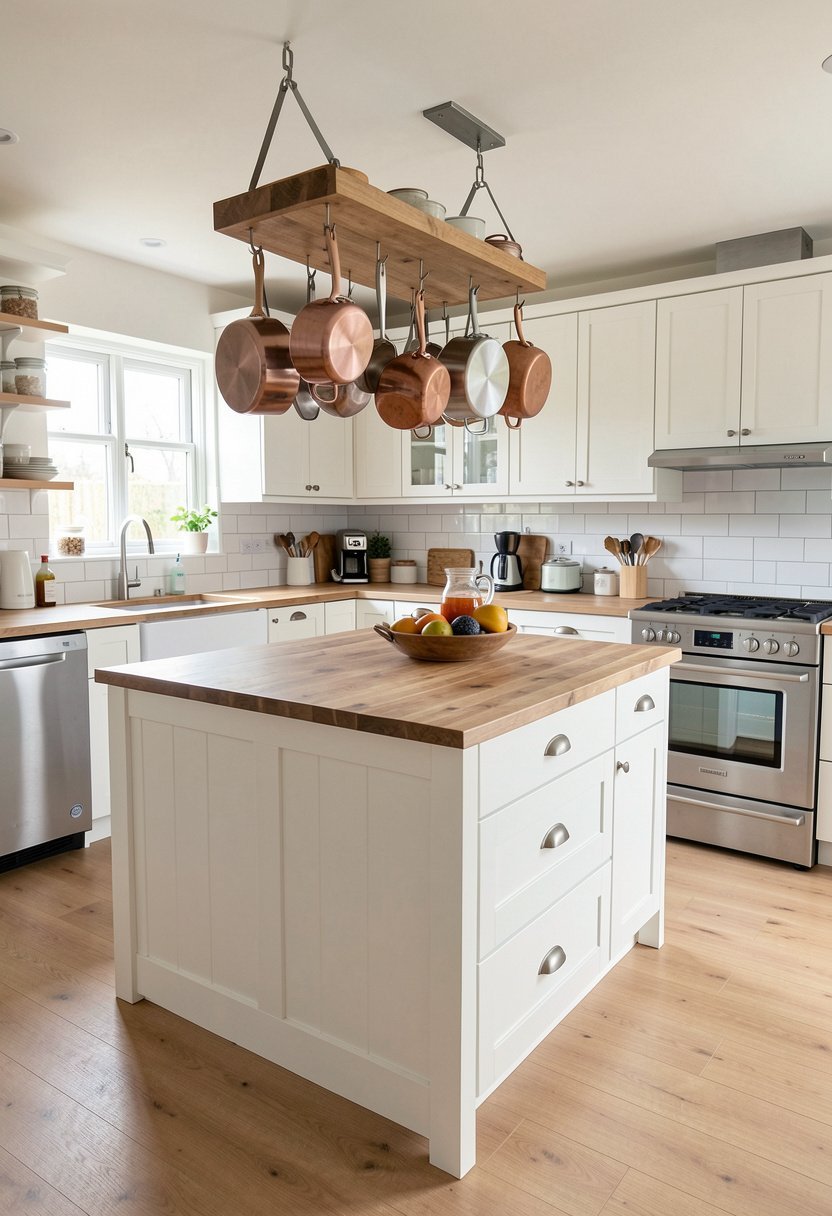
If your island feels small, use the ceiling, to gain more storage. Install a hanging pot rack, right above the island, to keep your heavy pans ready to use. It opens up your cabinets, and it looks like a professional chef works here, which is always a fun vibe.
Make sure it is anchored into the joists, not just the drywall, or it will fall. A rack full of pans is heavy, so please do not take chances, with loose screws. It should hang at a height, where you can reach, but where it does not, block your view.
It is a great way to display your copper cookware, and it adds a lot of character. Just keep your pans clean, because everyone will see them, whenever they walk into the room.
- Anchor into the studs.
- Hang at good height.
- Show off clean pans.
- Clear up cabinet space.

Final Thoughts
I hope you see now, that you do not need a massive budget, to get a great kitchen. A little paint, some sturdy screws, and a plan, can change your home for good. Stop waiting for the perfect moment, and just start building your space today. You have all the tools, you have the vision, and you have got this.
| Project Item | Cost Level | Time Needed |
|---|---|---|
| Kallax Hack | Low | 2 Hours |
| Bekvam Paint | Low | 1 Hour |
| Waterfall Side | Medium | 4 Hours |
| Add Casters | Low | 30 Mins |
| Wood Trim | Low | 1 Hour |
| Wine Rack | Medium | 2 Hours |
| Breakfast Bar | Medium | 3 Hours |
| Color Mix | Low | 3 Hours |
| Towel Bar | Low | 15 Mins |
| LED Lights | Low | 30 Mins |
| Pot Rack | Medium | 2 Hours |
| Custom Top | High | 4 Hours |
| Stool Selection | Medium | 1 Hour |
| Hardware Swap | Low | 30 Mins |
| Cabinet Prep | Low | 2 Hours |
Frequently Asked Questions
Is an Ikea Island Safe to Use As a Prep Area?
Yes, but you must secure the base to the floor, or add heavy weights inside. It is perfectly safe if you follow these rules. Do not lean heavily on the corners, unless the unit is bolted down tight. Always seal your wood top to keep it clean.
Can I Paint an Ikea Island Myself?
You absolutely can, and you should. Use a good primer, specifically for laminate, or the paint will just chip off in a week. Sand the surface lightly first, to give the primer something to grab. Use a foam roller for a smooth, clean finish, every single time.
Are These 11 Ikea Kitchen Island Ideas Expensive?
Most of these are very cheap, and use things you might already own. The most expensive part is usually the butcher block top, or the custom hardware. You can save money by scouting for deals, or buying pre-cut wood, from a big box store, to keep costs down.
Do I Need Power Tools for These Projects?
You will need a drill, and a screwdriver, for almost all of these. A saw helps if you need to cut wood, but you can have the store cut it for you. Do not try to build a sturdy island, with just tape, or glue, because it will just fall apart.
Should I Put a Sink in My Island?
No, that is a huge plumbing nightmare, and usually costs way more than it is worth. Stick to storage, and prep space, to keep your life easy. If you want a sink, hire a pro, because doing it wrong, will just flood your house, and cause big damage.
Will an Island Fit in My Small Kitchen?
Yes, if you choose a small, rolling cart, or a narrow unit. Measure your space, and leave enough room to walk, all the way around. If you cannot fit a chair, do not force one. Stick to a slim island, that keeps the flow, open and easy to move.
Can I Use a Regular Desk As a Kitchen Island?
You can, but replace the top, with something food safe. Desks are not meant for kitchen grease, or water, so protect the wood well. Check the height, because a desk is lower than a counter, which can hurt your back, if you prep on it, for too long.
Does an Island Need to Be Permanent?
Not at all. Adding wheels is the best way, to keep your space flexible. You can roll it out when you have friends over, or push it away, when you need more room to dance. A portable island is often way more useful, than a stuck, fixed unit.