As an Amazon Associate, I earn from qualifying purchases at no extra cost to you.
10 Mobile Home Kitchen Cabinet Ideas (Popular This Season)
 ByRayan

Many people think mobile home kitchens are just stuck in the past, forever doomed to look cheap. I have lived in these homes, and I have seen enough beige to last a lifetime. You do not have to settle for that flat, sad wood look.
The problem is most folks assume they have to rip everything out to make it look good. That is a total lie, and it is a waste of your hard-earned money. Most builders choose cabinets that are tiny, thin, and just plain depressing.
You will learn how to make your space feel huge, modern, and personal today. These 10 mobile home kitchen cabinet ideas will change your life, or at least your mood. Let us stop apologizing for our cozy kitchens and start making them look like a million bucks right now.
Remove the Doors for Open Shelving
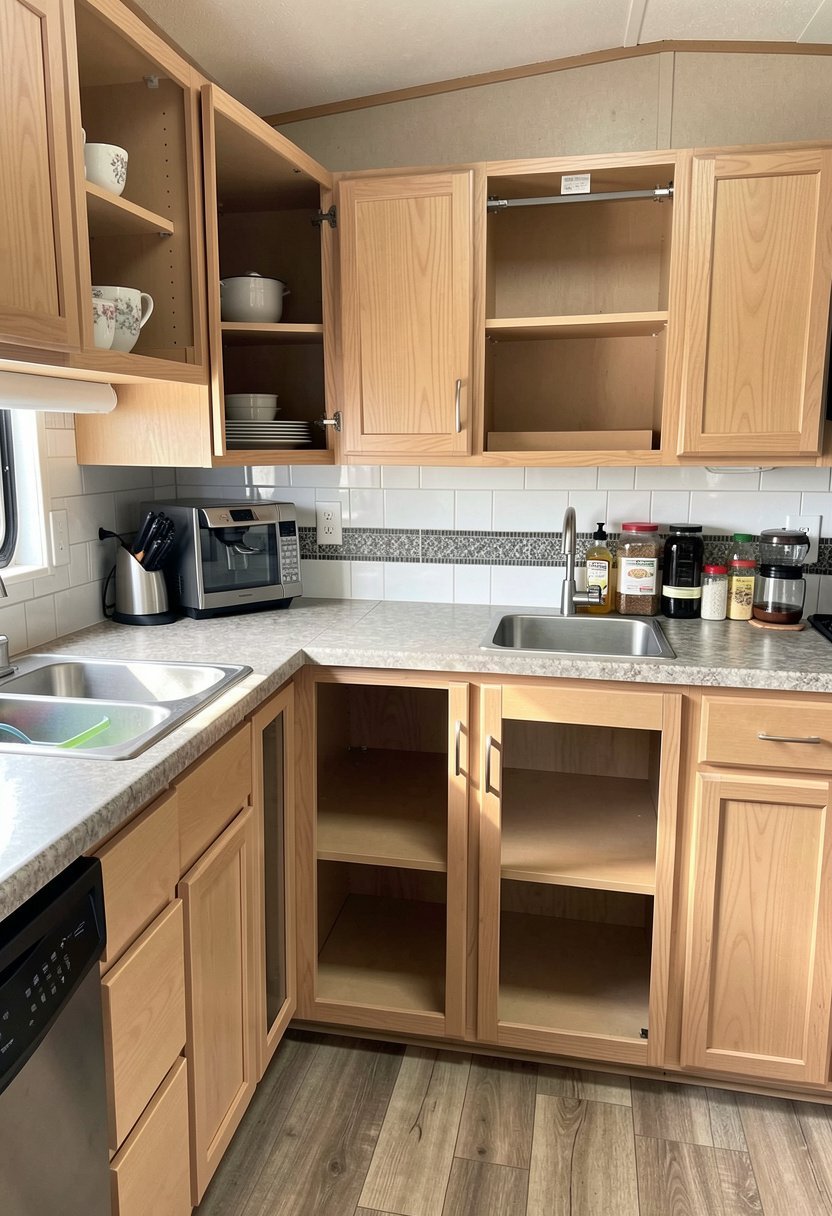
Taking the doors off your cabinets is the fastest way to change your kitchen vibe. People keep their old, fake wood doors on because they think it looks clean, but it actually makes a small room feel like a claustrophobic box. Just grab a screwdriver, take those hinges off, and store the doors in the garage. Once the doors are gone, you instantly gain more visual space. It is a bold move, but it pays off.
Painting the inside of those cabinets a bright white or a soft grey makes the wood look expensive, not cheap. Stack your pretty plates and cups there, and suddenly your kitchen looks like a cool cafe. Do not crowd the shelves with junk, though. Keep it simple, or you will regret the mess. It is about showing off your style, not proving how many mugs you can fit in one spot.
If you hate seeing your stuff, skip this idea, but for the rest of us, it is a game changer. You will wonder why you waited so long to see your dinner plates. It makes the kitchen feel open, airy, and much larger than it really is. Just keep those shelves clean, and you are good to go. This is the cheapest way to refresh your room, and it looks surprisingly high-end when done right.
- Remove cabinet doors to expand your visual space.
- Paint the inner cabinet back for a clean look.
- Group your items by color to stay organized.
- Only display things that actually look pretty.

Paint Everything a Crisp White
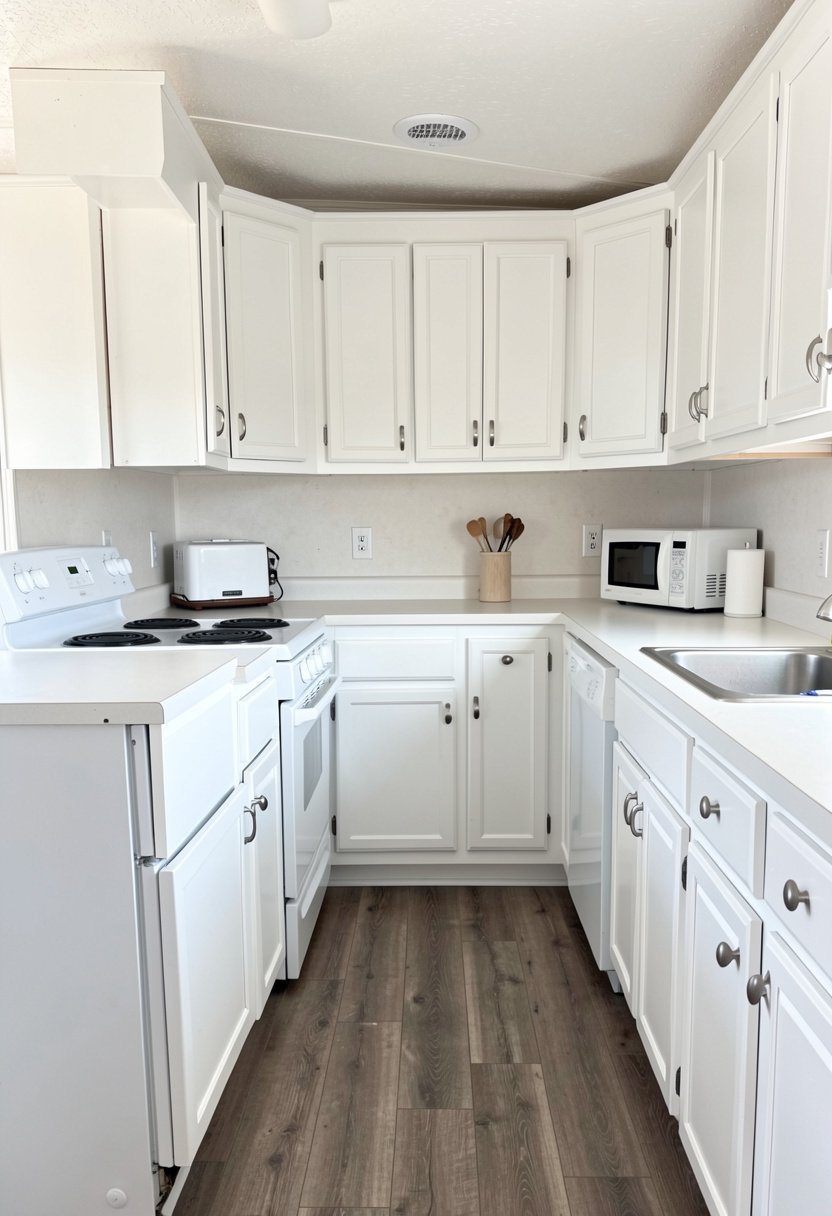
Painting is my favorite way to fix a kitchen, and white is the king of colors. Most mobile homes have dark, fake wood grain that sucks up all the light in the room. It feels like a cave, which is just bad for your soul. Slapping on a thick coat of white paint makes the room feel like it grew five feet overnight. It is like turning on a light bulb inside your cabinets.
You must use a good primer first, or the paint will peel off in a month. People try to skip this step, and then they wonder why their kitchen looks like a peeling mess. Do not be that person. Use a high-quality primer, wait for it to dry, and then use a tough cabinet paint that can handle daily spills. It takes a few days of hard work, but the payoff is totally worth the effort.
Avoid bright, hospital white if your kitchen does not have much natural light. Go for a cream or a soft off-white to keep things cozy. You want your kitchen to feel inviting, not like a lab. If you are worried about dirt, remember that high-quality paint is easy to wipe down. This is the best way to get a modern look on a tiny budget, so just do it.
- Use a strong primer to prevent future peeling.
- Choose a soft off-white to avoid sterile vibes.
- Select paint meant for cabinets, not wall paint.
- Clean surfaces well before you start the brush.

Add Sleek Modern Hardware
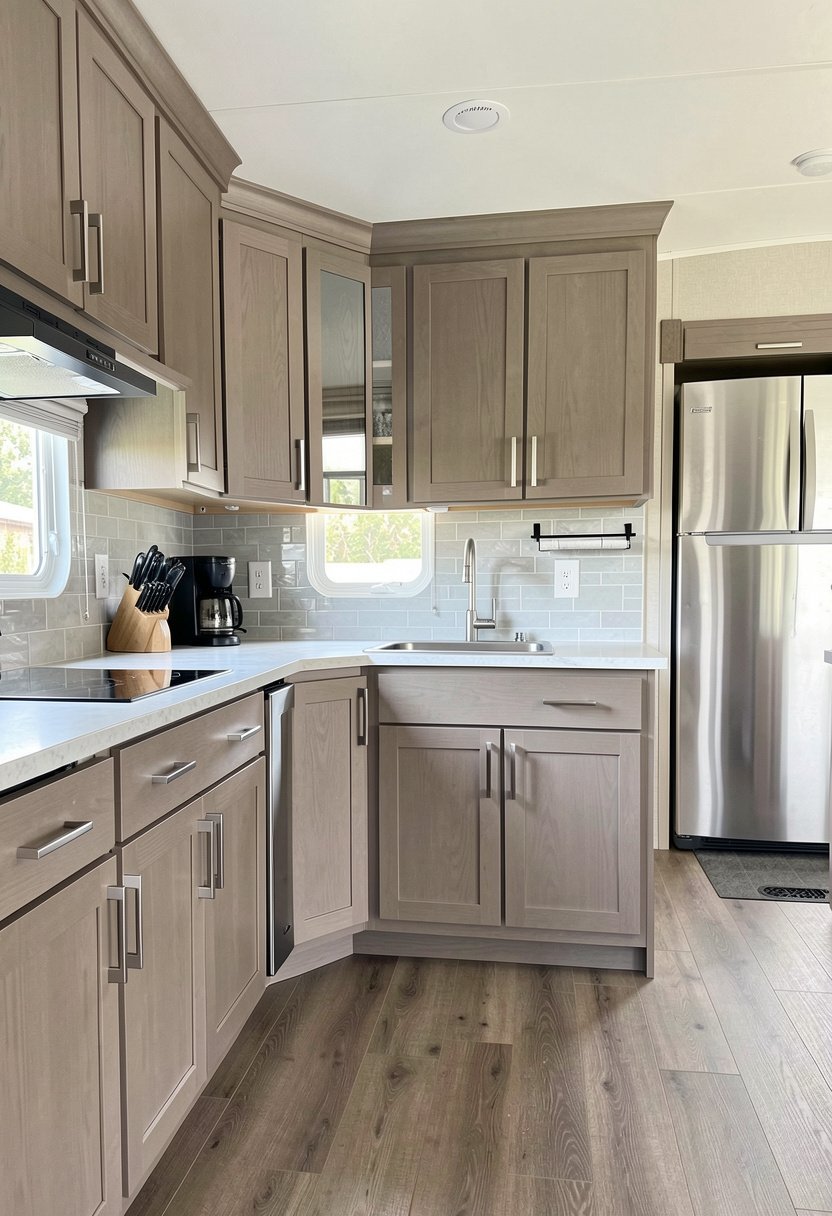
Most mobile home hardware is plastic, cheap, or just plain ugly. Replacing those tiny, dated knobs with something heavy and modern is like giving your kitchen a new suit. I suggest brushed gold or matte black handles to make everything pop. It sounds like such a small, silly thing, but it changes how the whole kitchen feels when you touch the doors every day. It makes a big difference.
You have to measure the distance between the holes carefully before you buy new ones. If you mess that up, you will have extra holes to fill, and that is a headache you do not need. Grab a simple tool at the store that helps you align the holes perfectly. It saves so much frustration, and it keeps your cabinets looking professional. Do not try to eyeball it, or your kitchen will look crooked.
Go for long, thin pulls instead of small knobs if you want a modern look. They make the cabinets look taller, and they are easier to grab when your hands are full. Avoid shiny chrome if you do not want to see every single fingerprint on them. Matte finishes are my secret weapon, and they hide mistakes much better than anything else. Your kitchen will look custom built in an afternoon.
- Buy handles that fit your existing hole spacing.
- Use a drill template to keep everything level.
- Pick matte finishes to hide all the fingerprints.
- Longer pulls make your small cabinets look taller.

Install Under Cabinet Lighting
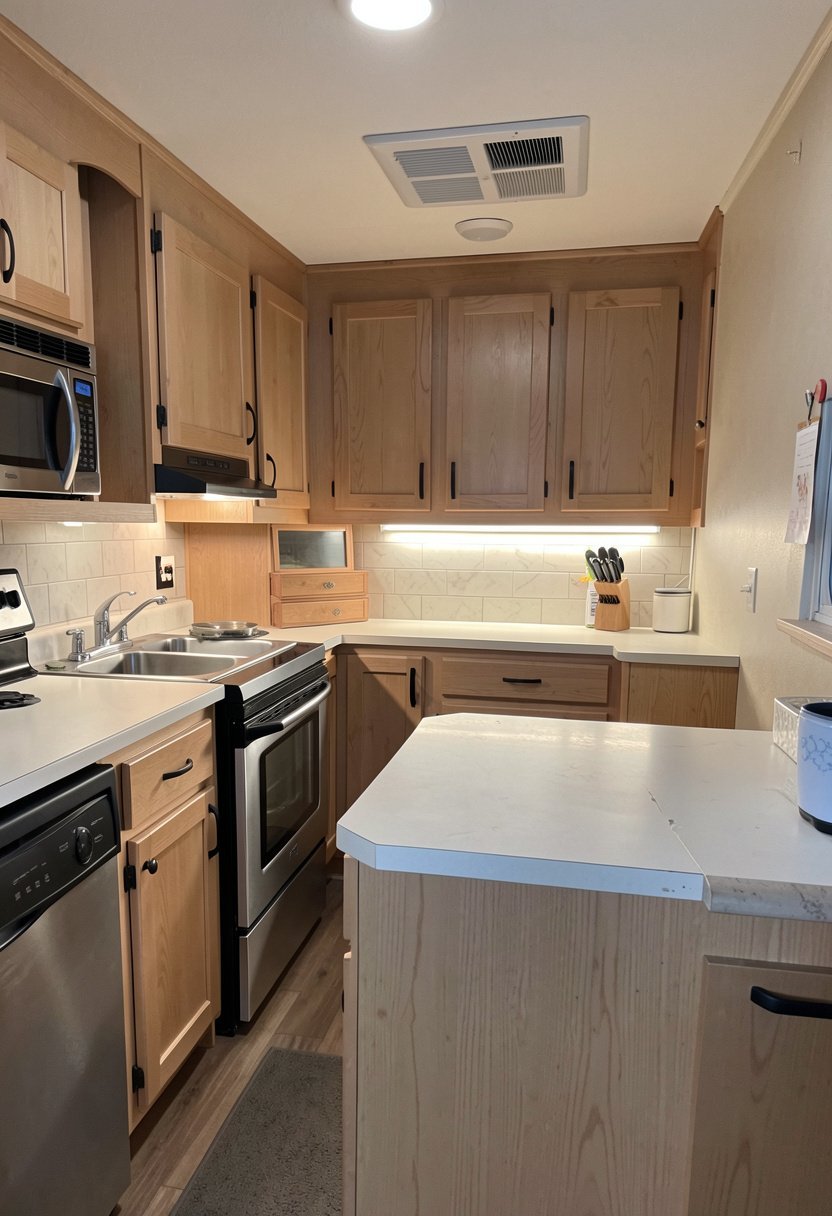
Dark shadows under your cabinets make cooking feel like a chore. People settle for one big light in the middle of the ceiling, but that is a mistake. Installing simple light strips under your cabinets is an easy way to brighten your workspace. It makes the counters look nice, and it adds a warm glow to the whole room. You can find cheap kits that stick right on with tape.
Make sure you hide the wires behind the front edge of the cabinet frame. Nothing ruins a nice look faster than messy wires hanging down for everyone to see. I like the ones that have a remote or a sensor. It feels fancy, but it costs almost nothing. You will never want to cook without that extra light once you get used to it. It really changes the entire atmosphere.
Check if you have an outlet nearby before you buy the lights. Most kits plug right into the wall, but some are battery operated if you hate wires. I suggest the plug-in ones, because batteries die when you need them most. It is such a small change, but your kitchen will look like it came out of a home magazine. If you ignore this tip, you are missing out on serious charm.
- Stick the lights behind the front cabinet lip.
- Hide all loose wires for a polished look.
- Use motion sensors so they turn on easily.
- Choose warm white bulbs for a cozy feel.

Apply Peel and Stick Wallpaper
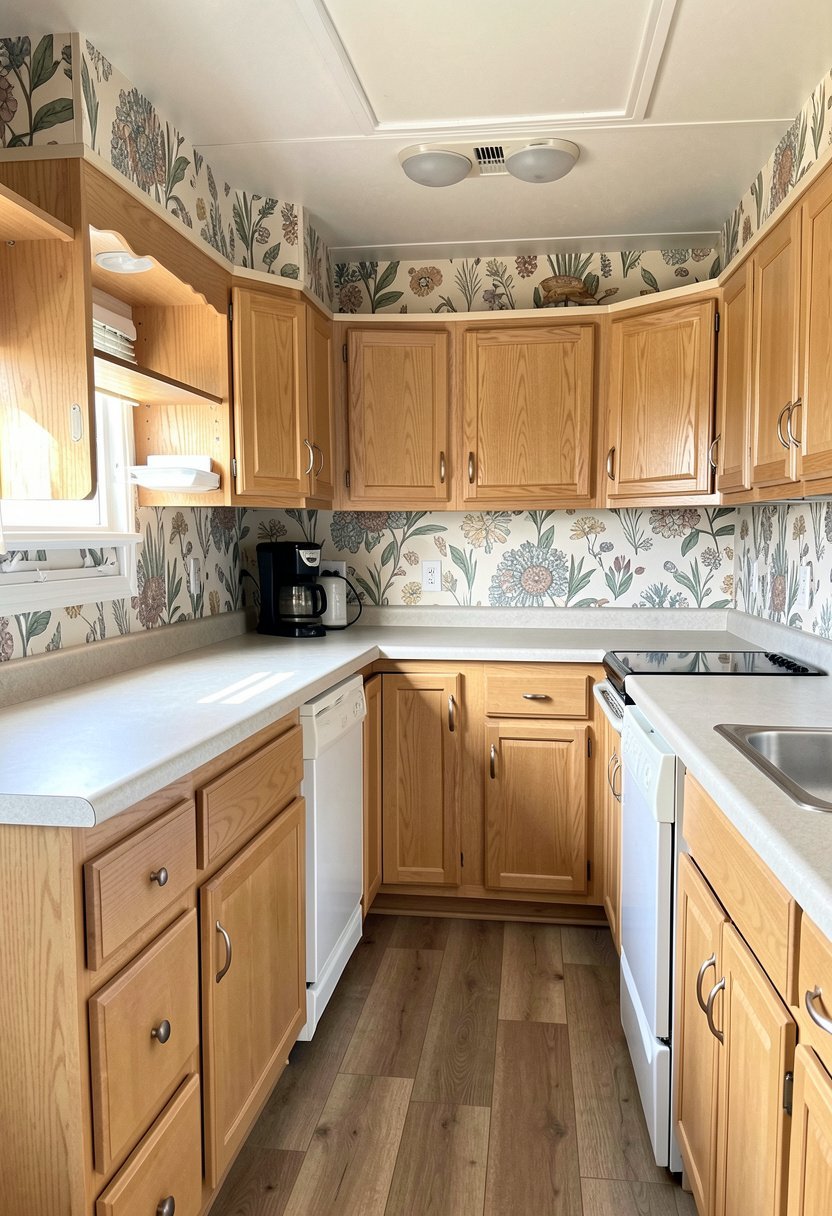
Adding a pattern inside your cabinets is a fun way to show your personality. Peel and stick wallpaper is a dream because you can take it down if you get tired of it. I love putting a bold, floral, or geometric pattern on the back wall of the cabinet. It turns your plates into art. People walk into my kitchen and always ask where I got such expensive custom cabinets. It is my little secret.
Clean the back surface perfectly before you stick the paper on. If there is grease or dust, the paper will fall off after a week, and you will be annoyed. Use a credit card to smooth out any air bubbles as you go. Take your time, and do not rush it. It is much easier than painting a design, and you can change it up whenever you feel like a new look.
If you have open shelves, this is a must-do project. It ties the whole room together, and it looks intentional. Just do not use something too busy, or it will distract from your dishes. Stick to colors that match your floor or your paint. This is a great way to add life to a dull kitchen without needing to spend a ton of cash. You will love the result.
- Wipe the back surface clean with soap first.
- Use a card to push out all trapped air.
- Pick a pattern that matches your room colors.
- Swap the paper whenever you want a change.

Update the Cabinet Doors Completely
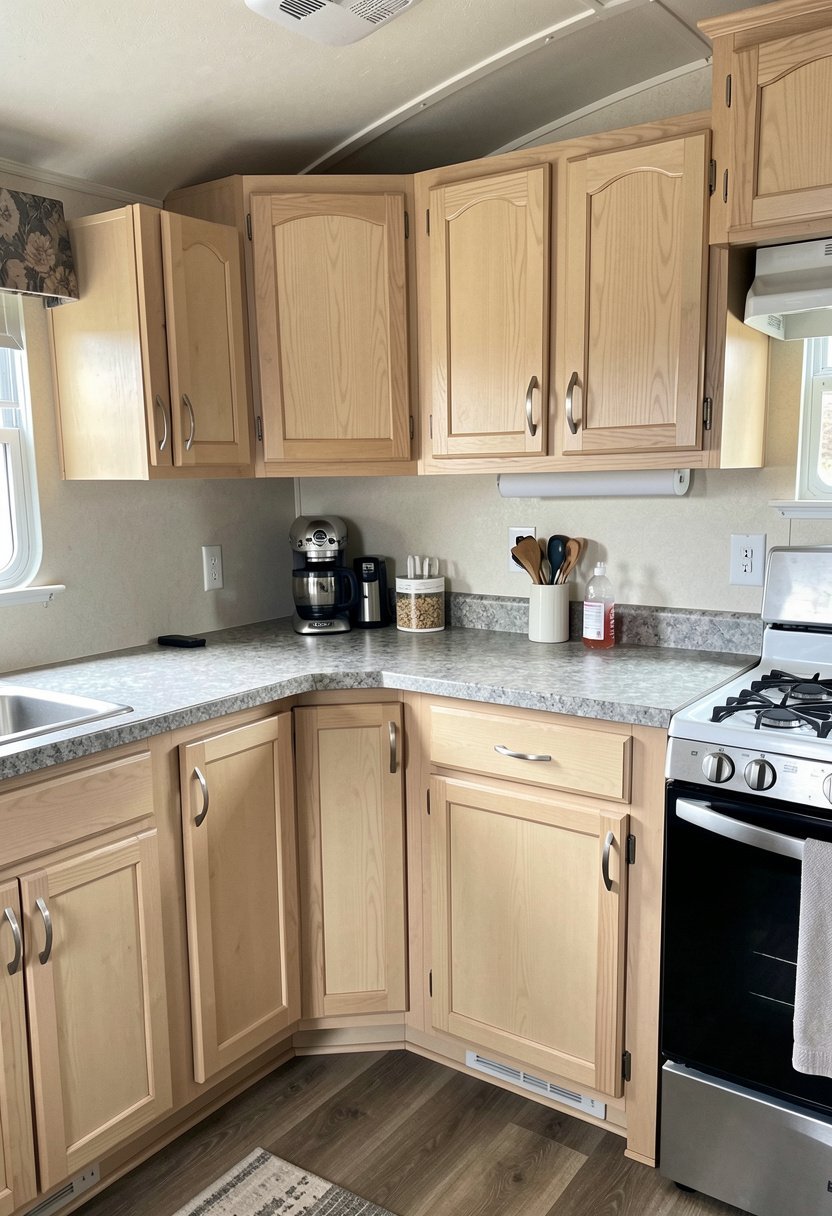
If your doors are falling apart or just plain ugly, replacing them is the way to go. You do not need to buy new cabinets. You can just order new doors that fit your existing boxes perfectly. It saves you so much money compared to a full remodel. Just make sure you measure every door twice. If you get the numbers wrong, you are stuck with a pile of useless wood.
Choose a simple Shaker style if you want a classic, clean look. Avoid doors with too many bumps or designs, because they just collect dust and look dated. Plain, flat panels are usually cheaper, too. You can get them unfinished and paint them whatever color you want, or get them factory finished for a faster job. It is a big project, but it makes your kitchen look brand new.
Once the new doors are on, the whole room will feel solid and modern. You can get new hinges that close softly so they do not bang. That little sound of a quiet door makes the whole kitchen feel premium. It is a small detail, but it is one I love. Save your energy for the painting, or pick the finish that makes you happy. You will love the new look.
- Double check all measurements to avoid mistakes.
- Choose shaker style for a timeless design.
- Install soft close hinges for a quiet kitchen.
- Order unfinished doors to save a bit more.

Use Glass Inserts for Depth
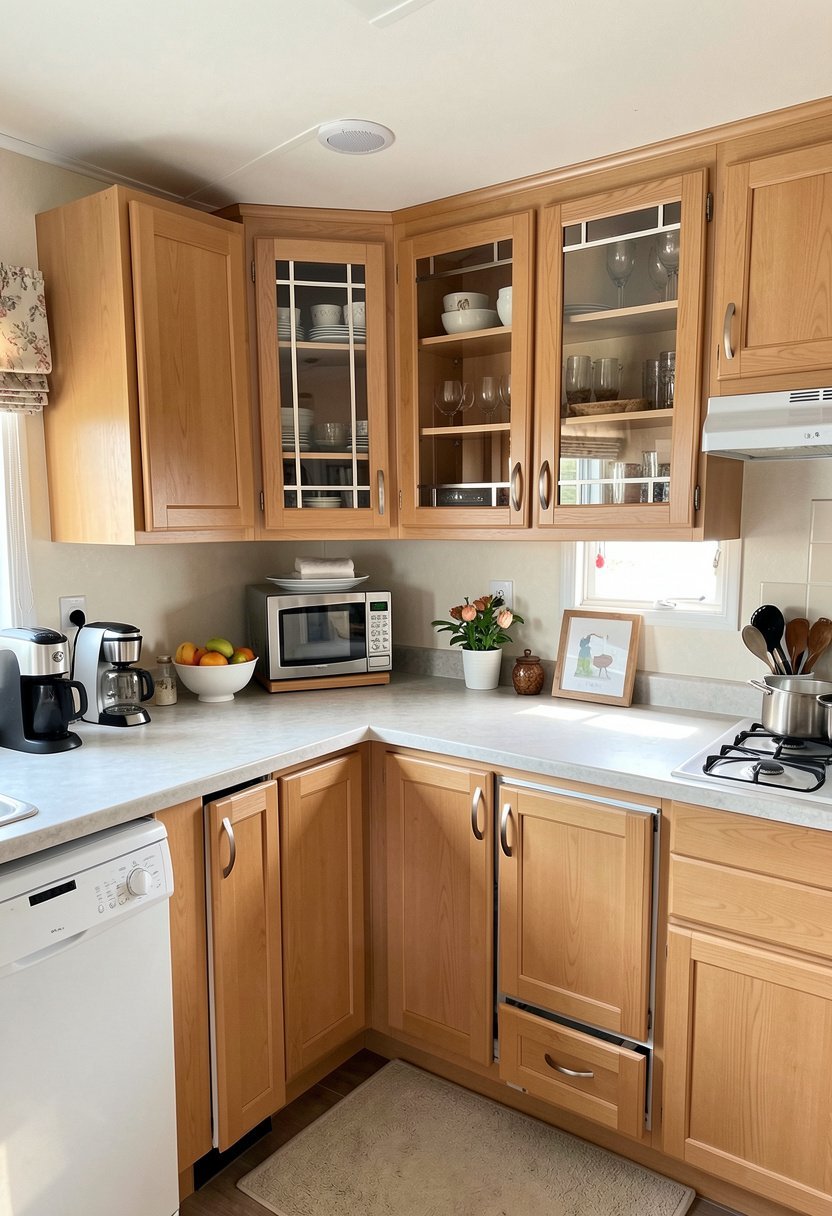
Adding glass to a few of your cabinet doors makes the space feel much bigger. You do not need to do this for every door. Just pick two doors near the center of the kitchen to show off your favorite glasses. It breaks up the wall of solid doors, and it adds some fancy character. Most doors can be cut to fit a glass panel, but check your local hardware shop first.
If you are not handy, you can just stick a sheet of frosted contact paper on the back of the glass. It keeps things private so people cannot see all your mismatched coffee mugs. It looks like high-end frosted glass, and no one will ever know the difference. It is a smart way to hide clutter while still getting that open, airy feeling in a small mobile home kitchen space.
Keep the glass clean, or the whole look will seem messy. A quick wipe with glass cleaner keeps things looking sharp. I love how the light reflects off the glass, especially in the evening. It is such a simple way to add interest, and it makes the room feel much less heavy. Just remember to be careful when you handle the glass panels during the big install.
- Cut only a few doors to keep it simple.
- Use frosted film if your cabinets are messy.
- Clean the glass often to keep it sparkling.
- Watch your hands when installing the panels.

Add Trim for Custom Detail
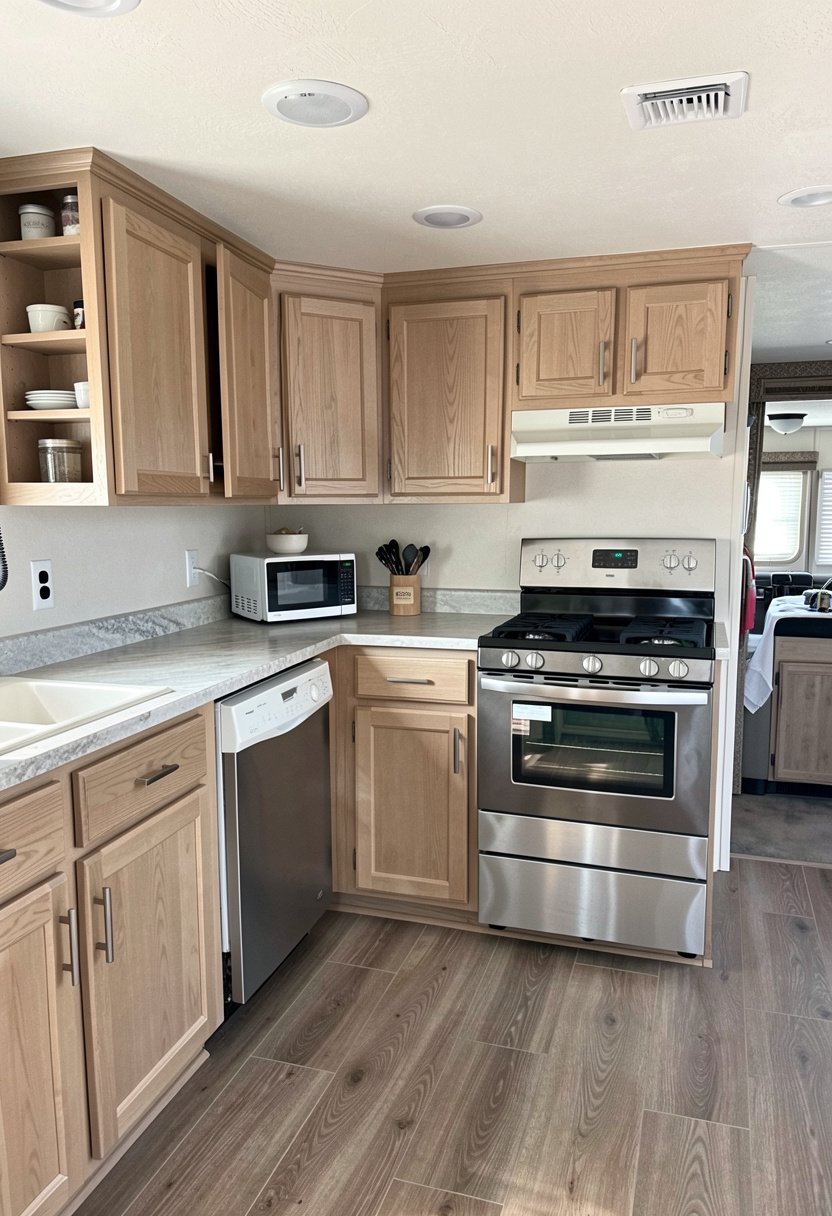
Many mobile home cabinets look like flat pieces of cardboard. You can easily fix this by adding thin wood trim to the front of your doors. This is called adding molding, and it makes flat doors look like custom Shaker style doors. It is such a cheap trick, and nobody ever guesses it is a DIY project. You just need some glue, a nail gun, and a steady hand.
Measure the trim pieces so they form a perfect square on your cabinet front. Cut the corners at an angle so they meet nicely. Paint the whole door once the trim is on, and the seams will just disappear. It creates depth and shadow, which makes the cabinets look like they are worth thousands. If you mess up a cut, it is okay, just buy another piece of trim.
This is the best way to hide a cheap, flat cabinet front. It adds so much character, and it turns a boring box into a beautiful feature. Take your time with the glue, and let it dry before you paint. If you rush, the trim will move, and you will be frustrated. It takes a weekend to do, but your kitchen will look like it cost a fortune.
- Cut trim at angles for a clean corner.
- Glue and nail the pieces for a firm fit.
- Paint everything in one coat to hide seams.
- Practice your cuts on scrap wood first.

Paint the Cabinet Frames Only
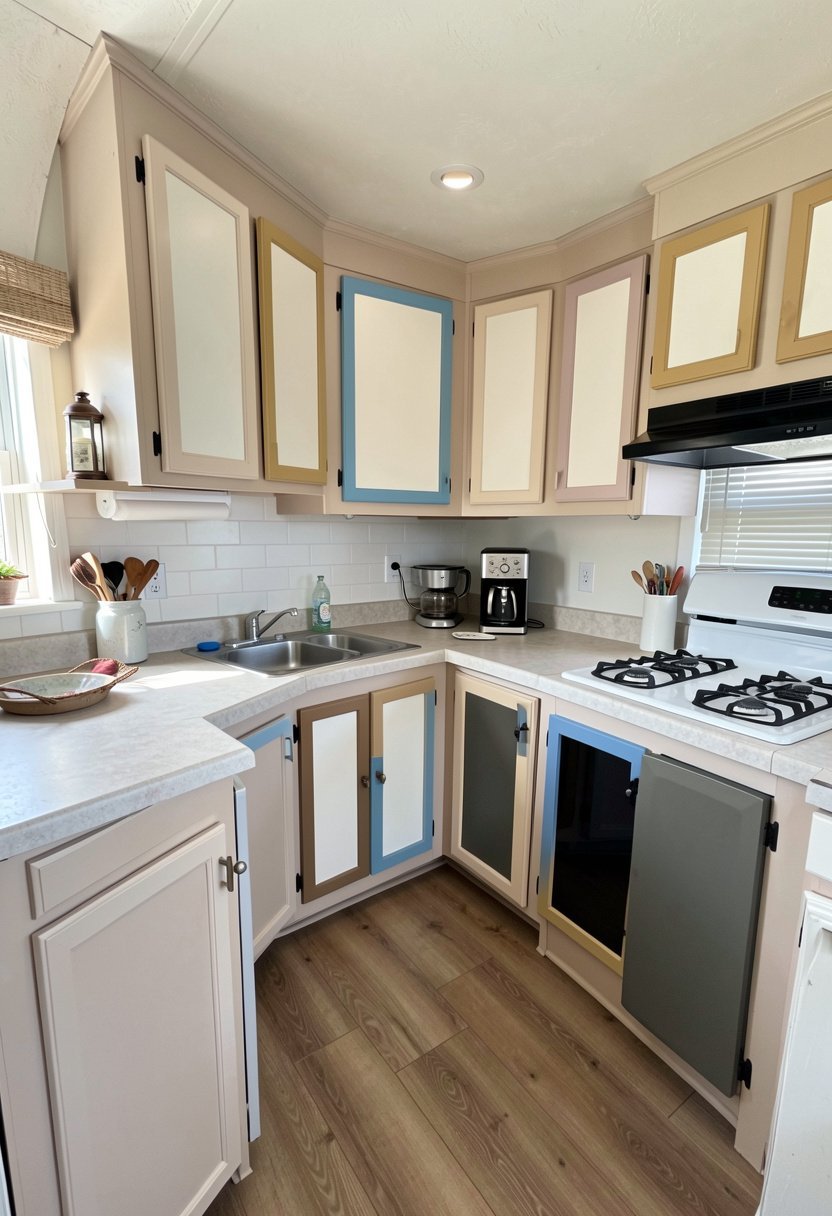
Sometimes you want a two-tone look, but you do not want to paint every single door. You can paint just the cabinet frames a dark, moody color and leave the doors as they are. This gives your kitchen a modern, professional edge. It is a huge trend right now, and it makes your kitchen look like a custom design choice. It is a daring look that works wonders.
Make sure the frame color matches your wall or your backsplash. If you pick a color that clashes, the whole kitchen will feel disjointed. I love navy blue or dark charcoal for the frames. It makes the cabinets look like they are floating against the wall. It is a great way to use a bold color without overwhelming the tiny space in your home. It feels very designer.
If you are scared of painting, this is a smaller job. You have less surface area to cover, and you can focus on getting those lines perfectly straight. Use painter tape, and do not pull it off until the paint is dry. You will get crisp edges that look like a pro did them. It is a clever way to modernize your space without doing a massive, exhausting kitchen makeover.
- Match the frame color to your wall art.
- Use painter tape for those sharp edges.
- Choose dark colors for a modern look.
- Paint the frames only for a unique style.

Swap Knobs for Leather Pulls
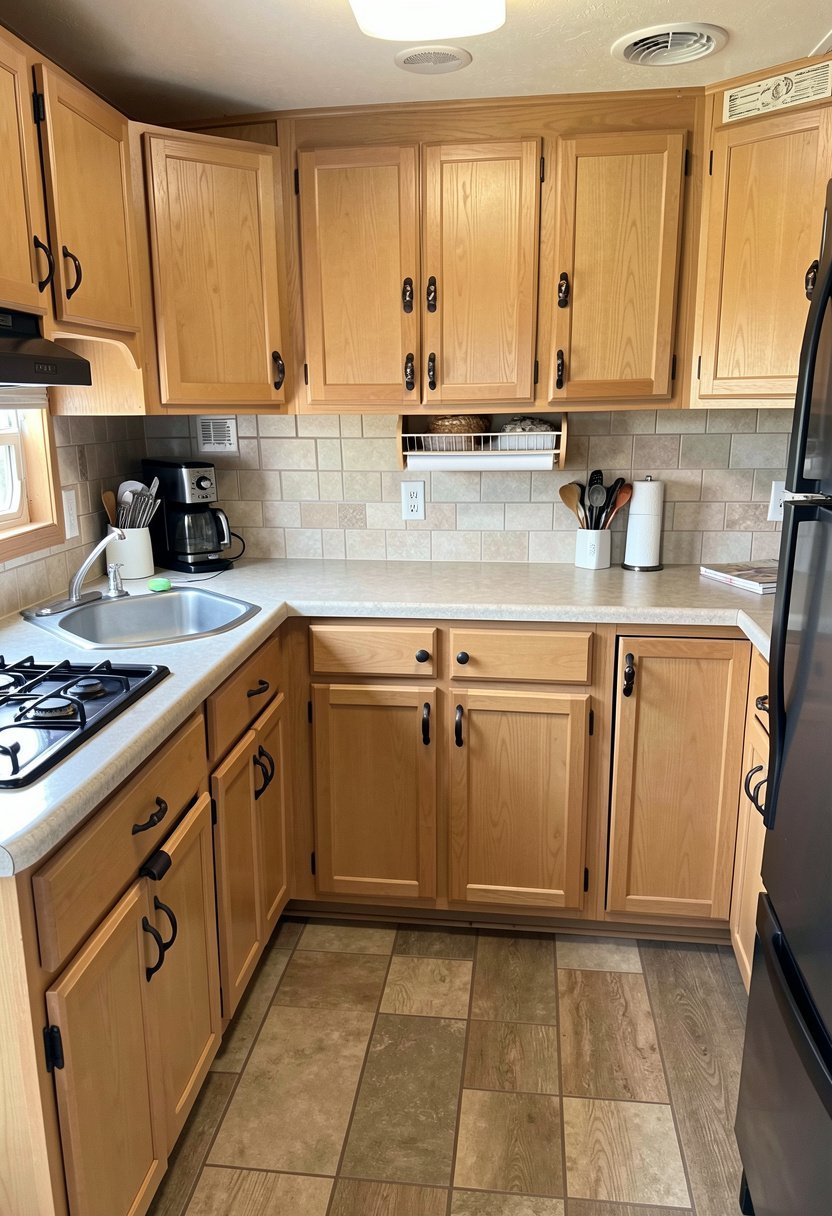
Leather pulls are a soft, cozy way to update your kitchen without drilling new holes. They are great if you have kids or if you just like a bohemian vibe. You can buy them or make them yourself with strips of leather. They add texture to your kitchen that you just cannot get with cold, hard metal. I love how they feel when you open a drawer.
They wear in over time, so they look better the longer you own them. If you get tired of them, you can swap them out for something else in ten minutes. It is the least permanent change you can make, which is perfect if you like to switch up your style often. Just pick a sturdy leather that will not stretch out too much after a few months.
If your kitchen feels too sharp and cold, these are your answer. They warm up the space instantly. They work perfectly with white cabinets or even dark wood. It is a small detail, but guests always comment on them. It shows you care about the little things, and that makes a house feel like a home. Don’t overthink this one, just buy a set and try it out.
- Pick high quality leather that won’t stretch.
- Use existing holes to avoid extra drilling.
- Try different colors for a fun, warm feel.
- Keep them clean with a simple leather wipe.

Final Thoughts
I hope these ideas show you that your kitchen has so much potential. Do not let those old, boring cabinets drag you down any longer. You have the power to change everything with just a little paint, some new hardware, and a bit of focus. Just pick one project, get it done, and watch how it shifts your whole space. You have got this, so go start today.
| Kitchen Update | Difficulty | Budget Impact |
|---|---|---|
| Remove Doors | Low | None |
| Paint White | Medium | Low |
| New Hardware | Low | Low |
| Under Lights | Low | Low |
| Wallpaper | Medium | Low |
| New Doors | High | High |
| Glass Panels | High | Medium |
| Add Trim | High | Low |
| Frame Paint | Medium | Low |
| Leather Pulls | Low | Low |
| Deep Cleaning | Low | None |
| Proper Priming | Medium | Low |
| Aligning Pulls | Low | None |
| Using Templates | Low | None |
| Quality Paint | Low | Medium |
Frequently Asked Questions
Is It Hard to Paint Mobile Home Cabinets Yourself?
It is not hard, but it does require patience. Many people fail because they skip the sanding or the primer. You must clean the fake wood surface perfectly before you start, or the paint will not stick. Take your time, use good products, and do not rush the drying process.
Can I Change Hardware Without Drilling New Holes?
Yes, you can. You just need to find new hardware that fits the same distance between your current holes. Most stores sell a tool that measures this for you. If you pick hardware that does not match, you will have to fill the old holes, which is a big headache.
Are Open Cabinets a Bad Idea for a Small Kitchen?
They are only a bad idea if you are messy. Open cabinets make a small room feel bigger and lighter. If you keep your dishes stacked neatly and avoid clutter, they look great. If you have too many mismatched items, you might want to keep the doors on instead.
Do I Need to Remove the Doors to Paint Them?
You should remove the doors to get a smooth finish. If you try to paint them while they are hanging, the paint will drip, and it will look cheap. Taking them off takes an extra hour, but it makes your hard work look like a professional job. Label each door.
Should I Choose Peel and Stick for Backsplash or Cabinet?
Peel and stick is great for the inside of cabinets to add style. For a backsplash, it is okay, but it can struggle with heat or water near the stove. Use it for decoration inside your cabinet shelves rather than in spots that get wet or very hot every day.
Does Under Cabinet Lighting Actually Help?
It helps a lot. Most mobile homes have one sad light in the center, which leaves your counter in a shadow. Adding lights under the cabinets brightens your prep area. It makes cooking safer and more enjoyable, and it adds a cozy glow to the kitchen at night.
Can I Mix Metal Finishes in My Kitchen?
You can mix metals, but do not go overboard. Keep it to two types, like black and gold. If you mix too many, it looks like a junk drawer. Pick a main metal for the big stuff and a secondary metal for small accents to keep the look very clean.
Will Leather Pulls Last in a Kitchen?
Leather pulls are surprisingly tough if you buy high quality strips. They will age and get a nice look over time. Avoid them if your hands are constantly covered in grease or water, but for most people, they are a durable, stylish way to soften your kitchen decor.