As an Amazon Associate, I earn from qualifying purchases at no extra cost to you.
12 distressed kitchen cabinet ideas (Everyone Loves Right Now)
 ByRayan

The first thing you notice in a tired kitchen is usually the cabinets, looking dull, peeling, or just plain sad. Everyone thinks you need a big budget to fix this, but you really do not.
Most people waste money on new cabinets, when they should just fix what they have. It drives me crazy to watch folks toss out solid wood, just because the finish is out of style, or the color is boring.
I have spent years painting, sanding, and fixing cabinets, so I know exactly what works, and what ends up being a total mess. You will learn the best ways to get that worn look, without making your kitchen look like a trash heap. Use these 12 distressed kitchen cabinet ideas to change your home today, and stop listening to those expensive experts who want to sell you a full remodel.
1. Soft White with Gray Worn Edges
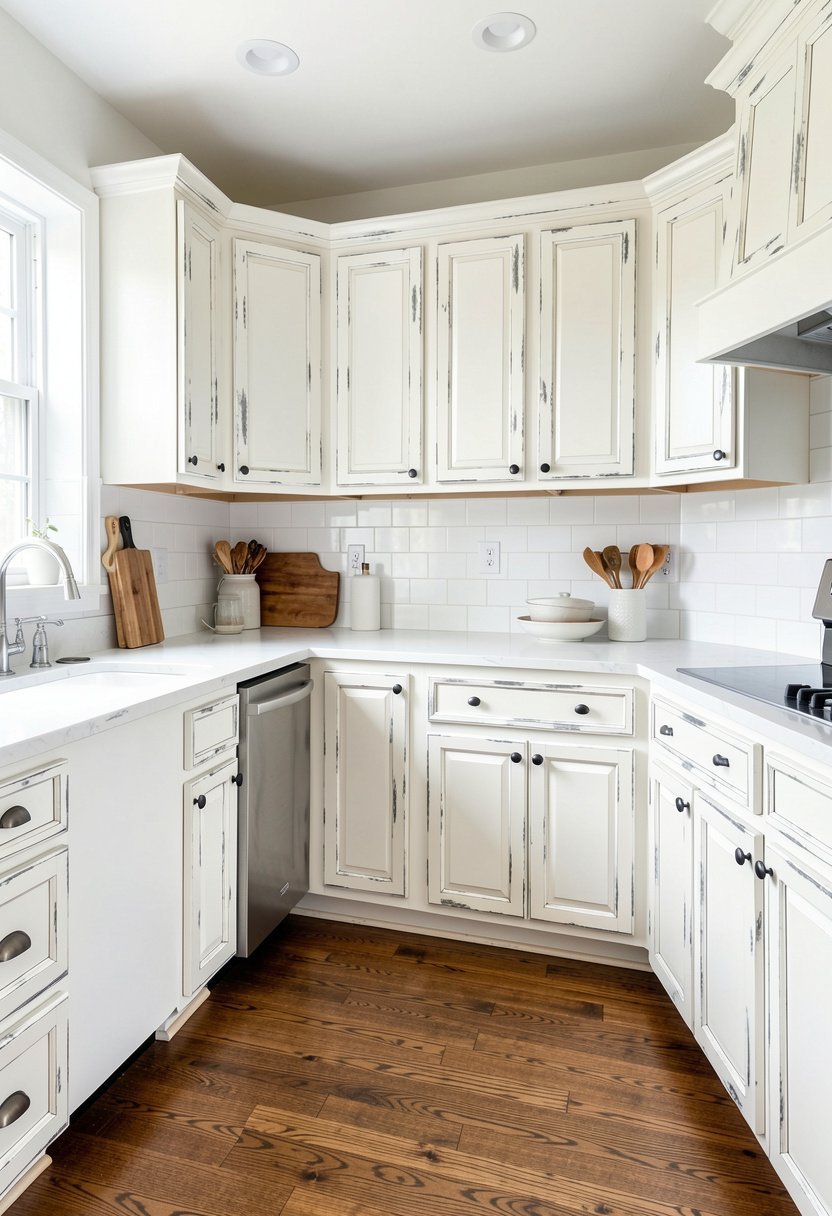
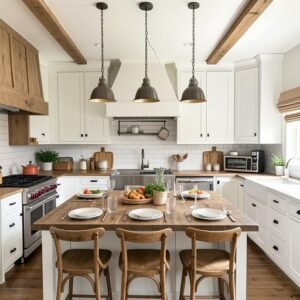
Start with a clean white base, but do not let it look like a hospital room. You want a soft white paint, then gently sand the edges, corners, and areas around the handles.
This look gives your kitchen a classic, lived-in feel, without feeling dirty or old. Use a light gray stain over the sanded spots, just to make them pop against the white paint. It adds depth, warmth, and character.
Most people sand too hard, so go slow, and step back often to look at the work. If you rush it, you ruin the clean, airy vibe you are trying to build. This style fits almost any kitchen, and it stays fresh for years. Keep the hardware simple, maybe dark bronze, to finish the look. You will love how much bigger your small kitchen feels once you choose this light, happy color scheme.
- Use a soft white base coat.
- Sand edges for a worn look.
- Add gray stain for depth.
- Pick dark metal handles.

2. Deep Navy Blue with Sanded Corners
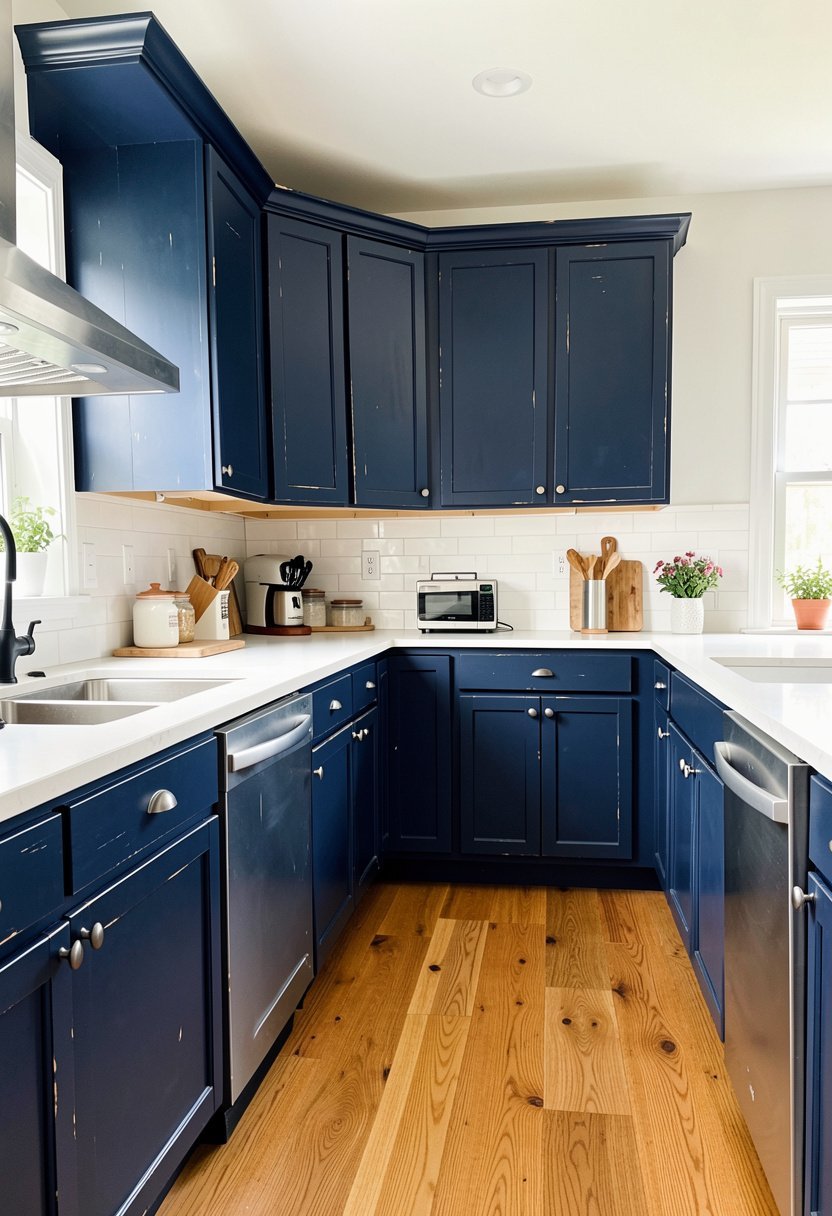
Navy blue cabinets are beautiful, but they can feel heavy if you do not add texture. Distressing them is the perfect way to make the color feel approachable, friendly, and not too formal.
Paint your cabinets a rich navy, then take a fine sandpaper block to the high traffic spots. Focus on where your hands grab the doors, and the corners where wear would naturally happen over time.
Do not be afraid to show a little bit of the wood underneath, because that is where the charm lives. People often paint navy cabinets and leave them flat, which makes them look like cheap plastic. You want that contrast, that hint of wood, to show you care about the details. Pair this with some light marble counters, and you have a kitchen that looks like a million bucks.
- Pick a rich navy paint.
- Sand corners and handle areas.
- Show wood for authentic character.
- Mix with bright stone counters.

3. Sage Green and Rustic Wood Tones
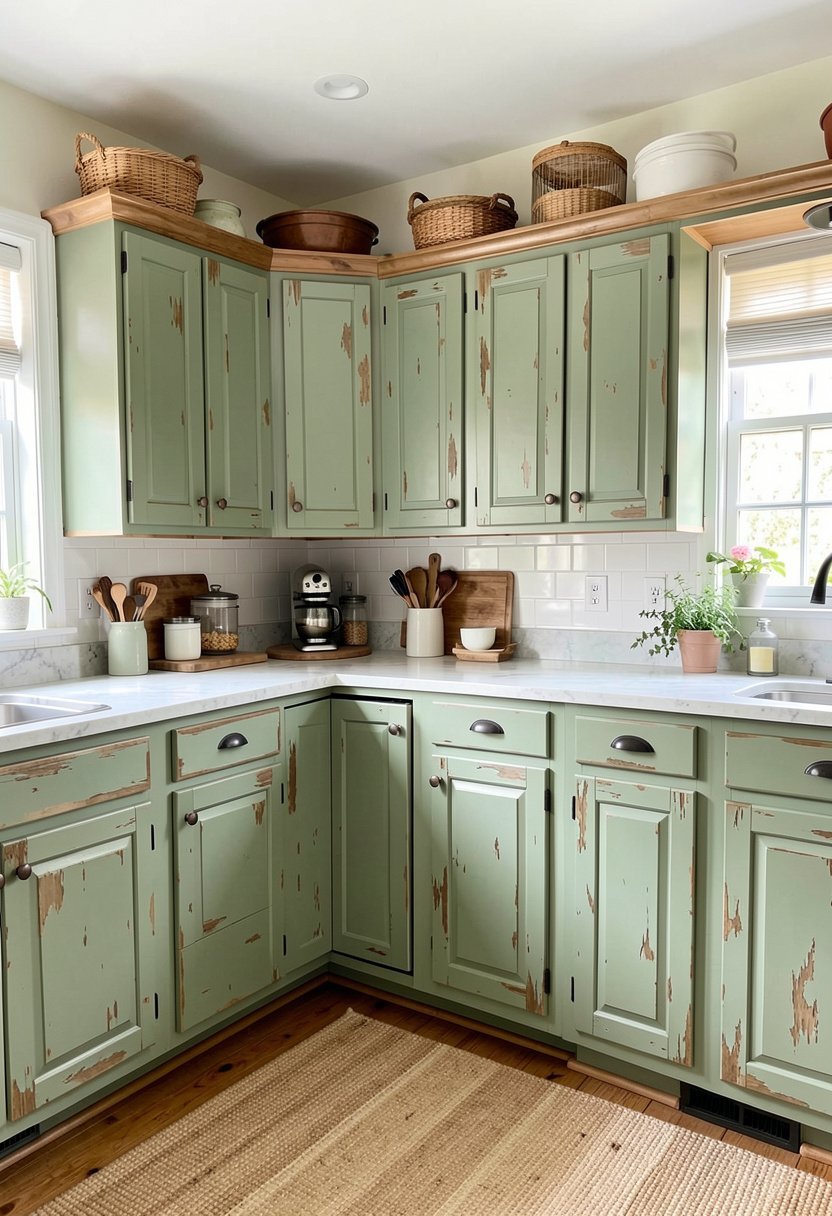
Sage green is such a calming color, but it needs a little edge to keep it from looking like a dusty office. Distressing the edges brings out the warmth in the green, especially when you use a wood stain.
Paint the cabinets, let them dry, and then use a dry brush with a lighter green or cream color. This adds layers, which makes your kitchen look like you spent weeks on a custom finish.
It is a mistake to think everything needs to be perfect, or solid, or flat. Your cabinets should have personality, and this green shade loves a bit of extra texture. I suggest adding some brass cabinet pulls to finish this look. It feels like a cottage in the countryside, even if you live right in the middle of a loud, busy city.
- Paint with a soft sage.
- Use a dry brush technique.
- Add layers for more texture.
- Attach pretty brass hardware.

4. Charcoal Gray and Black Wax Finish
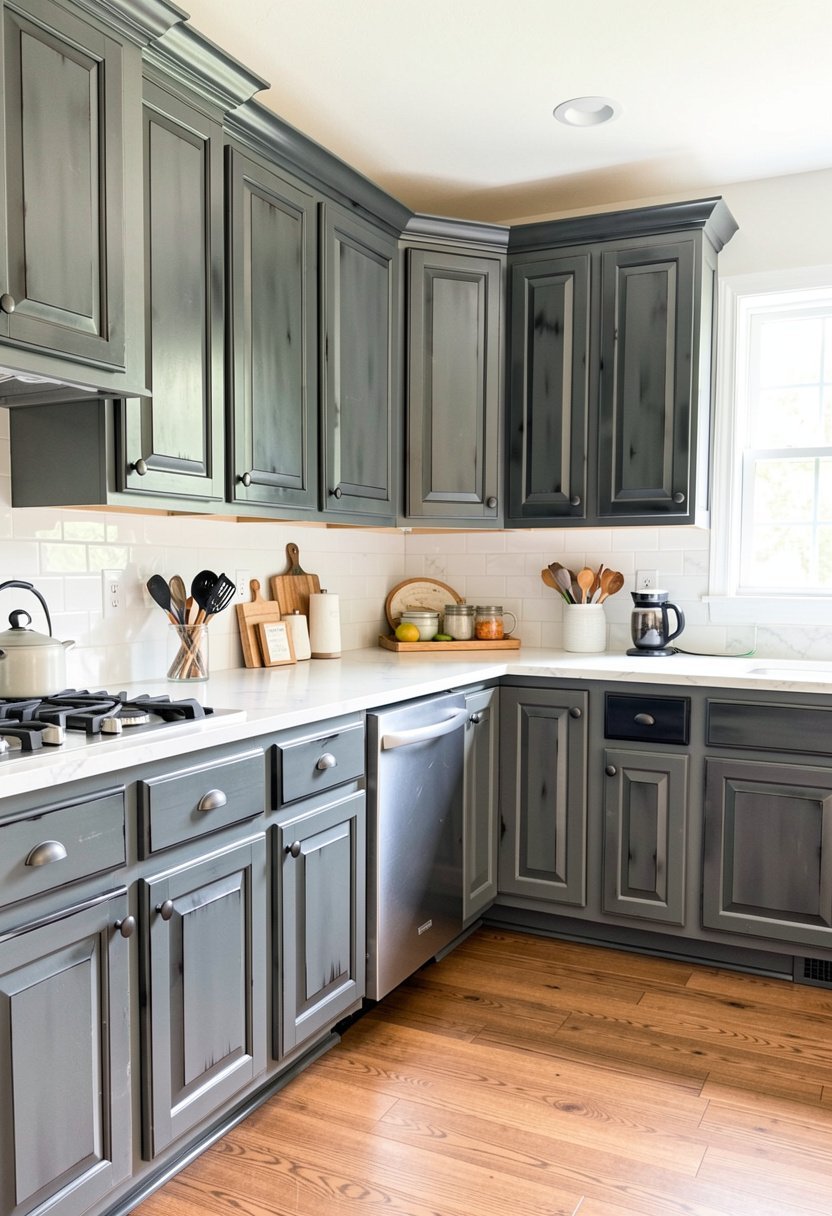
Charcoal gray is bold, and it works great if you want a kitchen that feels modern but not cold. The secret here is using a dark wax, which fills in the little nicks and scratches you create.
Sand your doors after painting them dark gray, but keep the sanding very light. Then, apply a dark, black wax all over the door, and wipe most of it away with a soft, clean cloth.
The wax settles into the crevices and the sanded edges, giving the cabinet a moody, aged look. People think you need to be a pro to use wax, but it is actually really easy. Just do not use too much, or it gets sticky and hard to manage. It makes your kitchen look expensive, custom, and very fancy, without you doing any hard labor.
- Paint with a charcoal gray.
- Sand doors very lightly first.
- Apply dark wax for depth.
- Wipe off the extra wax.
5. Creamy Yellow and Light Rubbed Finish
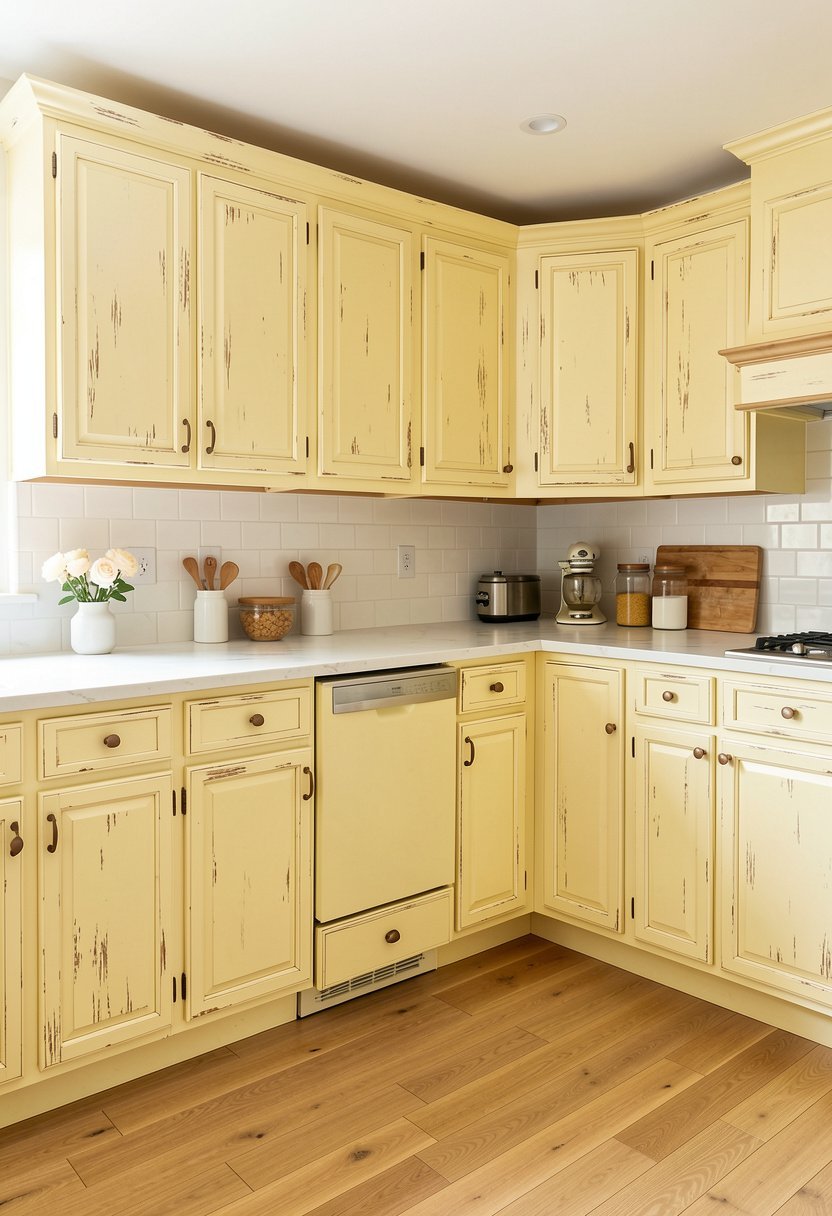
If your kitchen feels dark and gloomy, a creamy yellow is the best way to wake it up. It is cheerful, but you have to distress it right, or it starts to look like a messy nursery.
Use a damp rag to wipe away some of the paint right after you apply it, especially near the edges. This creates a soft, hazy look that feels like it has been there for fifty years.
Most DIY folks paint everything solid, which makes yellow look really flat and cheap. Do not do that. You want that translucent feel, so the wood grain can still peek through just a tiny bit. It makes the room feel cozy, welcoming, and like a place where people actually like to cook. It is perfect for farmhouse kitchen styles that need some bright, happy energy.
- Choose a warm creamy yellow.
- Wipe paint with damp rag.
- Keep the finish feeling thin.
- Let wood grain show through.
6. Weathered Gray and White Wash
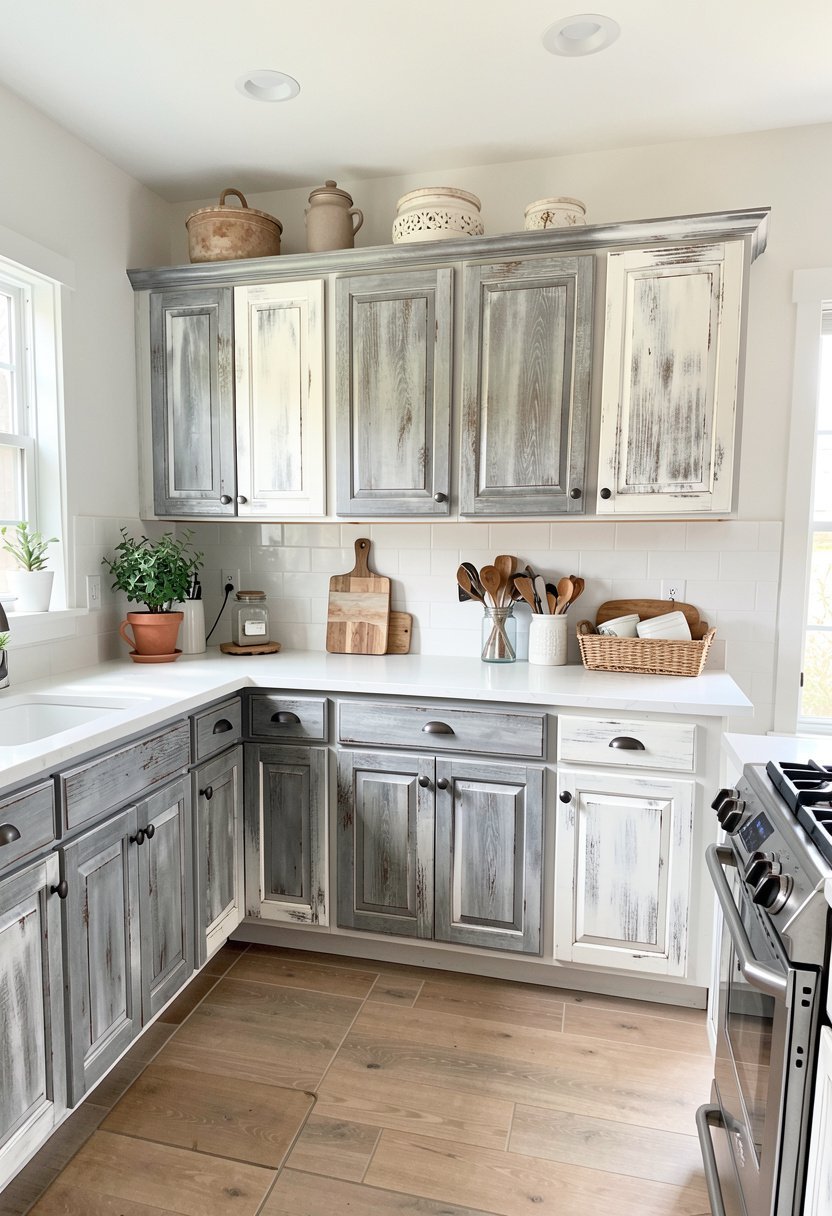
Weathered gray is popular for a reason, but the store-bought stuff often looks fake. You can make your own, and it will look much better, by using a simple white wash technique.
Start with a cool gray paint, and let it fully cure, or you will just smear the whole thing. Then, mix a little white paint with water to make a thin wash, and paint it over the gray.
Wipe it off immediately so it only stays in the little cracks and low spots. It mimics years of dust and sun, which is exactly the look you are after. People always ask how I got that look, and they are shocked when I say it was just a cheap mix of paint and water. It is elegant, simple, and totally foolproof.
- Start with a cool gray.
- Mix water and white paint.
- Apply the thin white wash.
- Wipe off the excess quickly.
7. Moody Black and Copper Highlights
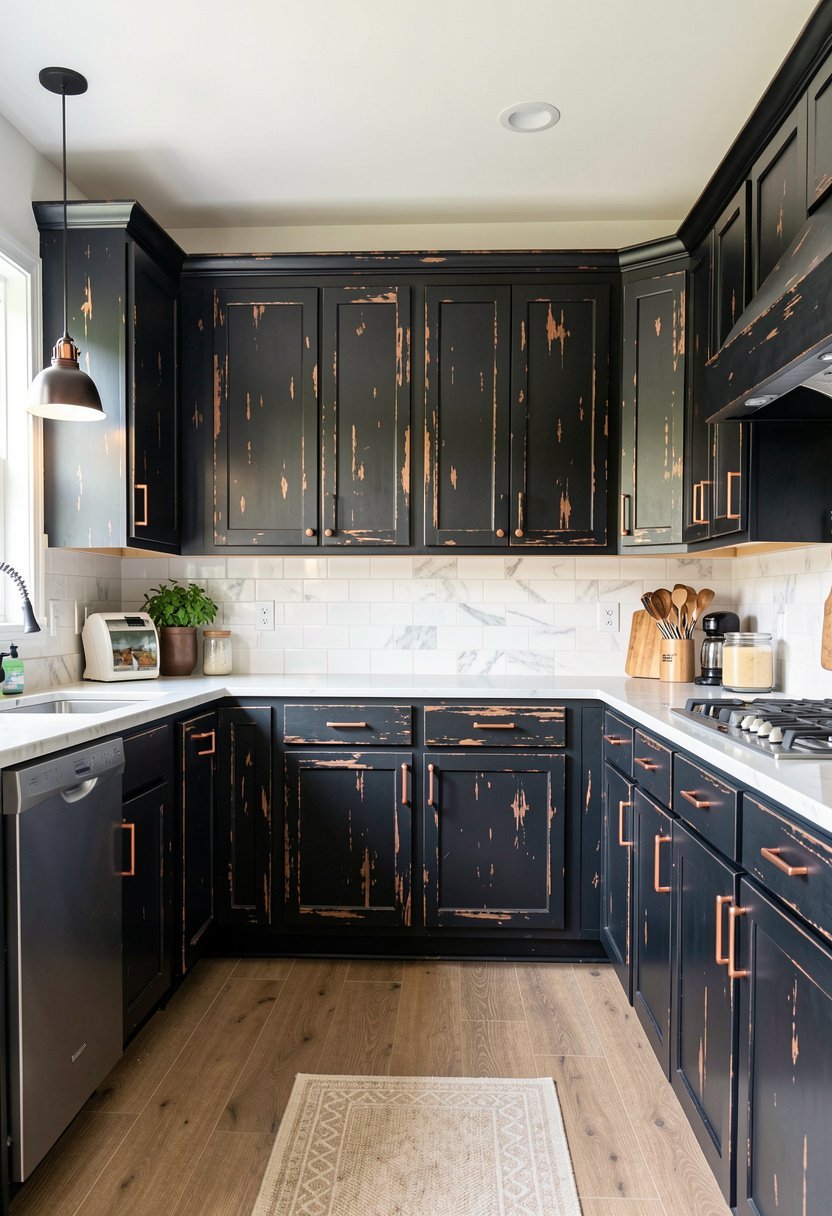
Black cabinets are very stylish, but they can disappear into the shadows. You can fix that by adding a bit of copper paint or wax to the edges and the raised details.
Paint the cabinets a flat matte black, and let it dry overnight. Take a small artist brush, and gently dab a tiny bit of copper color on the corners and the edges of your doors.
It is a subtle touch, but it catches the light and makes the whole kitchen glow. Do not go overboard, or you will look like you are hosting a messy art project. A little bit goes a long way here. It adds a high-end feel to your modern home decor that makes people think you hired a professional designer to do the work.
- Use a flat matte black.
- Find raised parts of doors.
- Dab copper on the edges.
- Keep the copper very subtle.
8. Dusty Blue with Sanded High Spots
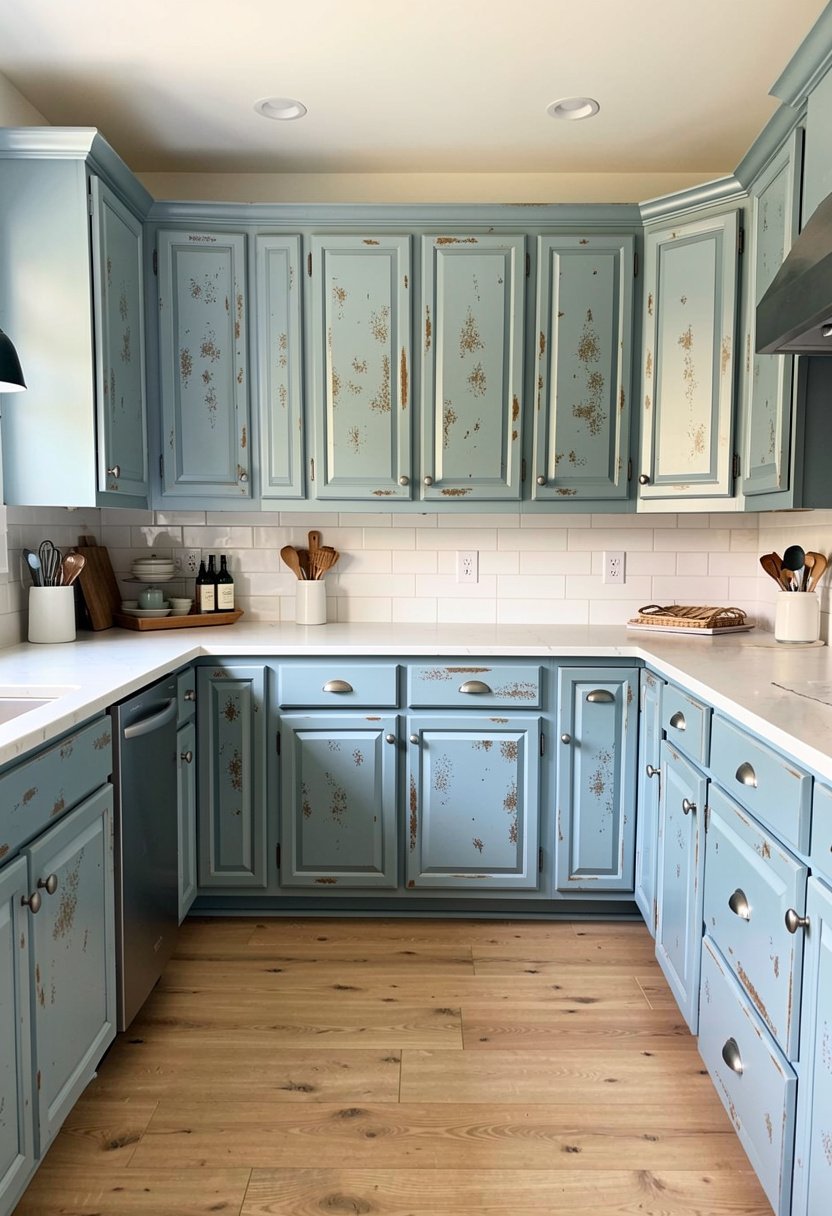
Dusty blue is one of my favorites, because it hides dirt well and looks great with almost any counter. To distress this, you want to focus on the high spots, not just the corners.
Paint your doors, and then take a sanding block to the middle of the panels. It makes the door look like it has been opened and closed a thousand times.
It creates a really nice focal point on the center of the cabinet. People often think they should only sand the edges, but that is boring. Moving your sanding into the middle of the wood adds a lot of visual interest to the cabinets. It is a bold move, but it pays off with a beautiful, custom look that no one else has.
- Use a soft dusty blue.
- Sand the center of panels.
- Focus on the high spots.
- Create a custom, worn look.
9. Off-White and Brown Glazed Depth
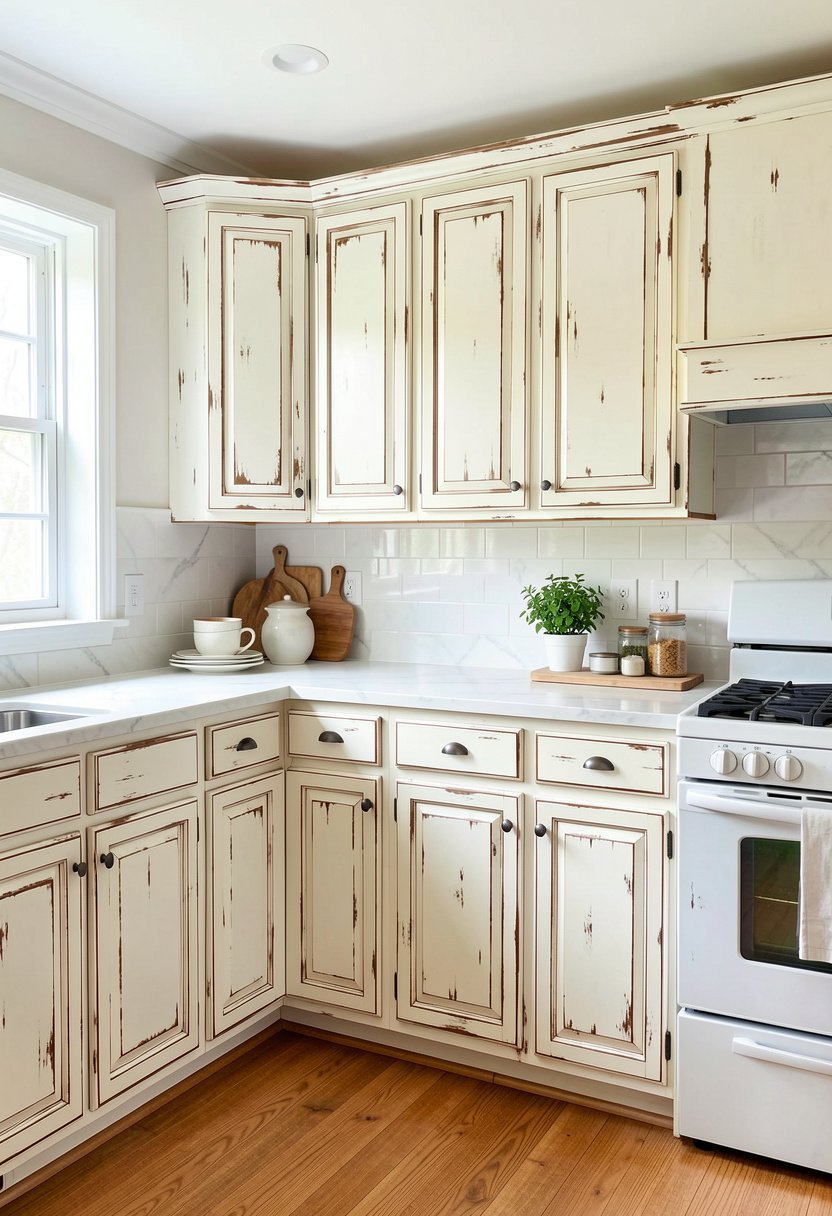
Off-white is the classic choice, but it can be boring if you do not add a glaze. A brown glaze fills the lines and makes your cabinets look like they are made of expensive wood.
Paint the cabinets a nice off-white, and let them dry for at least twenty-four hours. Apply a brown wood stain or glaze, and use a rag to work it into all the cracks and corners.
Wipe away the excess so it looks like years of gentle wear. People tend to put too much glaze on, and then the cabinets look dirty, not aged. Use a light hand, and take your time. It is a great way to add vintage kitchen charm to a newer, boring space without spending much money on new stuff.
- Use a warm off-white paint.
- Apply brown stain or glaze.
- Work it into the cracks.
- Remove the extra with rags.
10. Sage Green and White Sanding
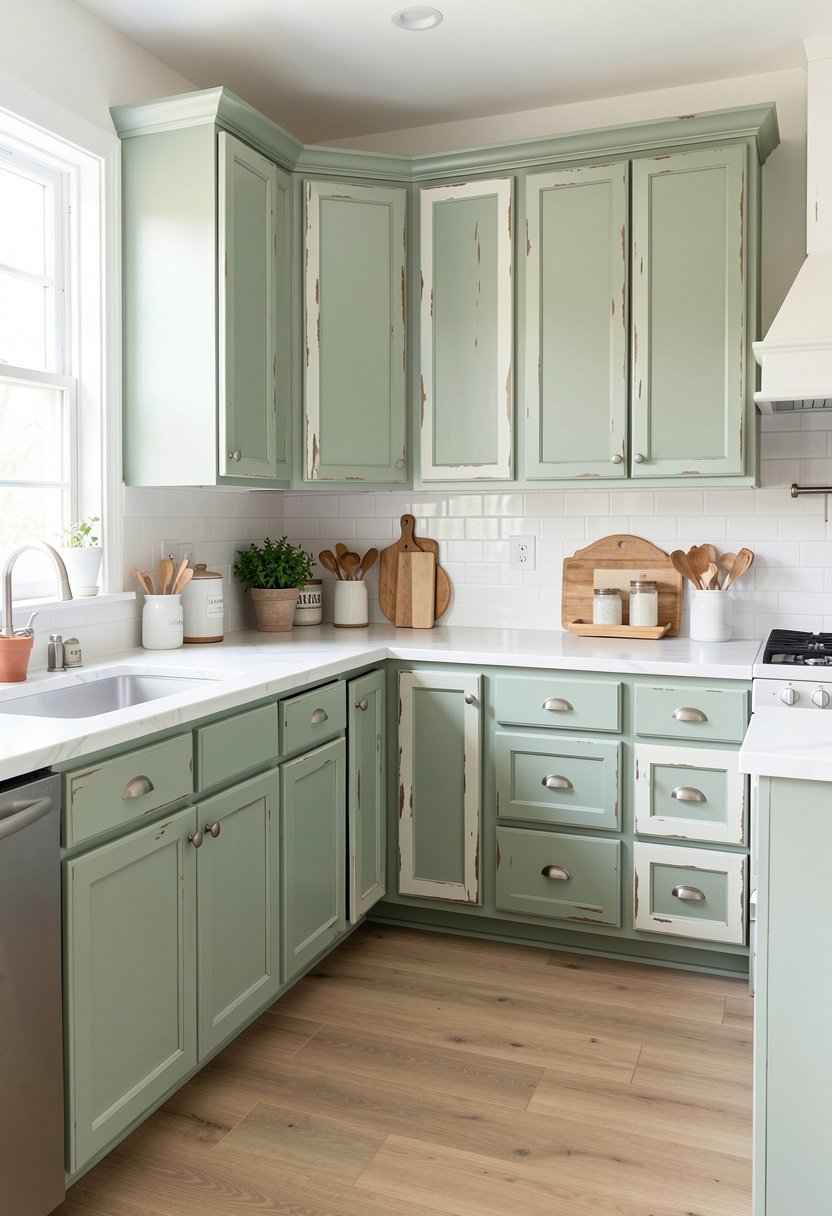
If you love the garden feel of sage, you can distress it with a white top coat. It makes the cabinets look soft, like they have been sitting in the sun for years.
Paint your base coat in sage green, and then lightly apply a thin layer of white paint over it. Before the white dries, take a rough cloth and rub it off in patches.
It reveals the green underneath in a beautiful, random way. Most people try to use sandpaper for this, but a rough cloth works way better for that hazy, soft finish. It looks organic, natural, and super professional. Just make sure you do not rush the drying time of the base color, or you will regret the messy, smeary results.
- Use a base of sage.
- Add thin white top coat.
- Rub off paint while wet.
- Use a rough, coarse cloth.
11. Bold Red and Darkened Edges
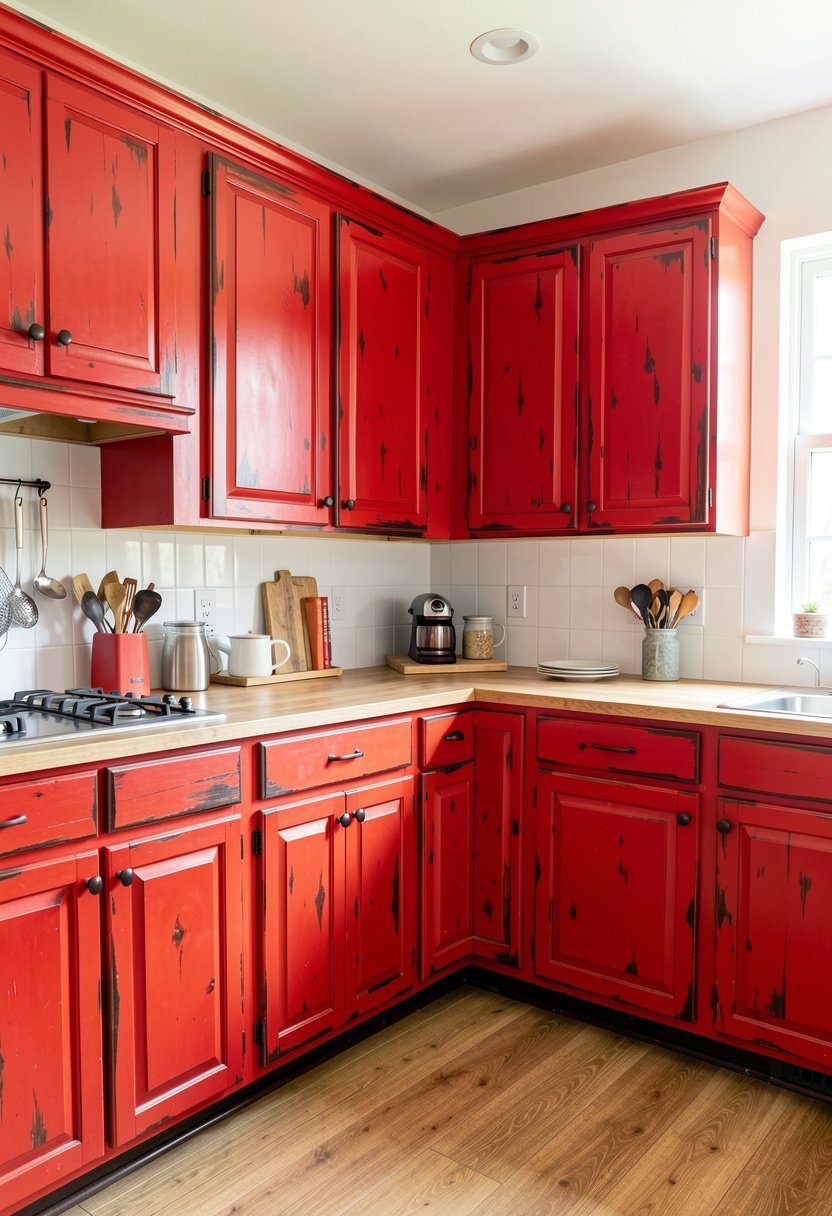
A red kitchen is brave, but it works if you keep the tone deep and slightly worn. If you leave it bright red, it looks like a cheap fast food joint.
Choose a barn red or a deep cherry tone, and then distress the edges with a black or dark brown shoe polish. It sounds crazy, but it works perfectly to create that old, industrial look.
The polish stains the wood slightly, and it gives the edges a darkened, aged appearance that paint cannot achieve. I have used this trick for years, and it never fails to impress. People will stop and stare at your cabinets, wondering how you got that cool, vintage finish. Just keep a steady hand.
- Pick a deep barn red.
- Use black wax or polish.
- Focus on all outer edges.
- Create an old industrial look.
12. Soft Gray and Distressed Knobs
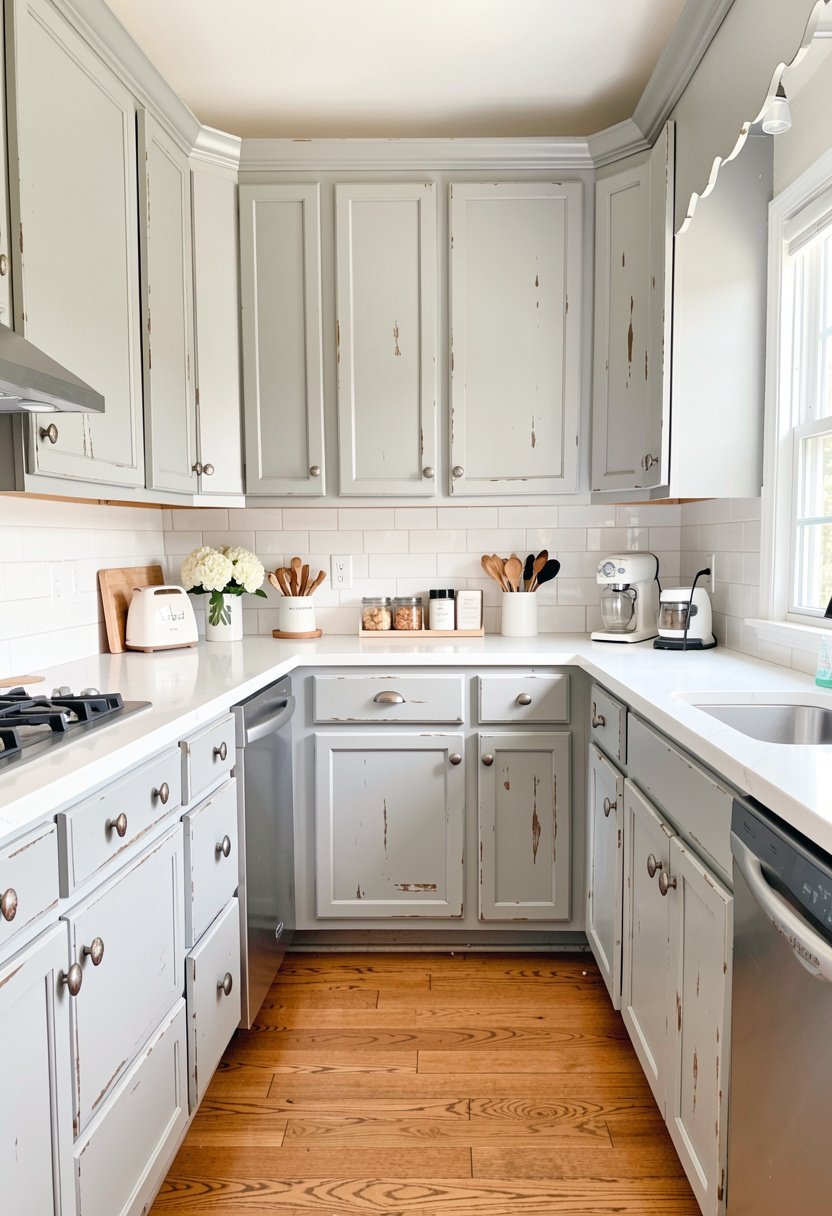
Sometimes you do not even need to sand the doors. You can create a distressed look by choosing worn-in hardware, and pairing it with a soft gray cabinet color.
Paint your cabinets a clean, light gray, and keep the finish smooth and perfect. Then, find some antique or chipped-looking metal handles that look like they came from a flea market.
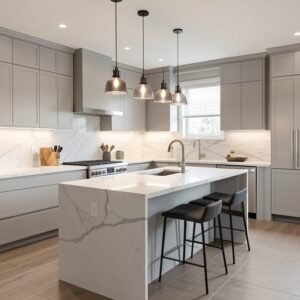
The contrast between the smooth paint and the rough, aged hardware makes the cabinets look distressed, without you ever touching them with a sander. It is the smartest way to get the style if you are worried about ruining your wood. It is clean, stylish, and super easy to swap out if you change your mind later. Try it on DIY kitchen islands for a quick update.
- Paint with light gray.
- Keep the paint finish smooth.
- Find old, chipped metal pulls.
- Let the hardware do work.

Final Thoughts
I hope you see how easy it is to change your space with these 12 distressed kitchen cabinet ideas. Do not be afraid to pick up a brush or a piece of sandpaper. You have the tools, you have the vision, and you definitely have the style to pull this off. Stop waiting for the perfect time and just start one door today. You have got this.
| Project Type | Difficulty | Time Needed |
|---|---|---|
| White Wash | Easy | 4 Hours |
| Dark Waxing | Medium | 6 Hours |
| Edge Sanding | Easy | 2 Hours |
| Glazing | Medium | 8 Hours |
| Dry Brushing | Easy | 3 Hours |
| Color Layering | Hard | 12 Hours |
| Hardware Swap | Easy | 1 Hour |
| Crackle Paint | Hard | 10 Hours |
| Steel Wool | Medium | 4 Hours |
| Rag Wiping | Easy | 3 Hours |
| Wax Polishing | Easy | 2 Hours |
| Staining | Medium | 6 Hours |
| Base Coating | Easy | 5 Hours |
| Sealing | Easy | 2 Hours |
| Finish Prep | Easy | 4 Hours |
Frequently Asked Questions (FAQs)
Is Sanding the Only Way to Distress Cabinets?
No, you do not have to use sandpaper. You can use damp rags to wipe away paint while it is wet, or use waxes to darken specific areas. I often use a dry brush with a lighter color to build texture without ever touching a piece of sandpaper.
Can I Distress Cabinets If They Are Made of Laminate?
You have to be very careful with laminate. It does not have real wood grain, so sanding too hard will ruin the finish and look like plastic. It is better to use glazes or waxes on laminate to get that worn look without damaging the surface.
Are These Ideas Good for a Very Small Kitchen?
Yes, they work great in small spaces. Just stick to lighter colors like soft white or cream. If you use too much dark paint in a tiny kitchen, the room will feel like a cave. Keep the colors airy and bright to make it feel bigger.
Do I Need to Seal the Wood After I Distress It?
You definitely need to seal your work. Use a water-based poly to protect the paint, especially in a kitchen where grease and water are everywhere. If you use wax, you might need to reapply it once a year to keep it looking fresh.
Does Distressing Lower the Value of My Home?
Most people love the custom, cozy look of distressed cabinets. It makes a house feel like a home. Unless you do a messy job, it usually adds personality that buyers love. Just keep the colors classic so it does not look too wild.
Should I Remove the Doors Before I Paint Them?
You should always take the doors off. It is much easier to paint them flat on a table, and you will get fewer drips. It also saves your back. Do not try to paint them while they are still hanging, as it just creates a mess.
Will the Paint Peel Off If I Distress It?
If you prep the cabinets correctly, the paint will stay put. You must clean the grease off first, and use a good primer. If you skip the prep, the paint will peel no matter what, whether you distress it or not.
Can I Mix Different Distressing Techniques Together?
You can, but do not go overboard. Pick one or two techniques, like light sanding and a dark wax. If you do too much, the kitchen will look cluttered and messy instead of stylish and intentionally aged. Keep it simple for the best results.